Vinyl plank flooring is an affordable, low-maintenance and durable option for the flooring in your home. It comes in a variety of colors and patterns, and can be installed over a variety of different surfaces. But, before you can begin the installation process, you need to know where to start.
1. Preparation
Before you start laying vinyl plank flooring, you need to make sure that the surface is clean and free from debris. This includes sweeping and vacuuming the floor, and making sure that any nails or screws are removed. You’ll also need to check that the subfloor is level and that any existing flooring is glued down securely.
2. Measurements
You’ll need to measure the area where you plan to install the vinyl plank flooring. This includes measuring the length, width and depth of the space. You’ll also need to take into account any doorways, closets, or other obstacles that will need to be cut around. Be sure to mark the measurements on the floor using a pencil.
3. Underlayment
You’ll want to install an underlayment before you begin laying the vinyl plank flooring. Underlayment provides cushion and insulation, and helps to reduce noise and absorb foot traffic. You’ll need to choose the right type of underlayment for the type of vinyl plank flooring you’re installing.
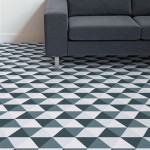
4. Layout
Once you have the measurements and the underlayment in place, you can begin to plan the layout of the vinyl plank flooring. You’ll want to start in the middle of the room and work your way out. You can use a chalk line to help you stay straight, and be sure to stagger the planks to create a more natural look.
5. Cutting
As you lay the planks, you may need to cut them to fit around obstacles or to fit the shape of the room. You can use a jigsaw, circular saw, or miter saw for this task. Be sure to wear safety glasses and use a guide when making any cuts.
6. Adhesive
Once the layout is complete, you’ll need to apply an adhesive to the planks to keep them in place. There are different types of adhesive available for vinyl plank flooring, so be sure to choose the right one for your installation. Apply the adhesive according to the manufacturer’s instructions.
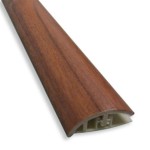
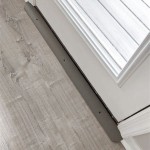
7. Finishing Touches
Once the adhesive has had time to dry, you’re ready to finish the installation. You may need to trim the edges of the planks to create a seamless look. You can also add any finishing touches, such as baseboards, quarter round, or trim. Once you’ve completed these steps, you can enjoy your new vinyl plank flooring.


:max_bytes(150000):strip_icc()/easy-install-plank-vinyl-flooring-1822808-09-a1f83db7bdf74f279f45594b897de82d.jpg)

:max_bytes(150000):strip_icc()/easy-install-plank-vinyl-flooring-1822808-06-3bb4422ca1bd49b080bfa73bce749acc.jpg)


:max_bytes(150000):strip_icc()/easy-install-plank-vinyl-flooring-1822808-02-19a3b80cd59943938a401560203706f3.jpg)
:max_bytes(150000):strip_icc()/easy-install-plank-vinyl-flooring-1822808-05-91e4c44966a145a39ad38430e4f7cc45.jpg)

:max_bytes(150000):strip_icc()/easy-install-plank-vinyl-flooring-1822808-07-9e82b716c3e94264b4a6084e174e9aeb.jpg)
:max_bytes(150000):strip_icc()/easy-install-plank-vinyl-flooring-1822808-04-93bf641de14c408aae824adebd448747.jpg)


Related Posts