What Are Vinyl Flooring Spacers And How To Use Them (Vinyl Flooring स्पैसर क्या हैं और उनका उपयोग कैसे करें)
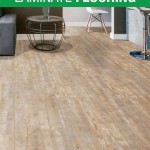
Vinyl flooring has become a popular choice for residential and commercial spaces due to its durability, water resistance, and affordability. While the installation process is generally considered manageable for DIY enthusiasts, achieving a professional-looking finish requires attention to detail. One crucial element often overlooked is the use of vinyl flooring spacers. These small but essential tools play a vital role in ensuring proper expansion gaps and a seamless appearance.
Vinyl flooring spacers, also known as expansion spacers, are small wedges or blocks designed to maintain a consistent gap between the vinyl flooring and the walls or fixed objects during installation. This gap is crucial to accommodate the natural expansion and contraction of the vinyl material due to temperature and humidity fluctuations. Without these expansion gaps, the flooring may buckle, warp, or even crack over time.
The need for expansion gaps arises from the inherent properties of vinyl. Like many building materials, vinyl expands when it gets warmer and contracts when it gets colder. This movement, although often imperceptible to the naked eye, can exert considerable force on the surrounding structures if the flooring is installed tightly against walls or other immovable objects. By providing a small space for the vinyl to expand into, spacers prevent these forces from causing damage.
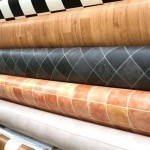
Vinyl flooring spacers are typically made of plastic or foam, and they come in various sizes to suit different flooring thicknesses and installation requirements. They are designed to be easily inserted and removed, allowing for a smooth and efficient installation process. Using the correct size and quantity of spacers is critical for achieving a successful and long-lasting vinyl flooring installation.
Key Benefits of Using Vinyl Flooring Spacers
The proper use of vinyl flooring spacers offers several benefits that contribute to the overall quality and longevity of the installation:
1. Prevents Buckling and Warping: As previously mentioned, vinyl flooring expands and contracts with changes in temperature and humidity. Without sufficient expansion gaps, the flooring can exert pressure on the walls, leading to buckling or warping. Spacers allow the flooring to move freely, preventing these issues and maintaining a flat, even surface.
2. Ensures Proper Expansion Gaps: Spacers ensure that consistent and appropriate expansion gaps are maintained throughout the perimeter of the room. This consistency is essential for even expansion and contraction, preventing localized areas of stress on the flooring.
3. Simplifies Installation: While it might seem like a minor detail, using spacers can significantly simplify the installation process. They provide a visual guide for maintaining the correct distance from the wall, reducing the need for constant measurements and adjustments. This can speed up the installation process and improve accuracy.
4. Contributes to a Professional Finish: By preventing buckling and warping, spacers contribute to a smooth, seamless appearance. The expansion gap is typically covered by baseboards or trim, resulting in a clean and professional-looking installation.
Types of Vinyl Flooring Spacers
While the basic function of vinyl flooring spacers remains the same, there are variations in their design and materials. Understanding these differences can help in choosing the right type for a specific project:
1. Plastic Spacers: These are the most common type of vinyl flooring spacers. They are typically made of durable plastic and come in various shapes and sizes. Plastic spacers are reusable and offer good resistance to compression, ensuring that the expansion gap remains consistent throughout the installation.
2. Foam Spacers: Foam spacers are softer and more flexible than plastic spacers. They are often used in installations where there are minor imperfections or irregularities in the wall. Foam spacers can conform to these irregularities, providing a more consistent expansion gap.
3. Wedge Spacers: Wedge spacers are tapered, allowing for fine-tuning of the expansion gap. They are particularly useful in situations where the wall is not perfectly straight or where different sections of the room require slightly different expansion gaps.
4. Self-Spacing Planks/Tiles: Some vinyl flooring products are designed with built-in spacers. These planks or tiles have small protrusions or interlocking edges that automatically create the required expansion gap when installed. This can simplify the installation process and eliminate the need for separate spacers.
How to Use Vinyl Flooring Spacers: A Step-by-Step Guide
Using vinyl flooring spacers is a straightforward process. However, following these steps ensures accurate and effective placement:
1. Prepare the Subfloor: Before installing the vinyl flooring, it is essential to prepare the subfloor properly. This involves ensuring that the subfloor is clean, level, and dry. Any imperfections or debris on the subfloor can affect the installation and the performance of the flooring.
2. Determine the Required Expansion Gap: The manufacturer's instructions typically specify the recommended expansion gap for the vinyl flooring. This gap usually ranges from 1/4 inch to 3/8 inch (approximately 6mm to 10mm). It is crucial to adhere to the manufacturer's recommendations to ensure proper expansion and contraction.
3. Place Spacers Along the Walls: Begin by placing spacers along the walls, ensuring that they are evenly spaced. A general guideline is to place a spacer every 12 to 24 inches (30 to 60 cm). In areas with corners or doorways, place spacers closer together to maintain a consistent gap.
4. Install the First Row of Flooring: Align the first row of vinyl flooring with the spacers, ensuring that the required expansion gap is maintained. Use a tapping block and mallet to gently tap the planks or tiles into place, ensuring a tight and secure fit.
5. Continue Installing the Flooring: Continue installing the remaining rows of flooring, maintaining the expansion gap along the walls and around any fixed objects, such as pipes or cabinets. Use spacers as needed to ensure consistent spacing throughout the installation.
6. Cut Flooring as Necessary: When reaching the end of a row or encountering obstacles, use a utility knife or flooring cutter to cut the vinyl flooring to the appropriate size. Remember to leave the required expansion gap when cutting the flooring around fixed objects.
7. Allow Adhesive to Cure (If Applicable): If using glue-down vinyl flooring, allow the adhesive to cure according to the manufacturer's instructions. This typically takes 24 to 48 hours. During this time, avoid walking on the flooring to ensure that the adhesive bonds properly.
8. Remove the Spacers: Once the flooring is fully installed and the adhesive has cured (if applicable), carefully remove the spacers. The expansion gap should now be visible along the perimeter of the room.
9. Install Baseboards or Trim: Cover the expansion gap with baseboards or trim to provide a finished and professional look. The baseboards or trim should be installed in a way that allows the flooring to move freely beneath them. Avoid nailing or gluing the baseboards directly to the flooring.
Common Mistakes to Avoid When Using Vinyl Flooring Spacers
While the process of using vinyl flooring spacers is generally straightforward, there are several common mistakes that can compromise the quality of the installation:
1. Using Insufficient Spacers: Failing to use enough spacers can lead to uneven expansion gaps, resulting in localized areas of stress on the flooring. Ensure that spacers are placed every 12 to 24 inches (30 to 60 cm) and closer together in corners and doorways.
2. Using Incorrect Spacer Size: Using spacers that are too small or too large can compromise the integrity of the expansion gap. Always adhere to the manufacturer's recommendations for the required expansion gap and choose spacers that match this specification.
3. Forgetting to Remove Spacers: Leaving spacers in place after the installation can prevent the flooring from expanding and contracting properly, leading to buckling or warping. Always remember to remove the spacers once the flooring is fully installed and the adhesive has cured (if applicable).
4. Securing Baseboards Directly to the Flooring: Nailing or gluing baseboards directly to the flooring can restrict its movement, negating the benefits of the expansion gap. Install baseboards in a way that allows the flooring to move freely beneath them.
5. Ignoring Manufacturer's Instructions: Always refer to the manufacturer's instructions for specific recommendations regarding expansion gaps and spacer placement. These instructions may vary depending on the type of vinyl flooring and the installation conditions.
6. Neglecting Subfloor Preparation: An improperly prepared subfloor can negatively impact the entire installation, even with the correct use of spacers. Ensure the subfloor is clean, level, and dry before starting the installation.
Alternatives to Traditional Spacers
While traditional plastic or foam spacers are the most common choice, alternative methods can also be used to create the necessary expansion gap:
1. Using Scrap Pieces of Flooring: Small, consistent pieces of scrap vinyl flooring can be used as spacers. This ensures that the expansion gap is the same thickness as the flooring itself, which can be beneficial in certain situations.
2. Pre-Spaced Flooring: As mentioned earlier, some vinyl flooring products come with integrated spacing mechanisms. These pre-spaced designs simplify installation and eliminate the need for separate spacers. However, it's crucial to verify that the provided spacing meets the manufacturer's recommendations for expansion.
3. Painter's Tape: While less precise than dedicated spacers, strips of painter's tape can be used to temporarily hold flooring in place while maintaining a consistent gap. This method is more suitable for smaller areas or intricate cuts, but it requires careful attention to ensure the gap remains uniform.
In summary, vinyl flooring spacers are essential for a successful and long-lasting vinyl flooring installation. By maintaining consistent expansion gaps, they prevent buckling, warping, and other issues caused by the natural movement of the vinyl material. Proper use of spacers, combined with careful subfloor preparation and adherence to manufacturer's instructions, will contribute to a professional-looking and durable flooring installation.

10 Beginner Mistakes Installing Vinyl Plank Flooring Fixthisbuildthat

How To Stagger Vinyl Plank Flooring Step By Guide

How To Install Vinyl Flooring 3 Methods

How Do You Fit Luxury Vinyl Tiles Floormart

Hybrid Flooring Gold Coast 100 Waterproof Ezy Decking

How To Install Vinyl Flooring In A Master Bedroom 1905 Farmhouse

Installing Vinyl Floors A Do It Yourself Guide The Honeycomb Home

Loose Lay Vinyl Plank Flooring Installation Birdz Of A Feather

How To Stagger Vinyl Plank Flooring Hatcher S Company

How To Join Vinyl Flooring Together Seamlessly
Related Posts