Trafficmaster Laminate Flooring Installation Instructions
Trafficmaster laminate flooring offers a durable and aesthetically pleasing flooring solution for a variety of spaces. Proper installation is crucial to ensuring the longevity and performance of the flooring. This article provides a comprehensive guide to the installation process, outlining the necessary preparation, tools, and techniques for a successful Trafficmaster laminate flooring project.
Before commencing the installation, it is paramount to thoroughly review the manufacturer's specific instructions included with the Trafficmaster flooring. While this guide covers general procedures, the manufacturer's recommendations should always take precedence. Deviations from the manufacturer's guidelines may void the warranty and compromise the integrity of the installed flooring.
Preparing the Subfloor
The subfloor is the foundation upon which the laminate flooring will rest. Its condition directly affects the stability, levelness, and overall appearance of the finished floor. Therefore, meticulous preparation of the subfloor is an indispensable step in the installation process.
Firstly, the subfloor must be clean and free of any debris, including dust, dirt, nails, staples, and adhesive residue. Thoroughly sweep and vacuum the entire area. For stubborn debris, a scraper or putty knife may be necessary. Any existing flooring, such as carpet, vinyl, or tile, must be removed unless specifically permitted by the Trafficmaster manufacturer's instructions for installation over existing flooring.
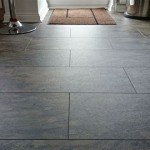
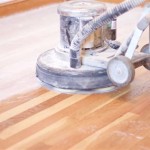
Secondly, the subfloor should be level. Imperfections exceeding 3/16 inch over a 10-foot span must be addressed. Minor variations can be corrected using a self-leveling compound. For more significant undulations, grinding or the use of plywood shims may be required to achieve a level surface. Accurate leveling ensures that the laminate flooring planks will interlock properly and avoids issues such as squeaking or uneven wear.
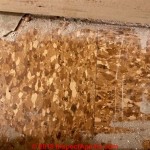
Thirdly, the subfloor must be dry. Excessive moisture can lead to warping, mold growth, and other problems that can damage the laminate flooring. Use a moisture meter to check the moisture content of the subfloor. Concrete subfloors should typically have a moisture content below 2.5% when tested with a calcium chloride test kit, or according to the manufacturer's specified method. Wood subfloors should have a moisture content between 6% and 12%. If the moisture content exceeds these recommended levels, allow the subfloor to dry completely before proceeding with the installation. The use of a vapor barrier is generally recommended, especially when installing over concrete subfloors, to prevent moisture migration.
In summary, proper subfloor preparation entails cleaning, leveling, and ensuring dryness. Neglecting any of these aspects can compromise the quality and longevity of the Trafficmaster laminate flooring installation.
Gathering Tools and Materials
Having the necessary tools and materials readily available streamlines the installation process and minimizes delays. The following is a comprehensive list of essential items:
Trafficmaster Laminate Flooring: Calculate the square footage of the room and purchase sufficient flooring to cover the area, adding 5% to 10% extra for cuts and waste. It is advisable to purchase all the flooring from the same batch to ensure color consistency.
Underlayment: Trafficmaster laminate flooring typically requires an underlayment to provide cushioning, sound insulation, and moisture protection. Check the manufacturer's recommendations for the appropriate type of underlayment for the specific flooring product.
Vapor Barrier (if required): A vapor barrier is a thin plastic sheet that is installed between the subfloor and the underlayment to prevent moisture from migrating upwards.
Measuring Tape: A measuring tape is essential for accurately determining the dimensions of the room and cutting the flooring planks to the correct size.
Pencil: A pencil is used for marking cutting lines on the flooring planks.
Saw: A circular saw, jigsaw, or laminate flooring cutter can be used to cut the flooring planks. A laminate flooring cutter provides clean, precise cuts and minimizes dust.
Tapping Block: A tapping block is used to gently tap the flooring planks together without damaging the edges.
Pull Bar: A pull bar is used to pull the last row of flooring planks into place against the wall.
Spacers: Spacers are small wedges that are placed around the perimeter of the room to maintain a consistent expansion gap between the flooring and the walls.
Hammer or Mallet: A hammer or mallet is used to tap the tapping block and pull bar.
Utility Knife: A utility knife is useful for cutting the underlayment and vapor barrier.
Safety Glasses: Safety glasses should be worn to protect the eyes from dust and debris.
Knee Pads: Knee pads can provide comfort and support during the installation process.
Dust Mask: A dust mask should be worn to protect the lungs from dust particles.
Prior to initiating the installation, ensure that the tools are in good working order and that all necessary materials are on hand. This proactive approach will prevent interruptions and ensure a smoother installation process.
Installing the Laminate Flooring
The installation process itself requires careful attention to detail and adherence to the manufacturer's instructions. The following steps outline the general procedure for installing Trafficmaster laminate flooring:
Acclimation: Allow the laminate flooring to acclimate to the room's temperature and humidity for at least 48 to 72 hours before installation. This allows the planks to expand or contract to their natural size, minimizing the risk of gaps or buckling after installation. Stack the boxes of flooring in the room where they will be installed, laying them flat and spaced apart to allow for air circulation.
Underlayment Installation: Unroll the underlayment over the prepared subfloor, covering the entire area. Overlap the edges of the underlayment by a few inches and tape them together using seam tape. Trim the underlayment along the walls, leaving a small gap for expansion. If a vapor barrier is required, install it between the subfloor and the underlayment, following the manufacturer's instructions.
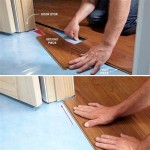
Laying the First Row: Begin installing the first row of flooring planks along a straight wall, leaving a ¼-inch expansion gap between the planks and the wall. Use spacers to maintain this gap. The tongue side of the planks should face the wall. Interlock the planks end-to-end, using a tapping block and hammer to gently secure them together. Ensure that the planks are aligned properly and that the joints are tight.
Continuing the Installation: Continue laying the flooring planks row by row, staggering the end joints to create a more visually appealing and structurally sound floor. Staggering the joints also helps to distribute weight evenly and prevent the formation of weak spots. Use a tapping block and hammer to interlock the planks, ensuring that the joints are tight and flush. For the last plank in each row, measure the distance to the wall and cut the plank to the correct size, remembering to leave a ¼-inch expansion gap. Use the cutout piece to start the next row, as long as it is at least 8 inches long.
Cutting Planks: When cutting planks to fit around doorframes, pipes, or other obstacles, use a jigsaw or laminate flooring cutter to make precise cuts. Use a template or measure carefully to ensure that the cuts are accurate. Remember to account for the expansion gap when cutting planks.
Installing the Last Row: The last row of flooring planks may need to be cut to fit the width of the room. Use a pull bar to pull the planks into place against the wall, ensuring that the ¼-inch expansion gap is maintained. If necessary, use a jigsaw to trim the planks to the correct width.
Removing Spacers and Installing Trim: Once the installation is complete, remove the spacers from around the perimeter of the room. Install baseboards or quarter-round molding to cover the expansion gap and provide a finished look. Attach the trim to the wall, not to the flooring, to allow the flooring to expand and contract freely.
This detailed approach, combined with strict adherence to the manufacturer's guidelines, will contribute significantly to a successful and long-lasting Trafficmaster laminate flooring installation.

General Guidelines

Home Depot Traffic Master 5g Installation

Home Depot Traffic Master Angle Tap Installation

Trafficmaster Laminate Flooring Installation

Trafficmaster Laminate Flooring Installation

Trafficmaster 6 In W X 36 L Consilio Oak Lock Rigid Core Luxury Vinyl Plank Flooring Installation Guide

Trafficmaster Ceramica 12 X 24 Vinyl Tile Floor Installation

Trafficmaster Lakeshore Pecan Stone 7 Mm T X 6 In W Laminate Wood Flooring 24 2 Sqft Case 50560 The Home Depot

How To Install Laminate Flooring The Home Depot

Laying Trafficmaster Laminate Flooring
Related Posts