Tools Needed To Install Wooden Flooring
Installing wooden flooring can significantly enhance the aesthetic appeal and value of a property. While professional installation is a viable option, many homeowners choose to undertake this project themselves. Successful DIY installation requires careful planning, preparation, and, crucially, the right tools. This article provides a comprehensive overview of the essential tools needed for installing wooden flooring, categorized for clarity and accompanied by explanations of their purpose.
Measuring and Layout Tools
Accurate measurement and layout are foundational to a successful flooring installation. Errors in this phase can lead to gaps, unevenness, and wasted materials. Therefore, investing in reliable measuring tools is paramount.
Measuring Tape: A durable measuring tape, preferably one that is at least 25 feet long, is essential for determining the dimensions of the room and calculating the required amount of flooring material. Metal tapes are recommended for their durability and resistance to stretching. Ensure the tape measure is clearly marked and easy to read.
Laser Distance Measurer: For larger rooms or complex layouts, a laser distance measurer can significantly speed up the measuring process and improve accuracy. This tool uses a laser beam to determine distances, eliminating the need for manual tape measure handling. It is particularly useful for measuring room diagonals and calculating square footage.
Square: A square, such as a combination square or a speed square, is used to ensure that cuts are made at precise 90-degree angles. This is critical for achieving a professional-looking installation, especially around walls and doorways. A speed square can also be used to mark angles for angled cuts.
Chalk Line: A chalk line is used to create straight, visible lines on the subfloor, serving as a guide for laying the first rows of flooring. This tool consists of a case containing chalk-coated string. The string is pulled taut and snapped against the floor, leaving a chalk line that marks the desired path.
Pencil or Marker: A pencil or marker is necessary for marking cutting lines on the flooring planks. Use a pencil for precise lines and a marker for bolder, more visible lines, especially on darker flooring materials. A carpenter's pencil, with its flat shape, is less likely to roll away and provides a good grip.
Level: A level, either a spirit level or a laser level, is essential for checking the flatness of the subfloor. Any significant variations in height must be addressed before installing the flooring to prevent unevenness and potential structural issues. A long level (e.g., 4-foot or 6-foot) is preferable for identifying subtle dips and humps.
Cutting Tools
Cutting flooring planks to the correct size and shape is a crucial aspect of the installation process. Selecting the appropriate cutting tools will ensure clean, accurate cuts and minimize waste.
Miter Saw: A miter saw, also known as a chop saw, is ideal for making precise crosscuts and angled cuts. This tool is particularly useful for cutting trim and molding, as well as for cutting planks to fit around corners and doorways. Compound miter saws allow for both angled cuts and bevel cuts, offering greater versatility.
Table Saw: A table saw is used for ripping planks, meaning cutting them along their length. This is necessary when fitting planks against walls or around obstacles that require the width of the plank to be reduced. A table saw provides a stable platform and allows for accurate, repeatable cuts.
Jigsaw: A jigsaw is a versatile tool used for making curved or irregular cuts. This is particularly useful for cutting around pipes, door frames, and other irregular shapes. Use a fine-tooth blade specifically designed for wood to minimize splintering.
Utility Knife: A utility knife, also known as a box cutter, is useful for scoring planks before snapping them, especially when working with laminate or engineered flooring. This technique can create a cleaner edge than sawing, especially for thinner materials. Ensure the blade is sharp and replaced frequently for optimal performance.
Flooring Cutter: A dedicated flooring cutter, also known as a laminate cutter or a vinyl cutter, is designed specifically for cutting flooring planks. These tools typically use a guillotine-style blade to make clean, straight cuts without the need for power. They are particularly useful for working with laminate and engineered flooring and can be a quieter and dust-free alternative to power saws.
Fastening and Installation Tools
Securing the flooring planks to the subfloor or to each other is a critical step in the installation process. The specific tools required will depend on the type of flooring being installed and the chosen installation method.
Tapping Block: A tapping block is used to gently tap the flooring planks together, ensuring a tight and seamless fit. This tool is typically made of wood or plastic and is designed to distribute the force evenly across the edge of the plank, preventing damage. It is essential when installing click-lock flooring systems.
Pull Bar: A pull bar is used to pull the last row of flooring planks into place, especially when working near walls where a tapping block cannot be used. The pull bar hooks onto the edge of the plank and allows the installer to apply force to close the gap between the plank and the wall.
Hammer: A hammer is a versatile tool used for various tasks, including driving nails or staples, and for tapping the tapping block or pull bar. A rubber mallet can be used as a gentler alternative to a metal hammer, especially when working with delicate flooring materials.
Nail Gun or Stapler: If the flooring is being nailed or stapled to the subfloor, a nail gun or stapler will be required. These tools provide a quick and efficient way to secure the planks. Choose a nail gun or stapler that is specifically designed for flooring installation and that uses the appropriate type and size of fasteners.
Spacers: Spacers are small wedges or blocks that are placed between the flooring planks and the walls to maintain a consistent expansion gap. This gap allows the flooring to expand and contract with changes in temperature and humidity, preventing buckling and other problems. Spacers are typically made of plastic or wood and come in various sizes.
Underlayment Tools: If an underlayment is being installed, tools such as a utility knife for cutting the underlayment and tape for securing the seams may be needed. The type of underlayment and the manufacturer's instructions will determine the specific tools required.
Safety Equipment
Ensuring personal safety is paramount when undertaking any DIY project. The following safety equipment should be worn at all times during the flooring installation process.
Safety Glasses: Safety glasses are essential for protecting the eyes from dust, debris, and flying objects. Wear safety glasses whenever cutting, hammering, or otherwise working with tools that could potentially create hazards.
Hearing Protection: Power tools can generate significant noise levels, which can damage hearing over time. Wear earplugs or earmuffs to protect your ears from excessive noise exposure. This is especially important when using saws, nail guns, or other loud tools.
Dust Mask or Respirator: Cutting and sanding flooring materials can generate fine dust particles that can be harmful to the respiratory system. Wear a dust mask or respirator to filter out these particles and prevent them from being inhaled. A respirator is recommended for individuals with respiratory sensitivities or when working with materials that may contain hazardous substances.
Gloves: Gloves protect the hands from cuts, splinters, and abrasions. Wear work gloves that provide a good grip and dexterity. Leather gloves are a good option for general-purpose tasks, while specialized gloves may be needed for specific tasks, such as working with adhesives.
Knee Pads: Installing flooring often involves working on the knees for extended periods. Knee pads provide cushioning and support, reducing strain and discomfort. Choose knee pads that are comfortable and durable.
Adhesive and Application Tools
For certain types of flooring, adhesive is required to bond the planks to the subfloor. Selecting the correct adhesive and using the appropriate application tools is essential for a secure and long-lasting installation.
Trowel: A trowel is used to apply adhesive to the subfloor. The type of trowel required will depend on the type of adhesive being used and the manufacturer's recommendations. Trowels come in various sizes and shapes, with different notch patterns that control the amount of adhesive applied. Use a trowel with the correct notch size to ensure proper adhesion.
Adhesive Spreader: An adhesive spreader can be used to evenly distribute adhesive over a large area. This tool is particularly useful when installing sheet vinyl or other large-format flooring materials. The spreader ensures that the adhesive is applied at the correct thickness and consistency.
Seam Roller: A seam roller is used to press the seams of flooring materials together, ensuring a tight and secure bond. This tool is particularly important when installing sheet vinyl or linoleum. The seam roller helps to eliminate air pockets and create a smooth, seamless surface.
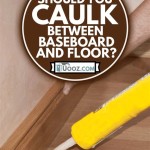
Caulk Gun: A caulk gun is used to apply caulk or sealant around the perimeter of the room and around fixtures such as pipes and toilets. Caulk helps to seal gaps and prevent water damage. Choose a caulk that is specifically designed for use with flooring materials and that matches the color of the flooring.
Adhesive Remover: Adhesive remover is used to clean up any spills or excess adhesive that may occur during the installation process. Choose an adhesive remover that is compatible with the flooring material and that will not damage the finish.
Preparation Tools
Preparing the subfloor is an important step before installing the wooden flooring. It ensures the subfloor is clean, level, and ready to adhere properly to the new flooring material.
Scraper: A floor scraper is used to remove old adhesive, paint, or other debris from the subfloor. This tool is particularly useful when renovating an existing floor. A long-handled scraper allows the installer to work from a standing position, reducing strain on the back.
Vacuum Cleaner: Use a vacuum cleaner or shop vacuum to remove dust, dirt, and debris from the subfloor. A clean subfloor is essential for proper adhesion of the flooring material. A shop vacuum is more powerful than a standard vacuum cleaner and is better suited for removing large amounts of debris.
Floor Sander: When the subfloor is uneven, a floor sander can be used to smooth out high spots and level the surface. This tool is typically used for larger imperfections and requires some skill to operate properly. A drum sander or an orbital sander can be used, depending on the size and nature of the imperfections.
Self-Leveling Compound: For severely uneven subfloors, a self-leveling compound may be required. This material is poured onto the subfloor and spreads out to create a smooth, level surface. Follow the manufacturer's instructions carefully when using self-leveling compound.

List Of Tools Equipment Needed To Install Hardwood Flooring

How To Install Laminate Flooring On Your Own Diy Hq Longwood Fl

How To Install Wood Flooring Lowe S

Installing Hardwood Flooring For The First Time How To Install Wood Floors

How To Install Wood Flooring Lowe S

6 Steps To Installing Laminate Flooring Do It Best

How To Install An Engineered Hardwood Floor

How To Install A Hardwood Floor Build This Weekend

Spc Lux Flooring Fitting Kit Ecohome Insulation

Wood Installation Tools
Related Posts