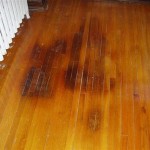
Stripping hardwood flooring is a process that involves removing the existing finish, which can be done as part of a refinishing project. It can be a daunting task, but it is important to make sure the job is done correctly to ensure the longevity of the hardwood floor. This guide will explain the steps involved in stripping hardwood flooring and provide tips on how to make the process easier.
Preparing the Room
Before stripping the hardwood floor, it is important to prepare the room. First, protect your furniture, furnishings, and other items from any potential damage by moving them out of the room. Next, vacuum the floor to remove any dirt or debris. Finally, cover any vents or other openings with plastic to prevent dust from entering other parts of the house.
Applying the Stripper
Once the room is prepared, it is time to apply the stripper. Most strippers are available in liquid or paste form, and it is important to follow the manufacturer’s instructions when applying the product. Generally, the stripper is applied in a thin layer across the entire floor. Leave the stripper on the floor for the specified amount of time, usually between 10 and 20 minutes.
Scraping the Floor
Once the stripper has been left on the floor for the specified amount of time, it is time to scrape the floor. It is important to use the proper tools for the job, such as a putty knife or a floor scraper. Start in one corner of the room and work your way out in a systematic pattern, scraping the stripper and the old finish away. Be sure to wear protective gloves and eye protection when scraping, as the chemicals in the stripper can be hazardous.
Washing the Floor
Once the scraping is complete, it is time to wash the floor. Begin by using a damp mop to remove any remaining stripper or old finish. Next, use a mild cleaner and a clean mop to remove any residue from the floor. Finally, rinse the floor with clean water and allow it to dry completely before proceeding.
Sanding the Floor
Once the floor is dry, it is time to sand the floor. Start with a coarse-grit sandpaper and work your way up to a finer-grit paper. This will help to remove any residue and prepare the floor for the new finish. Be sure to sand with the grain of the wood and avoid sanding too much, as this can damage the wood.
Finishing the Floor
Once the floor is sanded, it is time to apply the new finish. Start by vacuuming the floor to remove any dust and debris. Next, choose a finish that is appropriate for the type of hardwood you are using and apply it using a brush or roller. Allow the finish to dry for the specified amount of time and then apply a second coat. Finally, allow the floor to dry completely before using it.


Related Posts