Staining Oak Hardwood Floors: A Comprehensive Guide
Oak hardwood flooring remains a popular choice for homeowners due to its durability, natural beauty, and versatility. One of the significant advantages of oak is its ability to readily accept stains, allowing for a wide range of aesthetic options. This article provides a comprehensive guide to staining oak hardwood floors, covering everything from preparation to application and maintenance. Understanding the nuances of the process ensures a successful and visually appealing outcome.
Oak, in particular, is well-suited for staining because of its porous structure. This porosity allows the stain to penetrate the wood grain effectively, resulting in a richer and more consistent color. Different types of oak, specifically red oak and white oak, possess distinct grain patterns and undertones that influence how the stain is absorbed. Red oak typically exhibits a more pronounced grain pattern and a reddish hue, while white oak features tighter grains and a more neutral tone. Choosing the right stain color and application technique based on the specific type of oak is essential to achieving the desired aesthetic.
Understanding Oak Species and Their Stain Absorption
The selection of the appropriate stain color is crucial when staining oak hardwood floors. Red oak, known for its pinkish undertones and open grain, tends to absorb stain more readily than white oak. This means that red oak will often appear darker with the same stain compared to white oak. Darker stains accentuate the grain pattern in red oak, creating a dramatic visual effect. Lighter stains can also be used, but they may require multiple coats to achieve the desired color intensity.
White oak, with its tighter grain and greenish undertones, presents a slightly different challenge. It is generally more resistant to stain absorption, which can result in a lighter and more subtle color. For white oak, it is often recommended to use wood conditioners before staining to ensure even stain penetration. This is especially important when using darker stains, as uneven absorption can lead to blotchy or inconsistent results. When selecting a stain for white oak, consider the desired aesthetic – lighter, natural tones often complement the wood’s natural color, while darker stains can create a sophisticated and elegant look.
Testing the stain on a small, inconspicuous area or a sample piece of the same type of oak flooring is a vital step before committing to the entire floor. This allows the homeowner to assess how the stain interacts with the wood's grain and undertones, ensuring the final result aligns with their vision. It also provides an opportunity to experiment with different stain application techniques to achieve the desired color intensity and consistency.
Preparing the Oak Floor for Staining
Proper preparation is paramount to achieving a successful stain application. The first step involves thoroughly cleaning the floor to remove any dirt, dust, wax, or existing finishes. Begin by sweeping or vacuuming the floor to eliminate loose debris. Following this, use a wood floor cleaner specifically designed for removing old finishes and contaminants. Avoid using harsh chemicals or abrasive cleaners, as these can damage the wood and interfere with stain absorption.
Once the floor is clean, it is essential to sand the surface to create a smooth and even canvas for the stain. The sanding process typically involves using progressively finer grits of sandpaper. Starting with a coarser grit, such as 40-60 grit, will remove any existing finishes and imperfections. Subsequently, move to a medium grit, such as 80-100 grit, to further smooth the surface. The final sanding should be done with a fine grit, such as 120-150 grit, to create a polished and even texture. Always sand in the direction of the wood grain to avoid scratching or damaging the floor.
After sanding, meticulously remove all sanding dust. This can be achieved by vacuuming the floor thoroughly and then wiping it down with a tack cloth. Any remaining dust can prevent the stain from penetrating the wood properly, leading to uneven color and a poor-quality finish. Pay particular attention to edges and corners, where dust tends to accumulate.
For oak floors that have been previously stained or sealed, it may be necessary to use a chemical stripper to remove the old finish before sanding. Follow the manufacturer's instructions carefully when using chemical strippers, ensuring proper ventilation and personal protective equipment. After stripping, neutralize the floor with a recommended solution before proceeding with sanding.
If using a water-based stain, consider lightly dampening the floor with a clean sponge or cloth before applying the stain. This helps to raise the grain of the wood, allowing for better stain penetration and reducing the likelihood of blotchiness. Allow the floor to dry completely before applying the stain.
Applying the Stain and Achieving the Desired Color
With the floor properly prepared, the next step is to apply the stain. Choose a high-quality stain that is specifically formulated for hardwood floors. Oil-based stains offer excellent penetration and durability, while water-based stains are low in VOCs and dry quickly. Consider the desired color and finish when selecting the stain. Refer to the manufacturer’s instructions for specific application guidelines.
Before applying the stain to the entire floor, test it on a small, inconspicuous area to ensure the desired color and effect. This allows for adjustments to the application technique or stain color if necessary. Apply the stain evenly using a brush, rag, or foam applicator, working in the direction of the wood grain. Avoid applying too much stain at once, as this can lead to uneven coloring and a sticky finish.
After applying the stain, allow it to penetrate the wood for the recommended amount of time, as specified by the manufacturer. Typically, this is between 5 and 15 minutes. The longer the stain remains on the wood, the darker the color will be. After the penetration time, use a clean cloth to wipe off any excess stain. This step is crucial for achieving a consistent and even color. Wipe in the direction of the wood grain, ensuring that no stain pools or drips are left on the surface.
If a deeper color is desired, apply a second coat of stain after the first coat has completely dried. Lightly sand the floor with a very fine grit sandpaper (220 grit or higher) between coats to smooth out any imperfections. Remove all sanding dust before applying the second coat. Follow the same application and wiping process as with the first coat.
When staining oak floors, it is often recommended to use a wood conditioner prior to applying the stain. A wood conditioner helps to seal the wood pores and promote even stain absorption, reducing the likelihood of blotchiness, especially in areas with varying grain densities. Apply the wood conditioner according to the manufacturer's instructions and allow it to dry completely before proceeding with the stain application.
After the stain has completely dried, apply several coats of a high-quality polyurethane finish to protect the floor and enhance its durability. Choose a polyurethane finish that is specifically designed for hardwood floors, and follow the manufacturer's instructions for application. Apply the finish evenly using a brush, roller, or sprayer. Allow each coat to dry completely before applying the next coat. Lightly sand the floor with a fine-grit sandpaper between coats to smooth out any imperfections and promote adhesion. A minimum of two coats of polyurethane is recommended, but three or more coats will provide greater protection and durability.

What Color Should I Stain My Wood Floors

Insight And Tips For Refinishing Hardwood Floors Sand Sisal

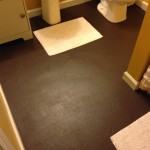
Light Stain On Red Oak Refinishing Floors

What Color Should I Stain My Wood Floors

Staining Hardwood Floors Magnus Anderson Flooring

Chicago Hardwood Install

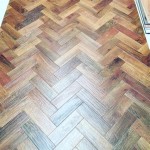
Oak Wood Floors Learn To Love This Classic Look Stefana Silber

Stain Colors

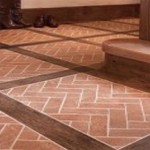
Red Oak Floor Stains Photo Guide

What Color Should I Stain My Wood Floors
Related Posts