Hardwood floors can last for years, but they can become dull, scratched, and stained with age. Restaining your hardwood floors can help them look like new again, and it’s a relatively easy process. This guide will help you understand the steps involved in restaining hardwood floors so you can decide if it’s something you can do yourself.
Step 1: Prepare the Floor
The first step in restaining hardwood floors is to prepare the floor. This includes removing any furniture from the room, sweeping away dirt and debris, and removing any existing finish or wax. You can do this by using a floor stripper or by sanding the floors. If you’re sanding the floors, you should use a rented floor sander. If you’re using a floor stripper, you should follow the manufacturer’s instructions.
Step 2: Apply the Stain
Once the floor has been prepared, you’re ready to apply the stain. Before you do this, make sure to test the stain on a small area of the floor to make sure you like the color. When you’re ready, apply the stain using a paintbrush or a paint roller. Make sure to cover the entire floor, and be sure to wipe off any excess stain with a cloth.
Step 3: Apply the Finish
Once the stain has been applied, you’re ready to apply the finish. You can choose from a variety of finishes, such as oil-based, water-based, or polyurethane. Again, make sure to test the finish on a small area of the floor before applying it to the entire floor. When you’re ready, apply the finish using a paintbrush or a paint roller. Make sure to cover the entire floor, and be sure to wipe off any excess finish with a cloth.
Step 4: Let the Floor Dry
Once the stain and finish have been applied, the floor needs to dry. This can take anywhere from a few hours to a few days, depending on the type of finish you used. Make sure to keep the room well ventilated while the floor is drying. Once the floor is completely dry, you can move the furniture back into the room.
Step 5: Reapply the Finish
Once the furniture is back in the room and the floor is completely dry, you can reapply the finish. This is important because it will help protect the floor from wear and tear. You can use the same type of finish you used before, or you can choose a different type. Again, make sure to test the finish on a small area of the floor before applying it to the entire floor.
Step 6: Enjoy Your Newly Refinished Hardwood Floors!
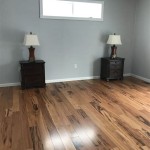
Once the floor has been stained, finished, and allowed to dry, it’s time to enjoy your newly refinished hardwood floors! You can keep them looking like new by cleaning them regularly with a damp mop or cloth.


Related Posts