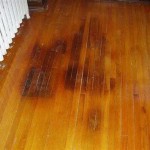
Hardwood floors are a classic addition to any home. They add a touch of sophistication and elegance to any room. However, these floors can become dull and worn over time. Sanding and refinishing your hardwood floors can bring them back to life and make them look like new again. This step-by-step guide will walk you through the process of resanding your hardwood floors.
Step 1: Preparing the Room
Before you begin sanding, you need to make sure the room is properly prepared to minimize the risk of damage. Start by removing all furniture and any other items from the room. You should also cover any vents and doorways with plastic sheets to keep dust out of other rooms. Next, you should sweep or vacuum the floor to remove any dirt or debris. Finally, you should use painter’s tape to mark off any areas that you don’t want to sand.
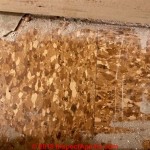
Step 2: Sanding the Floors
Once the room is properly prepared, you can begin sanding the floors. Start by using a coarse-grit sandpaper to remove the old finish and any imperfections. Work in small sections and sand in a circular motion. Be sure to wear a dust mask to protect yourself from the dust particles. After you have sanded with the coarse-grit paper, switch to a medium-grit paper and sand in the same circular motion. Finally, use a fine-grit paper to get the floors as smooth as possible.
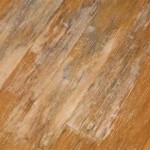
Step 3: Applying a Finish
Once the sanding is complete, you can apply a finish to the floors. There are several types of finishes you can use, including oil-based, water-based, and urethane. Oil-based finishes are durable and provide a rich color, but they can be difficult to clean up. Water-based finishes provide a natural, matte look, but they are not as durable as oil-based finishes. Urethane finishes provide a glossy look and are very durable, but they can be expensive. Choose a finish based on your preferences and budget.
Step 4: Cleaning and Sealing
After you have applied the finish, you need to clean and seal the floors. Start by using a damp cloth to remove any dust or debris. Next, you should use a sealer to protect the finish. Apply the sealer in thin coats and let it dry in between applications. Finally, use a soft cloth to buff the floors and make them shine.
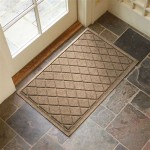
Step 5: Caring for the Floors
After your floors have been sanded and refinished, it is important to take proper care of them. Start by using a doormat to help remove dirt and debris from your shoes. Next, use a vacuum with a soft brush attachment to clean the floors on a regular basis. Finally, avoid using harsh cleaning products or products with ammonia, as they can damage the finish.
Conclusion
Resanding your hardwood floors is a great way to revive them and make them look like new. This step-by-step guide will help you get the job done quickly and correctly. Just make sure to take the necessary safety precautions and choose the right finish for your needs. With proper care and maintenance, your floors will look great for years to come.


Related Posts