Replacing hardwood floor boards can be a daunting task for any homeowner, as it requires a great deal of skill and precision to achieve a successful outcome. However, with the right tools and a bit of patience, replacing your hardwood floor boards can give your home a much-needed facelift. In this article, we’ll take a look at the steps involved in replacing hardwood floor boards, as well as some tips to help ensure your project is a success.
Preparing the Floor
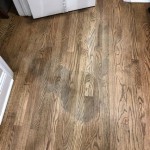
The first step in replacing hardwood floor boards is to properly prepare the floor. This includes removing furniture, rugs, and other items from the area, as well as sweeping and vacuuming the floor to remove dust and debris. Once the floor is prepped, you can begin to remove the existing boards. It’s important to use caution when removing the boards, as some may be fragile and can be easily damaged.
Removing the Old Boards
Once the area is prepped and the existing boards have been carefully removed, you can begin to install the new floor boards. You’ll need to measure the space you’re working with and select boards that will fit properly. It’s also a good idea to use a level to make sure the boards are installed correctly. Additionally, you may want to use a jigsaw to cut the boards to size, if necessary.
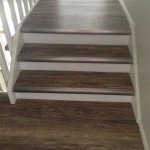
Installing the New Floor Boards
To install the new floor boards, you’ll need to place the boards together in the desired pattern and nail them into place. Make sure to leave a small gap between each board to allow for expansion. You can then use wood filler to fill in any gaps and sand the floor to create a smooth surface. Once the floor is sanded, you can apply a sealant or finish to protect the wood and give it a beautiful shine.
Tips for Success
When replacing hardwood floor boards, there are a few tips that can help ensure a successful outcome. First, be sure to buy high-quality boards that will last a long time. Additionally, take your time when replacing the boards, as rushing the job can lead to mistakes. Finally, use the right tools for the job to ensure the boards are installed correctly and securely.
Conclusion
Replacing hardwood floor boards can be a challenging project, but with the right tools, patience, and a bit of know-how, it can be a rewarding experience. By following the steps outlined in this article and using the tips provided, you can achieve beautiful, long-lasting results with your hardwood floor board replacement project.


Related Posts