Vinyl flooring is an increasingly popular choice for residential and commercial properties due to its low cost, easy maintenance, and long lifespan. Unfortunately, scratches can occur due to regular wear and tear, as well as from furniture and other objects being dragged across the surface. Fortunately, there are ways to repair the scratches and keep your floors looking like new.
Identifying the Type of Vinyl Flooring
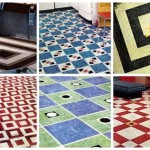
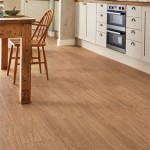
The first step in repairing scratches in your vinyl flooring is to identify the type of vinyl you have. There are two main types of vinyl flooring: sheet vinyl and vinyl tiles. Sheet vinyl is a single piece of vinyl that is laid over the entire floor. Vinyl tiles are individual tiles that are laid in a pattern. Once you have identified the type of vinyl you have, you can move on to the next step.
Gathering the Necessary Supplies
Before you begin repairing the scratches in your vinyl flooring, you will need to gather the necessary supplies. These supplies include a soft cloth, a mild detergent, a soft-bristled brush, a vacuum cleaner, a sponge, a putty knife, a floor polisher, and a vinyl flooring repair kit. If you have sheet vinyl, you will also need a heat gun.
Cleaning the Floor
The next step is to clean the floor. Start by vacuuming the area to remove any dirt and debris. Then, mix a mild detergent with warm water and use a soft cloth to clean the floor. Make sure to rinse the cloth and wring out excess water. Once the floor is clean, use a soft-bristled brush to scrub away any remaining dirt or grime. Once the floor is clean, allow it to dry completely before proceeding.
Repairing the Scratches
The next step is to repair the scratches in your vinyl flooring. If you have sheet vinyl, you will need to use a heat gun to soften the material. Then, use a putty knife to scrape away any loose material. For vinyl tiles, you will need to use a vinyl flooring repair kit. Use the kit to fill in the scratches and then use a sponge to smooth out the area. Once the repairs are complete, allow the material to dry completely before proceeding.
Polishing the Floor
The final step is to polish the floor. Use a floor polisher to buff the area and restore the shine to the floor. Make sure to follow the manufacturer’s instructions when using the polisher. Once the floor is polished, allow it to dry completely before walking on it.
Conclusion
Repairing scratches in your vinyl flooring can be a simple and straightforward process. Start by identifying the type of vinyl you have and gathering the necessary supplies. Then, clean the floor and repair the scratches. Finally, polish the floor to restore the shine. With a little bit of time and effort, you can have your vinyl flooring looking like new again.


Related Posts