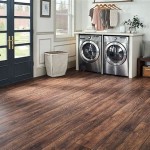
Refinishing your hardwood floors is a great way to enhance the look of your home. It can be a daunting task, especially if you’ve never done it before. But with the right tools and a bit of patience, you can refinish your own hardwood floors with ease. Here is a step-by-step guide to help you get started.
Step 1: Preparing the Room
Before you begin the process of refinishing your hardwood floor, it’s important to prepare the room. You’ll need to move out any furniture and other items, as well as remove any rugs or carpets. Use a vacuum cleaner to remove any dirt and dust from the floor, and then use a damp cloth to clean the floor thoroughly.
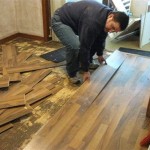
Step 2: Removing the Old Finish
Once the room is ready, it’s time to begin removing the old finish. You can use a belt sander to remove the old finish, but this can be difficult and time-consuming. An easier option is to use a chemical stripper, which will help to quickly and easily remove the old finish.
Step 3: Sanding the Floor
Once the old finish has been removed, it’s time to sand the floor. This is a crucial step in the process, as it will help to ensure the new finish sticks to the floor better. Use a floor sander to sand the floor, starting with a coarse sandpaper and then using progressively finer sandpaper until the floor is smooth.
Step 4: Applying the New Finish
Now that the floor is sanded, it’s time to apply the new finish. You can choose from a variety of finishes, such as polyurethane or varnish. Apply the finish in thin coats, using a brush or roller, and allow each coat to dry before applying the next. Be sure to follow the manufacturer’s instructions to ensure the best results.
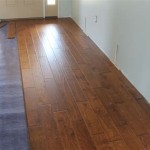
Step 5: Finishing Touches
Once the new finish has been applied and allowed to dry, it’s time to give the floor a final touch. Use a fine-grit sandpaper to smooth out any rough spots, and then use a tack cloth to remove any dust and debris. Finally, apply a coat of wax to protect the floor and give it a beautiful shine.
Step 6: Enjoy Your Refinished Hardwood Floors
Now that the job is complete, you can sit back and enjoy your newly refinished hardwood floors. With proper care and maintenance, your floors will look beautiful for years to come.


Related Posts