Laying a laminate floor is a great way to update the look of any room in your home. This type of flooring is stylish, durable, and relatively easy to install. It’s also a great choice for DIYers because it doesn’t require any special tools or skills. In this guide, we’ll walk you through the steps of laying a laminate floor, so you can get the job done right.
What You’ll Need
Before you get started, make sure you have the following supplies:
- Laminate flooring planks
- Underlayment
- T-molding
- Quarter-round molding
- Flooring adhesive
- Measuring tape
- Circular saw
- Table saw
- Hammer
- Pencil
- Chalk line
- Utility knife
Step 1: Preparing the Floor
The first step is to prepare the floor. Start by removing any carpets, rugs, or other floor coverings. Then, make sure the subfloor is clean and free of any debris or dirt. If there are any cracks or holes in the subfloor, fill them with a patching material. Finally, use a level and a chalk line to ensure the floor is level.
Step 2: Installing the Underlayment
Once the floor is ready, it’s time to install the underlayment. This is a thin layer of foam that provides cushioning and helps protect the floor from moisture. Start by unrolling the underlayment and cutting it to size. Then, use flooring adhesive to secure it to the floor. Make sure to overlap the seams and smooth out any bumps.
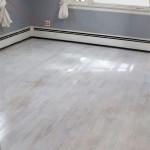
Step 3: Laying the Laminate Floor
Now it’s time to lay the laminate floor. Start by measuring the room and cutting the planks to size. Then, lay the planks in a staggered pattern, making sure to leave a gap of at least ¼ inch between the walls and the planks. When you reach the end of a row, use a jigsaw to cut the planks to size. Finally, use a hammer and tapping block to secure the planks in place.
Step 4: Installing the Transition Pieces
Once the floor is in place, it’s time to install the transition pieces. These are pieces of trim that help to bridge the gap between the laminate floor and adjacent surfaces, such as carpet or tile. Start by measuring the length of the gap and cutting the transition pieces to size. Then, use flooring adhesive to secure them in place.
Step 5: Finishing the Floor
The final step is to finish the floor. Start by applying a coat of floor sealant to protect the planks from water damage. Then, use a utility knife to trim off any excess material. Finally, install the quarter-round molding around the edges of the room to give the floor a finished look.
Conclusion
Laying a laminate floor is a great way to update the look of any room in your home. It’s also a great DIY project that doesn’t require any special tools or skills. With the steps in this guide, you’ll be able to lay a professional-looking laminate floor in no time.


:max_bytes(150000):strip_icc()/how-to-lay-laminate-flooring-1822250-01-0b84ff37785a4f8b94ab8bd30c300bfb.jpg)


:max_bytes(150000):strip_icc()/Installing-Laminate-Eyeballing-Layout-56a49d075f9b58b7d0d7d693.JPG)


Related Posts