Installing Engineered Wood Flooring on Stairs: A Comprehensive Guide
Installing engineered wood flooring on stairs presents a unique challenge, requiring meticulous planning and execution. While it offers a beautiful and durable finish, the process involves working with uneven surfaces, potential for uneven wear patterns, and careful attention to detail. This comprehensive guide provides a step-by-step approach to installing engineered wood flooring on stairs, ensuring a successful and aesthetically pleasing outcome.
1. Planning and Preparation
Preparation is paramount when installing engineered wood flooring on stairs. The first step involves assessing the existing staircase and determining the appropriate flooring type and installation method. Consider factors like:
- Staircase type: Straight, spiral, or curved stairs have different installation requirements.
- Existing surface: Determine if the surface is solid, plywood, or concrete.
- Desired finish: Choose a flooring type compatible with the stairs' design and desired aesthetics. Engineered wood flooring with a wear layer suitable for high-traffic areas is recommended.
- Installation method: Choose between glue-down, floating, or nail-down installation based on the existing surface and desired finish.
Once these factors are assessed, the next step involves preparing the existing surface. This includes removing any existing floor coverings, filling gaps or cracks, and ensuring the surface is level. If necessary, install a plywood subfloor to create a consistent base for the flooring.
2. Measuring and Cutting
Accurate measuring and cutting are crucial for a seamless installation on stairs. This involves measuring each step's width and length, accounting for the flooring's thickness and any desired overhang. Use a table saw or a circular saw with a guide to ensure precise cuts, ensuring that the flooring pieces fit perfectly on each step.
For stairs with multiple steps, it is essential to maintain a consistent pattern of flooring to avoid creating a visual mismatch. Consider starting with the top step and working your way down, ensuring that the direction of the flooring planks is consistent across all steps.
3. Installation
The installation process depends on the chosen method: glue-down, floating, or nail-down.
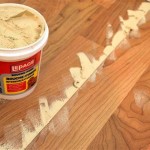
Glue-down Installation: This method involves applying construction adhesive to each step and carefully laying the flooring planks. Ensure that the glue is spread evenly and that the flooring planks are pressed firmly into place. Avoid excessive pressure to prevent warping or damage.
Floating Installation: This method requires a specialized underlayment that provides a stable and cushioned base for the flooring. The flooring planks are then interlocked using a tongue-and-groove system. This method allows for some movement and expansion, making it suitable for areas with fluctuating temperatures.
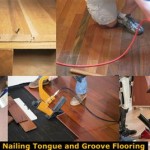
Nail-down Installation: This method involves securing the flooring planks to the subfloor using nails. This method is typically used for hardwood flooring but can be adapted for engineered wood flooring. Ensure that the nails are driven at an angle to prevent splitting the planks and that the flooring is properly secured to the subfloor.
4. Finishing Touches
Once the flooring is installed, the final step involves finishing the edges and transitions between the stairs and the surrounding floors.
Edging: Use stair nosing or a coordinating trim to cover the exposed edges of the flooring on each step. Ensure that the trim is securely attached and flush with the flooring.
Transitions: Use a transition strip or a coordinating piece of molding to connect the flooring on the stairs to the flooring on the landing or the adjacent floor. This creates a seamless and visually appealing transition between the two surfaces.
Finally, apply a sealant or finish to protect the wood flooring from moisture and stains. This will enhance the longevity and beauty of the engineered wood flooring on your stairs.
Installing engineered wood flooring on stairs requires meticulous planning, precise cutting, and careful execution. By following the steps outlined above, homeowners can achieve a beautiful and durable finish that complements their home's design and enhances its overall aesthetic appeal.

Engineered Wood Flooring Up Close With Mikasa Staircase Solution Blog By

How To Install Wood Flooring On Stairs Esb

You Want To Install Hardwood On Stairs Reallyfloors America S Est Flooring

Flooring For Stairs Hardwood Direct

How To Install Laminate Flooring On Stairs Direct Wood

Cladding A Staircase With Engineered Wood Flooring And Beyond Blog

How To Install Laminate Flooring On Stairs Direct Wood

How To Clad A Staircase Esb Flooring

How To Make Stair Treads With Prefinished Flooring And Floormade Nosing Rw Supply Design

Can You Put Hardwood Flooring On Stairs Ll
Related Posts