Having a beautiful hardwood floor installed in your home can be a great way to add value and style. But it can be a daunting task to tackle the installation process without the help of a professional. Fortunately, this guide will walk you through each step of the process, from choosing the right hardwood to finishing the installation.
Selecting the Right Hardwood
The first step in installing a hardwood floor is to select the right type of wood for your needs. There are a variety of hardwood options available, including oak, maple, cherry, and more. Each has its own unique characteristics, so it’s important to do your research and make sure you’re selecting the right type of wood for your specific project.
When selecting wood, you’ll also need to consider the type of finish you’d like. Some woods can be left unfinished, while others will require a protective finish to help keep them looking new for years to come.
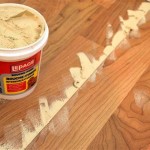
Preparing the Subfloor
Once you’ve selected the right hardwood, the next step is to prepare the subfloor. The subfloor is the material that your hardwood floor will be installed on, and it’s important to make sure it’s level and free of any damage or imperfections. If the subfloor is not properly prepared, it can cause issues with the installation process.
You can use a level to make sure the subfloor is level, and you may need to apply a leveling compound if there are any low spots or imperfections.
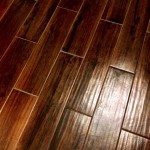
Laying the Flooring
Once the subfloor is prepared, you can begin laying the hardwood flooring. Start in one corner and work your way across the room, making sure to stagger the boards as you go. This will help to create an even look and reduce any potential warping.
You’ll also need to make sure you leave a gap around the edges of the room to allow for expansion. This gap should be around 1/8 to 1/4 of an inch.
Finishing the Floor
Once all of the boards have been laid, you can finish the floor. Depending on the type of wood you selected, you may need to apply a protective finish to help keep it looking new. You can choose from a variety of finishes, including polyurethane, wax, and more.
If you decide to apply a finish, make sure you read and follow the manufacturer’s instructions carefully.
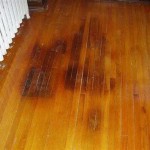
Maintaining Your Hardwood Floor
Once your hardwood floor is installed and finished, it’s important to take care of it properly to keep it looking great. Regularly sweeping, mopping, and vacuuming will help to keep it clean and free of debris. You should also avoid walking on the floor with high heels or other pointed objects that can cause damage.
You may also want to consider applying a sealant or wax every few years to help protect the wood and keep it looking new.
Conclusion
Installing a hardwood floor can be a great way to add value and style to your home. By following the steps outlined in this guide, you can ensure that your hardwood floor is installed correctly and is well-maintained for years to come.

/154907699-56a49f3c5f9b58b7d0d7e14e.jpg)


Related Posts