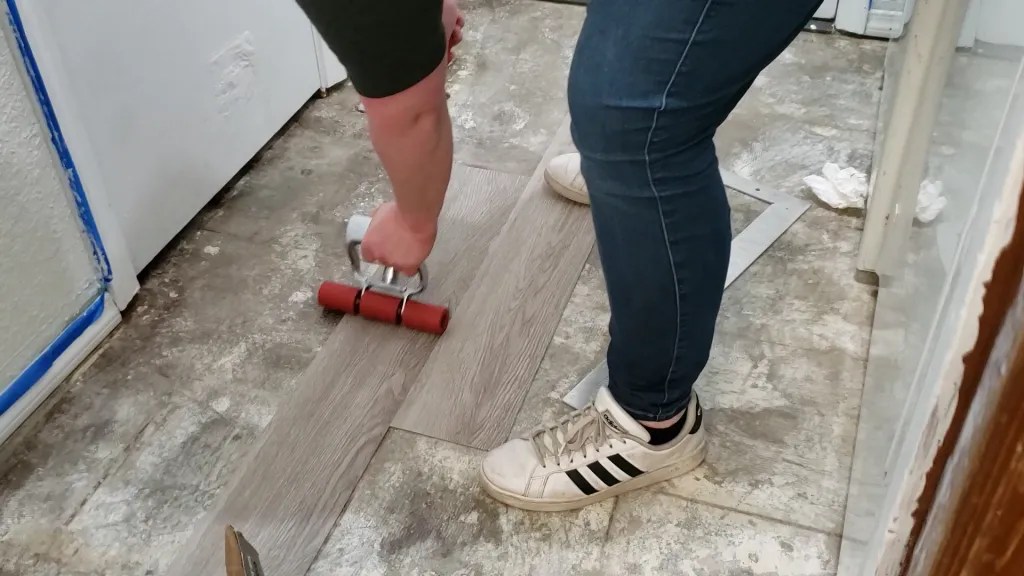
Vinyl flooring is a great option for any home, as it is easy to install and cost-effective. This guide will walk you through the process of installing vinyl flooring in your home.
1. Preparing the Subfloor
The first step in installing vinyl flooring is to prepare the subfloor. This includes ensuring that the subfloor is level and free of any debris. If the subfloor is not level, you may need to use an underlayment such as plywood or a leveling compound. If the subfloor is not free of debris, you may need to sweep or vacuum the area before installing.
2. Measuring the Room
The next step is to measure the room and determine how much vinyl flooring you will need. You will need to measure the length and width of the room and then add 10% extra for waste. You will also need to consider any doorways or other obstructions in the room that may require additional material.
3. Purchasing the Vinyl Flooring
Once you have determined the amount of vinyl flooring you will need, you can begin shopping for the product. Vinyl flooring is available in a variety of styles and colors, so you will have plenty of options to choose from. Be sure to purchase enough material to complete the job, as you may not be able to purchase additional material if it is out of stock.
4. Prepping the Vinyl Flooring
Before you can begin installing the vinyl flooring, you will need to prep it. This includes unrolling the material and allowing it to acclimate to the room temperature for at least 48 hours. This will help ensure that the flooring will lay flat and be more resistant to scratches and tears.
5. Installing the Vinyl Flooring
Once the material has been prepped, you can begin installing the vinyl flooring. Start in one corner of the room and work your way out. You will want to leave a 1/4 inch expansion gap around the perimeter of the room. You can use a utility knife to cut the material to fit around any obstructions in the room.
6. Seaming and Sealing the Vinyl Flooring
Once the material has been installed, you will need to seam and seal the vinyl flooring. This is done by applying a seaming tape to the seams and then using a roller to press the tape into place. You will also need to apply a sealant to the edges of the material to help reduce the chance of moisture damage.
7. Finishing the Vinyl Flooring
The last step in installing vinyl flooring is to finish it. This includes adding trim around the perimeter of the room and any other decorative touches. You may also want to add a protective sealant to the material to help resist scratches and spills.


:max_bytes(150000):strip_icc()/easy-install-plank-vinyl-flooring-1822808-09-a1f83db7bdf74f279f45594b897de82d.jpg)


Related Posts


