How to Transition from Vinyl Floor Tiles to Wood
Transitioning from vinyl floor tiles to wood flooring can enhance the aesthetic appeal and value of a home. However, it's crucial to understand the preparation and installation process to ensure a smooth and successful transition. This article outlines the essential steps for transitioning from vinyl tile to wood flooring.
1. Assessing the Existing Vinyl Flooring and Subfloor
Before beginning the transition, a thorough assessment of the existing vinyl flooring and the subfloor is essential. This evaluation will determine the most appropriate installation method for the wood flooring.
Firstly, check the vinyl flooring for any damage, such as cracks, peeling, or loose tiles. Damaged areas should be repaired or replaced before installing the wood flooring. A stable and level subfloor is crucial for a successful wood flooring installation. Uneven subfloors can cause the wood flooring to buckle or warp over time.
Secondly, determine the type of subfloor beneath the vinyl tiles. Common subfloor materials include plywood, concrete, or oriented strand board (OSB). Each subfloor type requires a different approach when installing wood flooring. Knowing the subfloor material will help determine the necessary preparation steps and the appropriate underlayment, if needed.
Finally, measure the moisture content of the subfloor using a moisture meter. Excessive moisture can damage wood flooring, leading to warping and other issues. Ensure the subfloor meets the manufacturer's recommended moisture content levels before proceeding with the installation.
2. Choosing the Right Wood Flooring and Transitioning Methods
Selecting the appropriate wood flooring and transitioning method is crucial for a seamless and visually appealing result. Several factors influence the choice of wood flooring, including the overall style of the home, budget, and the level of foot traffic in the area.
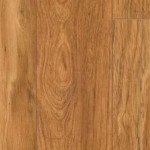
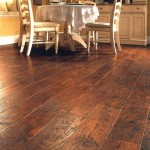
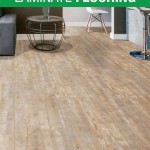
Solid hardwood, engineered wood, and laminate flooring are popular choices. Solid hardwood offers classic beauty and durability, while engineered wood provides greater stability in areas with fluctuating humidity levels. Laminate flooring offers a cost-effective alternative with a variety of wood-look finishes.
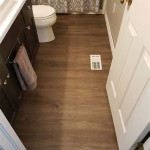
Once the wood flooring type is selected, consider the transition between the vinyl and wood flooring. Several options are available, including T-moldings, which create a smooth transition between floors of different heights; threshold strips or reducers, used to bridge height differences between flooring materials; stair nosing, for a finished look on stair edges where vinyl meets wood; and flush transitions, which create a level surface between the two flooring types, providing a seamless and aesthetically pleasing transition.
3. Preparing the Subfloor and Installing the Wood Flooring
Proper subfloor preparation is vital for a successful wood flooring installation. Depending on the subfloor condition and chosen wood flooring type, different preparation steps may be required. For example, if installing wood flooring over concrete, a moisture barrier might be necessary to prevent moisture from seeping into the wood.
If the existing vinyl flooring is in good condition and securely adhered to the subfloor, it can often serve as an underlayment for the wood flooring. This eliminates the need for removing the vinyl tiles, saving time and effort. However, it's essential to ensure the vinyl surface is clean, level, and free of any debris before installing the wood flooring.
Once the subfloor is prepared, the wood flooring can be installed according to the manufacturer’s instructions. Different wood flooring types have specific installation methods, including nail-down, glue-down, or click-lock systems. Following the manufacturer's guidelines will ensure a stable and long-lasting installation.
Acclimation is an essential step before installation. Wood flooring should be allowed to acclimate to the room's temperature and humidity for a specified period, typically 48 to 72 hours. This helps prevent expansion and contraction issues after installation.
4. Finishing Touches and Maintenance
After the wood flooring installation is complete, adding finishing touches can enhance the overall appearance and protect the flooring. Baseboards and quarter-round molding cover the gaps between the flooring and the walls, providing a finished look.
Regular maintenance is crucial for preserving the beauty and longevity of wood flooring. Sweeping or vacuuming regularly helps remove dirt and debris that can scratch the surface. Avoid using excessive water when cleaning, as this can damage the wood. Use wood floor cleaners specifically designed for the type of finish on the flooring.
Protecting high-traffic areas with rugs or mats can help prevent scratches and wear. Furniture pads under chair and table legs also minimize the risk of damage to the wood flooring surface. By following these maintenance practices, the beauty and durability of the wood flooring can be maintained for years to come.

How To Install A Transition Strip

Tile To Hardwood Transition Strips Handling Flooring Transitions

How To Install Transition Strip Up 1 Inch Tall On Tile Vinyl Lvp Laminate And Wood Flooring

Your Complete Guide To Flooring Transition Strips Builddirect

How To Transition Between Manufactured Hardwood And Vinyl Rolled Flooring Home Improvement Stack Exchange

How To Make Your Own Wood Floor Transition Strips

How To Add Floor Trim Transitions And Reducers Young House Love

Uncover How To Use Luxury Vinyl Plank Transition Strips

20 Great Examples Of Transitions In Flooring

Lifeproof Luxury Vinyl Plank Flooring Just Call Me Homegirl
Related Posts