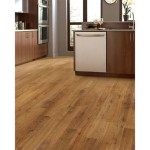
Engineered hardwood floors are a great choice for those looking to add a touch of classic beauty to their home. These floors are made up of a top layer of real hardwood with a base of plywood, making them a durable and long-lasting option. Unfortunately, like all floors, engineered hardwood can become damaged over time. If you’ve noticed scratches, dents, or other damage to your engineered hardwood floor, don’t despair. There are a few simple steps you can take to repair and restore your floor to its original glory.
Assess the Damage
The first step in repairing your engineered hardwood floor is to assess the damage. Take a look at the floor to determine the type and extent of the damage. Light scratches, for instance, can usually be repaired with a simple wax or polish. For deeper scratches and dents, however, you may need to take more extensive measures.
Gather the Necessary Materials
Once you’ve determined the type of damage, you’ll need to gather the necessary materials for repair. Depending on the type of damage, you’ll need to have on hand wax, wood putty, wood stain, and sandpaper. If the damage is extensive, you may also need to purchase a new plank of engineered hardwood.
Repair Minor Damage
For minor damage, such as light scratches and dents, you can often repair the floor with a wax or polish. Start by wiping down the damaged area with a damp cloth to remove any dirt or debris. Then, apply a thin layer of wax or polish to the area and buff it in with a soft cloth. This should help to restore the floor to its original condition.
Repair Major Damage
If you’re dealing with deeper scratches and dents, you’ll need to take more extensive measures. Start by using sandpaper to sand down the area and remove any rough edges. Then, apply wood putty to the area to fill in any gaps or cracks. Once the putty is dry, use a wood stain to match the color of the floor. Finally, use a wax or polish to seal the area and restore its original shine.
Replace Damaged Planks
In some cases, the damage may be too severe to repair. If this is the case, you may need to replace the damaged plank. To do this, start by removing the damaged plank with a chisel and hammer. Then, measure the area and purchase a new plank of the same size and shape. Finally, glue the new plank into place and use a wax or polish to seal the area.
Conclusion
Engineered hardwood floors can add a classic touch to any home. Unfortunately, these floors can become damaged over time. If you’ve noticed scratches, dents, or other damage to your engineered hardwood floor, don’t despair. With a few simple steps, you can repair and restore your floor to its original glory. Start by assessing the damage, gathering the necessary materials, and then repairing or replacing the damaged area. With some patience and a little bit of elbow grease, you can make your engineered hardwood floor look like new again.


Related Posts