How to Remove Laminate Flooring Without Damaging It
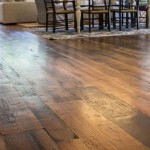
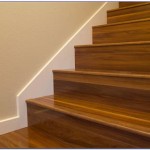
Laminate flooring, known for its durability and ease of installation, is a popular choice for homeowners. There are instances, however, when its removal becomes necessary, such as during renovations, repairs beneath the flooring, or simply when a different flooring style is desired. While laminate is relatively easy to install, removing it without causing damage to the planks, or the subfloor, requires careful planning and execution. Preserving the laminate allows for potential reuse in another area or resale, minimizing waste and saving money.
The subsequent sections will offer a detailed guide on how to effectively remove laminate flooring without inflicting damage. This will cover preparation, the necessary tools, and sequential steps to ensure a successful removal process.
Preparation for Laminate Flooring Removal
Prior to initiating the physical removal process, adequate preparation is crucial. Proper preparation not only streamlines the removal but also minimizes the risk of damage to the laminate planks and the subfloor beneath. The first step involves clearing the room of all furniture and obstructions. This provides ample workspace and prevents accidental damage to surrounding items.
Next, thoroughly clean the laminate floor. Vacuuming or sweeping removes dirt, dust, and debris that might scratch the surface during removal. A clean surface allows for better visibility of the plank edges and seams, facilitating easier separation. Identifying the starting point for removal is also critical. Typically, this will be along a wall, often where the flooring was initially installed. Examining the expansion gap along the walls, the small space left during installation to allow for natural expansion and contraction of the laminate, will help determine the direction to work in.
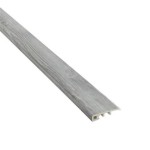
Finally, gather all the necessary tools. Having the right tools readily available will significantly improve efficiency. This may include, among other items, a pry bar, a hammer, a tapping block, a utility knife, and safety glasses. The specific tools required will vary depending on the type of laminate flooring and the installation method.
Essential Tools for Damage-Free Removal
Employing the appropriate tools is essential for removing laminate flooring without causing damage. The selection of tools will depend on factors such as the type of locking mechanism used in the laminate planks and the method used for installation. The following is a detailed list of frequently used tools and their specific functions:
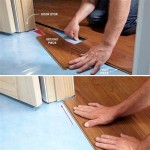
Pry Bar: A pry bar is used for gently lifting the laminate planks, particularly at the edges where they are interlocked. Choose a pry bar with a thin, flat end to minimize the risk of damaging the subfloor. The pry bar should be used in conjunction with a piece of wood or a shim to protect the wall and flooring from damage during leverage.
Hammer: A hammer is typically used in conjunction with a tapping block to loosen the planks and disengage the interlocking mechanism. Use a rubber mallet to provide gentler impact, reducing the chances of chipping or cracking the laminate. If using a standard hammer, ensure the tapping block is positioned correctly to distribute the force evenly.
Tapping Block: A tapping block is a small, rectangular block made of wood or plastic. It is positioned against the edge of the laminate plank and struck with a hammer to gently loosen the interlocking mechanism. This prevents direct contact between the hammer and the laminate, minimizing damage to the tongue-and-groove system. Choose a tapping block made of a material softer than the laminate to avoid scratching the surface.
Utility Knife: A utility knife is valuable for scoring the laminate where it meets walls or other fixed surfaces. This creates a clean separation and prevents splintering during removal. Use a sharp blade and exercise caution to avoid cutting into the wall or baseboards.
Safety Glasses: Safety glasses are non-negotiable tools when removing laminate flooring. This is because small pieces of laminate can break off and fly around, posing a risk to the eyes. Proper eye protection is crucial to ensure safety throughout the removal process.
Gloves: Wearing gloves protects the hands from splinters and abrasions during the removal process. Gloves also provide a better grip on the tools and the laminate planks.
Vacuum Cleaner or Broom: As you remove the laminate, dust and debris will accumulate. Having a vacuum cleaner or broom readily available allows you to keep the work area clean and prevent the dirt from scratching the laminate planks.
Step-by-Step Guide to Laminate Flooring Removal
This section outlines the detailed, step-by-step process for carefully removing laminate flooring, aiming to preserve the planks for reuse. The procedure involves a systematic approach that minimizes the risk of damage and ensures a smooth removal experience.
1. Locate the Starting Point: Identify the initial row of planks that were installed. This is often along a wall, typically the longest wall in the room. The expansion gap will provide a visual starting point. Carefully examine the interlocking mechanism to determine its orientation and the direction needed to disengage the planks.
2. Remove Baseboards or Molding: Carefully remove the baseboards or molding along the perimeter of the room. Use a pry bar and a putty knife to gently separate the molding from the wall. Score along the top edge of the molding with a utility knife to prevent paint from peeling. Store the molding safely for reinstallation later.
3. Initial Plank Removal: Insert the thin end of the pry bar between the first plank and the wall, using a shim or piece of wood to protect the wall. Gently lift the plank, applying even pressure. If the plank is tightly interlocked, use a tapping block and hammer to gently tap the plank sideways to loosen it. Once the plank is partially disengaged, carefully lift it out.
4. Removing Subsequent Planks: Once the first plank is removed, the subsequent planks can be removed more easily. Continue to use the pry bar and tapping block as needed to disengage the interlocking mechanism. Work systematically, removing one row of planks at a time. Be mindful of the direction of the interlocking mechanism and adjust your technique accordingly.
5. Dealing with Stubborn Planks: If a plank is particularly difficult to remove, avoid using excessive force. Instead, try gently wiggling the plank back and forth to loosen the interlocking mechanism. You can also try using a utility knife to carefully score the edges of the plank to relieve pressure. If necessary, consider cutting the plank into smaller pieces using a saw, but be cautious not to damage the surrounding planks.
6. Inspecting and Stacking Removed Planks: As you remove each plank, inspect it for any damage, such as chips, cracks, or warping. Discard any damaged planks. Stack the removed planks neatly in a safe location, preferably on a flat surface, to prevent them from warping or being damaged. Consider labeling the stacks by room or section to facilitate reinstallation or reuse. You might choose to wrap the stacks in plastic to prevent moisture damage during storage.
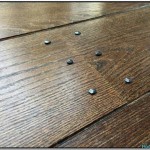
7. Addressing Adhesive: If the laminate flooring was installed with adhesive, carefully scrape away any remaining adhesive from the subfloor using a floor scraper or a putty knife. Use a solvent specifically designed for removing adhesive residue, following the manufacturer's instructions. Ensure proper ventilation when using solvents. Complete removal of adhesive will provide a smooth and clean surface for any future flooring installation.
8. Inspecting the Subfloor: After removing all the laminate planks, carefully inspect the subfloor for any damage, such as cracks, holes, or unevenness. Repair any damage before installing new flooring. This may involve patching holes with a cement-based patching compound or leveling uneven areas with a self-leveling compound. A level and stable subfloor is critical for the successful installation of any new flooring.
9. Cleaning the Work Area: Thoroughly clean the work area by sweeping or vacuuming up all debris, dust, and small pieces of laminate. Dispose of the debris properly. A clean work area ensures safety and prepares the space for any subsequent projects.
By following these steps carefully and using the appropriate tools, it is possible to remove laminate flooring without inflicting significant damage. This enables the reuse of the planks, contributing towards saving resources and money.

The Easiest Way To Remove Laminate Flooring

How To Remove Laminate Flooring

How To Remove Laminate Flooring

How To Lift Up Laminate Flooring

How To Remove Tongue And Groove Flooring Without Causing Any Damage

Diy Laminate Flooring Removal How To Remove Pergo And Of Trim Without Damaging

How To Remove Old Flooring Without Doing Serious Damage Your Home Hirepool

How To Remove Laminate Flooring The Home Depot

How To Repair Laminate Flooring Forbes Home

The Easiest Way To Remove Laminate Flooring
Related Posts