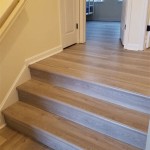
How to Remove Laminate Flooring Under Cabinets
Removing laminate flooring that extends under cabinets presents a particular challenge in flooring projects. Unlike laminate flooring that simply butts up against a wall or appliance, the portion under cabinets is typically installed before the cabinets are put in place, effectively locking it in. Therefore, directly pulling up the flooring in these areas is often impossible without damaging either the flooring, the cabinets, or both. This article outlines a systematic approach to removing laminate flooring from under cabinets, focusing on techniques that minimize potential damage and ensure a clean and professional result.
Before starting any flooring removal, proper preparation is crucial. This begins with gathering the necessary tools and materials. Essential tools include a utility knife with a sharp blade, a pry bar, a hammer, a multi-tool (oscillating tool) with a flush-cut blade, safety glasses, work gloves, and a dust mask. Depending on the age and installation method of the laminate flooring, a heat gun might also be useful to soften adhesives. In addition, a small piece of matching laminate flooring can be helpful for testing techniques and assessing potential damage. A shop vacuum is also recommended to keep the work area clean and mitigate dust accumulation.
Safety is paramount during any demolition project. Always wear safety glasses to protect eyes from flying debris. Work gloves will protect hands from splinters and sharp edges. A dust mask is crucial to prevent inhalation of dust particles, especially if the laminate flooring contains formaldehyde or other potentially harmful substances. Before beginning, ensure the work area is well-ventilated. Clear the area of any obstructions, and protect adjacent surfaces, such as walls and appliances, with drop cloths or painter's tape.
Assessing the Situation and Planning the Approach
The first step in the removal process is a thorough assessment of the situation. Determine how the laminate flooring was installed, specifically, how it transitions under the cabinets. Is it a continuous piece running from the exposed area to under the cabinets? Or was it installed in sections, with pieces fitted around the cabinet legs? Understanding the installation method will dictate the appropriate removal strategy. Also, evaluate the type of cabinets. Are they base cabinets on legs, or are they toe-kick style cabinets that sit directly on the subfloor? The cabinet style will influence accessibility and determine the best way to access the flooring underneath.
Next, examine the gap between the laminate flooring and the cabinet base. A larger gap provides more room to work and potentially requires less aggressive methods. A smaller gap, on the other hand, may necessitate more careful and precise cutting. If there is molding or trim covering the edge of the laminate flooring where it meets the cabinet, it must be carefully removed first. Use a pry bar and a utility knife to gently separate the trim from the cabinet and the wall, minimizing damage to both. Score along the top edge of the trim with the utility knife to prevent the paint from chipping when removing it.
Based on this initial assessment, develop a removal plan. Consider starting with the least invasive methods first, gradually increasing the force and precision as needed. This approach minimizes the risk of accidentally damaging the cabinets or the subfloor. Document the process with photographs at various stages. This can be helpful if any unexpected problems arise or for reference when installing the new flooring.
Cutting the Laminate Flooring
After assessing the situation and developing a plan, the next step is to carefully cut the laminate flooring along the edge of the cabinets. This is often the most critical step, as it determines the final appearance and minimizes the chance of damaging the cabinets. A multi-tool (oscillating tool) with a flush-cut blade is the ideal tool for this task. The flush-cut blade allows for precise cutting close to the cabinet base without damaging it. If a multi-tool is unavailable, a sharp utility knife can be used, but this requires more patience and careful execution.
Before making any cuts, mark a clear, consistent line along the edge of the cabinets where the laminate flooring will be cut. Use a straight edge and a pencil to ensure a straight and accurate line. When using a multi-tool, set the blade depth to match the thickness of the laminate flooring. This will prevent the blade from cutting into the subfloor. Start the cut slowly and carefully, following the marked line. Maintain a steady grip on the tool and avoid applying excessive pressure. Let the tool do the work.
If using a utility knife, score along the marked line several times, gradually deepening the cut with each pass. Be extremely careful not to slip and damage the cabinets. Once the scoring is deep enough, the laminate flooring should snap cleanly along the line. For thicker laminate flooring, this process may require more repetitions. Heat can be applied to the laminate with a heat gun to make it more pliable and easier to cut. Always test the heat setting on a scrap piece of laminate flooring first to avoid scorching or damaging it.
In some situations, especially with toe-kick style cabinets, it may be necessary to create relief cuts in the laminate flooring. Relief cuts are small, perpendicular cuts made to the long cut line. These cuts help to release tension in the flooring and make it easier to remove the sections under the cabinets. These cuts should be made approximately every six to eight inches along the cut line.
Removing the Cut Sections
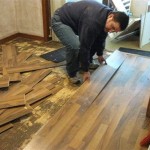
After cutting the laminate flooring along the cabinet edges, the next step is to carefully remove the cut sections. This may involve prying, pulling, or a combination of both. If the laminate flooring is glued down, more force and potentially the use of a heat gun to soften the adhesive will be required. Start by attempting to pry up the edge of the cut section using a pry bar. Insert the pry bar between the laminate flooring and the subfloor, applying gentle pressure. Work slowly and carefully to avoid damaging the subfloor or the cabinets.
If the laminate flooring is not glued down but is installed as a floating floor, it may be possible to simply lift the sections. This involves carefully disengaging the locking mechanism that connects the laminate planks. Use a tapping block and a hammer to gently tap the planks apart. Work from the exposed edge of the laminate flooring towards the cabinets. Be careful not to damage the locking mechanism, as this could make it more difficult to remove the remaining sections. If the laminate floor is installed with an underlayment attached, remove the underlayment from the subfloor after removing the laminate flooring. Scrape away any adhesive that remains on the subfloor using a floor scraper.
For sections of laminate flooring that are particularly difficult to remove, consider using a specialized flooring removal tool. These tools are designed to provide leverage and power without damaging the underlying surface. The tools often have a long handle and a wide blade that can be inserted under the flooring to lift and remove it. If the laminate flooring is attached to the subfloor with nails or staples, use a nail puller or pliers to remove them. Be sure to remove all nails and staples completely to create a smooth surface for the new flooring.
Once the laminate flooring is removed, thoroughly inspect the subfloor for any damage or imperfections. Repair any cracks or holes with a patching compound. Sand down any high spots or uneven areas to create a smooth, even surface for the new flooring. Clean the subfloor thoroughly to remove any dust, debris, or adhesive residue. A shop vacuum is ideal for this task. Before installing the new flooring, allow the subfloor to dry completely. Consider applying a moisture barrier to the subfloor to prevent moisture damage in the future.
The process of removing laminate flooring from under cabinets requires patience, precision, and careful execution. By following these steps and using the appropriate tools, it is possible to remove the old flooring without damaging the cabinets or the subfloor, preparing the area for the installation of new flooring.

Remove Hardwood Floors Under Cabinets Baseboards

How To Finish Wood Viny Flooring In Kitchens Bath Around Cabinets Tips Tricks For Beginners Diy

What Comes First Flooring Or Cabinets

How To Install Laminate Flooring Around Doors And Cabinets

How To Remove Vinyl Flooring The Home Depot

Can I Use Laminate Flooring Under Cabinets

How To Remove Laminate Flooring

How To Remove Laminate Flooring A Step By Guide The Forge Skip Hire Leeds Blog

Laminate Floor Repair Diy Family Handyman

A Comprehensive Guide To Removing Floors Discount Dumpster
Related Posts