How To Remove Glued Down Laminate Flooring From Wood Subfloor
Removing laminate flooring that has been glued down to a wood subfloor can be a challenging and time-consuming project. The process often requires patience, the right tools, and a methodical approach to minimize damage to the subfloor. This article outlines the steps involved in removing glued-down laminate flooring, emphasizing strategies to effectively loosen the adhesive and protect the underlying wood.
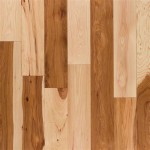
Before beginning the removal process, it is crucial to assess the installation method. Glued-down laminate relies on a powerful adhesive to bond the laminate planks or tiles directly to the subfloor. This method provides a stable and durable floor but can make removal significantly more difficult compared to click-lock or floating laminate installations. Understanding the type of adhesive used and the extent of its bond will aid in choosing the most appropriate removal techniques.
Safety is paramount throughout the removal process. Laminate flooring and the adhesives used can contain materials that are harmful if inhaled or come into contact with skin. Therefore, proper personal protective equipment (PPE) is essential. This includes wearing safety glasses to protect the eyes from flying debris, work gloves to protect the hands from sharp edges and adhesive residue, and a dust mask or respirator to avoid inhaling dust and particles. Adequate ventilation in the work area is also crucial to minimize exposure to airborne contaminants.
Gathering Necessary Tools and Materials
The success of removing glued-down laminate hinges on having the right tools and materials available. A well-equipped toolkit will streamline the process and reduce the likelihood of damaging the subfloor. Here is a list of essential items:
- Scraper: A long-handled floor scraper with a sharp blade is indispensable for lifting laminate planks from the subfloor. Consider a scraper with an adjustable head for added convenience.
- Hammer: A standard claw hammer is useful for tapping the scraper or chisel to help break the adhesive bond.
- Chisel: A wide, flat chisel can be used to pry up stubborn pieces of laminate flooring, especially around edges and corners.
- Pry Bar: A pry bar provides leverage for lifting larger sections of laminate. Be careful not to apply too much force, which could damage the subfloor.
- Heat Gun or Hair Dryer: Applying heat to the adhesive can soften it, making it easier to lift the laminate. A heat gun is more effective but requires careful handling to avoid overheating and damaging the surrounding materials. A hair dryer is a safer, albeit slower, alternative.
- Putty Knife or Smaller Scraper: These are useful for removing adhesive residue from the subfloor after the laminate is removed.
- Solvent or Adhesive Remover: A solvent specifically designed for removing adhesive can help dissolve stubborn residue. Always test the solvent in an inconspicuous area first to ensure it doesn't damage the subfloor.
- Shop Vacuum: A shop vacuum is essential for cleaning up dust and debris as you work, preventing the work area from becoming too cluttered and hazardous.
- Trash Bags or Containers: Having a place to immediately dispose of removed laminate and debris will keep the workspace organized and safe.
- Knee Pads: Removing flooring requires a lot of kneeling, so knee pads will significantly improve comfort and reduce strain.
- Safety Glasses, Gloves, and Dust Mask/Respirator: As mentioned earlier, these are crucial for protecting oneself from potential hazards.
The Laminate Removal Process: Step-by-Step
Effective removal of glued-down laminate requires a systematic approach. Rushing the process can lead to damage to the subfloor, which will necessitate additional repairs. The following steps outline a recommended method:
- Preparation: Clear the room of all furniture and obstacles. Cover any exposed surfaces, such as walls or trim, to protect them from damage. Open windows and doors to ensure adequate ventilation.
- Loosening the Edges: Begin by focusing on the perimeter of the room. Use a chisel and hammer to gently pry up the edges of the laminate planks or tiles. Working along the edges first creates a starting point for removing larger sections.
- Applying Heat: If the adhesive is particularly strong, apply heat to the laminate using a heat gun or hair dryer. Hold the heat source a few inches away from the laminate and move it slowly back and forth to avoid overheating a single spot. Heat softens the adhesive, making it easier to lift.
- Using the Floor Scraper: Position the floor scraper at an angle beneath the edge of the laminate and apply steady pressure. If necessary, tap the scraper with a hammer to help break the adhesive bond. Work methodically, lifting the laminate plank by plank or tile by tile.
- Employing the Pry Bar: For larger sections or areas where the laminate is particularly stubborn, use a pry bar. Place the pry bar beneath the laminate and gently lift, using a piece of wood as a fulcrum to protect the subfloor. Avoid applying excessive force, which could damage the subfloor.
- Addressing Stubborn Areas: If certain sections of laminate are proving difficult to remove, try a combination of heat, scraping, and prying. You may need to reheat the adhesive and apply more force with the scraper or pry bar. Patience is key to avoiding damage.
- Removing Adhesive Residue: Once the laminate is removed, the subfloor will likely have adhesive residue. Use a putty knife or smaller scraper to remove as much of the residue as possible.
- Applying Solvent (If Necessary): If scraping alone is insufficient, apply an adhesive remover or solvent to the residue. Follow the manufacturer's instructions carefully. Allow the solvent to sit for the recommended time to soften the adhesive, then scrape it away. Be sure to test the solvent in an inconspicuous area first to check for any adverse reactions with the subfloor.
- Cleaning the Subfloor: After removing the adhesive residue, thoroughly clean the subfloor with a shop vacuum to remove any remaining debris.
- Inspecting the Subfloor: Inspect the subfloor for any damage, such as gouges, cracks, or unevenness. Repair any damage before installing new flooring.
Minimizing Damage to the Wood Subfloor
Protecting the integrity of the wood subfloor is crucial during the laminate removal process. Damage to the subfloor can necessitate costly repairs and potentially compromise the stability of the new flooring installation. Here are some key strategies to minimize damage:
- Use the Right Tools: Selecting the appropriate tools for the job is essential. Avoid using tools that are too aggressive or likely to damage the subfloor, such as power tools with excessive force.
- Apply Heat Judiciously: While heat can be helpful for softening adhesive, excessive heat can damage the subfloor or the laminate itself. Use a heat gun or hair dryer sparingly and avoid overheating any one area.
- Avoid Excessive Force: When using a scraper or pry bar, apply steady, controlled pressure rather than excessive force. Applying too much force can cause the tool to slip and gouge the subfloor.
- Use a Fulcrum: When using a pry bar, place a piece of wood between the pry bar and the subfloor to act as a fulcrum. This will help distribute the pressure and prevent the pry bar from directly damaging the subfloor.
- Work Methodically: Rushing the removal process increases the risk of making mistakes and damaging the subfloor. Work methodically, taking the time to carefully loosen and remove each section of laminate.
- Address Adhesive Residue Carefully: When removing adhesive residue, avoid using abrasive tools or harsh chemicals that could damage the subfloor. Use a putty knife or scraper to gently remove the residue, and test any solvents in an inconspicuous area first.
By carefully following these guidelines, one can successfully remove glued-down laminate flooring from a wood subfloor while minimizing damage and preparing the surface for new flooring installation. The key is patience, the right tools, and a methodical approach.

How To Remove Glued Wood Flooring Easy Diy Steps Faqs And Abbotts At Home

Wood Floor Removal Glued Down Jbl Flooring

How Do I Remove Wood Parquet Flooring That Is Glued Down Super Tight Hometalk

How To Remove Laminate Flooring Lcf Ltd

The Easiest Way To Remove Laminate Flooring

How To Remove Glued Vinyl Plank Flooring King Of Floors

How To Remove Glued Wood Flooring Easy Diy Steps Faqs And Abbotts At Home

How To Remove Glued Down Parquet Flooring On Plywood Doityourself Com Community Forums

How To Remove Baseboards Parquet Flooring

How To Remove Sheet Vinyl Flooring Made Easy
Related Posts