How To Lay Out Laminate Flooring Pattern
Laminate flooring is a popular choice for many homeowners due to its durability, affordability, and ease of installation. However, a crucial step often overlooked is the planning and laying out of the laminate flooring pattern. Proper planning ensures a visually appealing finished product, minimizes waste, and provides structural integrity to the floor. This article provides a comprehensive guide on how to lay out laminate flooring patterns effectively.
Before starting any physical work, gather the necessary tools and materials. This includes the laminate flooring itself, underlayment (if required), a measuring tape, a pencil, a saw (circular saw, jigsaw, or hand saw), spacers, tapping block, pull bar, and safety glasses. Ensure the subfloor is clean, level, and dry. Any imperfections in the subfloor will translate to imperfections in the finished laminate floor.
Key Point 1: Determining the Direction of the Laminate Flooring
The direction in which the laminate flooring is laid significantly impacts the aesthetic appeal of the room. Several factors influence this decision, including the room's dimensions, the light source, and the desired visual effect.
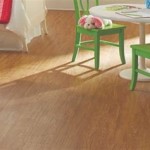
Generally, running the planks parallel to the longest wall of the room creates a sense of spaciousness. This is particularly effective in narrow rooms, as it visually widens the area. However, this rule of thumb is not absolute and may not be suitable for all room layouts.
Consider the primary light source, typically a window. Laying the planks parallel to the light source minimizes the appearance of seams and imperfections. When light shines across the planks, it can emphasize any slight height variations or gaps between them. Conversely, laying the planks perpendicular to the light source can accentuate these imperfections.
The existing flooring in adjacent rooms can also influence the direction. To create a seamless transition, consider continuing the same direction of the flooring in the adjacent room. If this is not feasible or desirable, create a contrasting pattern or use a transition strip to visually separate the two areas.
Finally, consider personal preference. Experiment with different layouts visually before committing to a particular direction. Lay a few rows of planks in different directions to get a sense of how each option looks under varying light conditions. The goal is to choose a direction that complements the room's architecture and reflects the homeowner's aesthetic taste.
Once the direction is determined, measure the room's length and width accurately. These measurements are crucial for calculating the amount of laminate flooring needed and for planning the layout.
Key Point 2: Calculating the Amount of Laminate Flooring Needed and Minimizing Waste
Accurate calculation of the required laminate flooring is essential to avoid running short during the installation process. It also helps minimize waste and ultimately reduces costs. Overestimating is generally preferable to underestimating, as having extra material allows for cuts and mistakes.
First, calculate the square footage of the room by multiplying the length by the width. Add a percentage of waste, typically between 5% and 10%, to this figure. The waste factor accounts for cuts, damaged planks, and fitting around obstacles. For rooms with complex shapes or intricate patterns, a higher waste factor (up to 15%) may be necessary.
For example, if a room is 10 feet wide and 12 feet long, the square footage is 120 square feet. Adding a 10% waste factor results in a total requirement of 132 square feet of laminate flooring.
Next, determine how many square feet of flooring are contained in each box of laminate. This information is usually printed on the box. Divide the total square footage required by the square footage per box to determine the number of boxes needed. Round up to the nearest whole number, as it is not possible to purchase partial boxes.
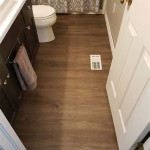
Once the flooring is purchased, carefully plan the layout to minimize waste. Begin by considering the end pieces of each row. If the end piece is less than 12 inches long, the first plank of the next row should be cut to a length that ensures the end piece is at least 12 inches long. This provides structural stability and prevents a patchwork appearance. This is referred to as staggering the seams.
Consider using the cut-off pieces from one row to start the next row, provided they meet the minimum length requirement. This reduces waste and maximizes the use of the material. However, avoid creating a pattern where seams line up in adjacent rows. This weakens the floor and creates an aesthetically unappealing look.
During the installation, carefully plan each cut before making it. Measure the space accurately and use a sharp saw to ensure clean cuts. Avoid rushing the process, as mistakes can lead to wasted material and a less-than-perfect finish.
Key Point 3: Executing the Layout and Installation Process
The actual installation process involves several steps, starting with the underlayment (if required) and progressing to the placement and securing of the laminate planks. Proper execution during this stage is crucial for achieving a professional-looking and durable floor.
Install the underlayment according to the manufacturer's instructions. The underlayment provides cushioning, sound insulation, and moisture protection. Overlap the seams slightly and tape them together to prevent moisture from seeping through.
Begin laying the first row of planks along the longest wall, ensuring there is a consistent expansion gap between the planks and the wall. Use spacers to maintain this gap, typically ¼ to ⅜ inch. The expansion gap allows the flooring to expand and contract with changes in temperature and humidity, preventing buckling or warping.
Connect the planks according to the manufacturer's instructions. Most laminate flooring uses a click-lock system, where the planks snap together. Ensure the planks are properly aligned and locked into place. Use a tapping block and a hammer to gently tap the planks together if necessary. Avoid hitting the planks directly with the hammer, as this can damage the locking mechanism.
Continue laying the subsequent rows, staggering the seams as planned. Pay close attention to the alignment of the planks. If necessary, use a pull bar to pull the planks tightly together in tight spaces or along walls.
When reaching obstacles such as pipes or doorways, carefully measure and cut the planks to fit around them. Use a jigsaw or a coping saw to make intricate cuts. Be precise with the measurements and cuts to ensure a snug fit.
For the last row, it may be necessary to rip the planks to the appropriate width. Measure the distance between the last row of planks and the wall, taking into account the expansion gap. Use a table saw or a circular saw to rip the planks to the correct width.
Once all the planks are installed, remove the spacers. Install baseboards or quarter-round molding to cover the expansion gap along the walls. This provides a finished look and protects the flooring from moisture and debris.
Finally, inspect the floor for any imperfections or gaps. Address any issues promptly to ensure the longevity and aesthetics of the floor. Clean the floor thoroughly with a damp cloth to remove any dust or debris.
Laying laminate flooring requires careful planning and execution. By following these guidelines, homeowners can achieve a professionally installed floor that enhances the beauty and value of their home. The key is to prioritize accurate measurements, thoughtful layout planning, and precise installation techniques.

A Tip For The Best Presentation Of Your Wood Look Flooring Tile Floor Pattern Laminate Diy

How To Stagger Laminate Flooring Case Study Floortheory

Yahoo Image Search Diy Flooring Wood Floor Pattern Layout

A Tip For The Best Presentation Of Your Wood Look Flooring Home

How To Stagger Laminate Flooring Case Study Floortheory

How To Stagger Laminate Flooring Experts Com

A Tip For The Best Presentation Of Your Wood Look Flooring Tile Floor Pattern Laminate Diy

Laminate Flooring Layout Howtospecialist How To Build Step By Diy Plans

Controlled Chaos For Laying Plank Flooring

A Tip For The Best Presentation Of Your Wood Look Flooring Home
Related Posts