How To Lay Laminate Wood Flooring in Various Patterns
Laminate wood flooring offers a cost-effective and aesthetically pleasing alternative to solid hardwood, providing durability and ease of installation. One of the key aspects of achieving a visually appealing laminate floor is selecting and executing the appropriate laying pattern. The pattern significantly influences the overall look and feel of the room, adding character and depth. This article will detail several laminate flooring patterns, providing guidance on how to install them effectively.
Before beginning any laminate flooring project, it is crucial to prepare the subfloor. The subfloor must be clean, level, and dry. Any imperfections, such as bumps or dips, will affect the stability and appearance of the finished floor. Use a self-leveling compound to address any unevenness, and ensure the subfloor is free from debris. A moisture barrier, typically a thin foam underlayment, should be installed before laying the laminate planks. This barrier protects the laminate from moisture rising from the subfloor and provides a comfortable, cushioned feel underfoot.
Understanding Laminate Flooring Plank Construction
Laminate flooring consists of four primary layers: the wear layer, the decorative layer, the core layer, and the backing layer. The wear layer is a transparent, durable coating that protects the underlying layers from scratches, stains, and fading. The decorative layer is a high-resolution photograph of wood, stone, or other materials, providing the visual appearance of the flooring. The core layer, typically made of high-density fiberboard (HDF) or medium-density fiberboard (MDF), provides structural stability and impact resistance. The backing layer is a moisture-resistant layer that balances the plank and prevents warping.
Laminate planks typically utilize a click-lock system, allowing for a floating floor installation. This means the planks are not glued or nailed to the subfloor; instead, they interlock with each other. The click-lock system makes installation relatively straightforward, even for DIY enthusiasts. However, proper planning and execution are essential to achieve a professional-looking result.
Popular Laminate Flooring Patterns
Several patterns can be used when laying laminate flooring. The choice of pattern depends on personal preference, the size and shape of the room, and the desired aesthetic. Some common patterns include:
- Straight Lay: This is the simplest pattern, involving laying planks parallel to each other along the length or width of the room.
- Brick or Staggered: This pattern resembles a brick wall, with each row offset from the previous row.
- Diagonal: Planks are laid at a 45-degree angle to the walls, creating a more dynamic look.
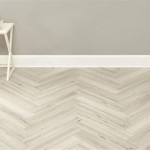
- Herringbone: Planks are arranged in a zigzag pattern, creating a classic and elegant appearance.
- Random: This pattern involves varying the length of the planks in each row, creating a more natural and informal look.
Each of these patterns has its own unique characteristics and installation requirements. Careful planning is essential to ensure a successful outcome.
Detailed Installation Guides for Different Patterns
The following sections outline the installation process for several popular laminate flooring patterns.
Straight Lay Pattern
The straight lay pattern is the most straightforward and economical option for laminate flooring installation. It's ideal for beginners and works well in various room sizes and shapes. To begin, determine the direction you want the planks to run. Typically, planks are laid parallel to the longest wall in the room to visually lengthen the space. However, personal preference and the direction of natural light can also influence this decision.
Start by measuring the width of the room. Divide this measurement by the width of a single laminate plank. If the result is a fraction, you'll need to cut the first row of planks to ensure a consistent width along the wall. This prevents having a very narrow strip of plank at the opposite wall, which can look unsightly.
Install the first row of planks, leaving a small expansion gap (typically ¼ to ⅜ inch) between the planks and the wall. This gap allows for the natural expansion and contraction of the laminate due to temperature and humidity changes. Use spacers to maintain the consistent gap. Connect the planks using the click-lock system, ensuring a tight and secure fit. Use a tapping block and a hammer to gently tap the planks together if necessary.
Continue laying subsequent rows, ensuring the planks are aligned and the click-lock system is properly engaged. Regularly check for squareness and alignment using a level and a straight edge. When reaching the opposite wall, you may need to cut the planks to fit, again maintaining the expansion gap.
For doorways and other obstructions, use a jigsaw to cut the planks to the required shape. Be sure to measure accurately and leave the appropriate expansion gap. Once the entire floor is laid, remove the spacers and install baseboards or quarter-round molding to cover the expansion gap and provide a finished look.
Brick or Staggered Pattern
The brick or staggered pattern adds visual interest to a room and is slightly more complex than the straight lay pattern. This pattern mimics the look of a brick wall, with each row offset from the previous row by a consistent amount, usually half the length of a plank. This is also called a running bond pattern.
As with the straight lay pattern, prepare the subfloor and install the underlayment. Determine the direction you want the planks to run, considering the room's dimensions and natural light.
Start the first row with a full-length plank, leaving the expansion gap. For the second row, begin with a half-length plank (or whatever offset you choose). This creates the staggered effect. Connect the planks using the click-lock system, ensuring a tight and secure fit. Continue laying subsequent rows, alternating between full-length and shorter planks to maintain the staggered pattern.
The key to success with this pattern is to ensure consistent staggering throughout the installation. Use a measuring tape or a marking tool to maintain the desired offset. When cutting planks, use a sharp saw and wear appropriate safety gear. As with the straight lay pattern, remember to maintain the expansion gap around the perimeter of the room and around any obstructions.
Waste is a factor in the Brick or Staggered pattern; expect to cut more planks than in the straight lay pattern. Factor this into your material purchase to avoid shortages. The discarded cut pieces can often be used to start subsequent rows, minimizing waste.
Diagonal Pattern
The diagonal pattern creates a more dynamic and visually interesting look, making a small room appear larger. However, it is also more challenging to install and generates more waste than the straight lay or brick patterns.
Prepare the subfloor and install the underlayment. To begin the diagonal pattern, you need to establish a reference line at a 45-degree angle to the walls. Use a protractor or a framing square to accurately mark the angle.
Start in a corner of the room and lay the first row of planks along the reference line, maintaining the expansion gap. Cut the planks at a 45-degree angle to fit against the walls. Connect the planks using the click-lock system.
Continue laying subsequent rows, maintaining the 45-degree angle and the expansion gap. This pattern requires more cutting and fitting than the other patterns, so accurate measurements and precise cuts are essential. Use a miter saw or a circular saw with a bevel guide to make accurate angled cuts.
Due to the angled cuts, waste is significantly higher in the diagonal pattern. Purchase approximately 15-20% more material than you would for a straight lay pattern. Consider using the cut-off pieces in less visible areas, such as closets, to minimize waste.
Herringbone Pattern
The herringbone pattern is a classic and elegant choice that adds a touch of sophistication to any room. However, it is the most complex of the patterns discussed here and requires careful planning and precise execution.
Prepare the subfloor and install the underlayment. The herringbone pattern requires two types of planks: left and right. These are typically sold as pre-cut pairs specifically designed for this pattern. If using standard planks, you will need to cut the ends at a 45-degree angle.
To begin, find the center of the room and establish a reference line. Lay the first two planks, one left and one right, forming a "V" shape along the reference line. Connect the planks using the click-lock system.
Continue laying subsequent rows, alternating between left and right planks to create the herringbone pattern. The pattern requires precise alignment and a tight fit between the planks. Use a tapping block and a hammer to gently tap the planks together if necessary. The pattern can be complex near the walls. It is imperative to plan this out well. The use of a jig is helpful.
The herringbone pattern generates significant waste, especially near the walls. Purchase at least 20% more material than you would for a straight lay pattern. Installing a border around the perimeter of the room can simplify the installation and reduce waste. The border can be a contrasting color or a different material, such as tile or stone.
Because the cuts are at 45-degree angles on both ends of a herringbone plank, it is highly recommended to use a miter saw with a precise angle setting. This will produce much cleaner and accurate cuts, increasing the speed and quality of this pattern. It is also important to note that not all laminate flooring click-lock systems work with herringbone pattern installations. Ensure you are able to lock the boards together at the smaller ends prior to committing to a purchase and installation plan.
Random Pattern
The random pattern is designed to mimic the natural variation found in real hardwood floors. This pattern involves using planks of different lengths to create a more informal and organic look. It is relatively easy to install and generates less waste than the diagonal or herringbone patterns.
Prepare the subfloor and install the underlayment. To begin, sort the laminate planks by length. You can either purchase planks of varying lengths specifically designed for a random pattern or cut standard-length planks into different sizes.
Start the first row with a plank of any length, leaving the expansion gap. For the second row, choose a plank of a different length and stagger the end joints by at least 6 inches. This ensures the joints are not aligned in adjacent rows, which can weaken the floor.
Continue laying subsequent rows, varying the length of the planks and staggering the end joints. Avoid creating any patterns or repeating sequences. The goal is to create a random and natural look.
Waste is minimized in the random pattern because you can use cut-off pieces to start subsequent rows. However, it is still important to plan the layout carefully to avoid having too many short planks in one area. Consider using a consistent color variation and wood-grain direction to make this pattern look its best.
Essential Tools and Materials
Regardless of the pattern chosen, several essential tools and materials are required for a successful laminate flooring installation. These include:
- Laminate flooring planks
- Underlayment
- Spacers
- Tapping block
- Hammer
- Measuring tape
- Pencil
- Saw (circular saw, jigsaw, or miter saw)
- Safety glasses
- Knee pads
- Moisture meter
- Level
- Square
Ensuring you have all the necessary tools and materials before starting the project will save time and prevent frustration. It is also important to read and follow the manufacturer's instructions for the specific laminate flooring product you are using. Different products may have slightly different installation requirements.
Properly laying laminate flooring in various patterns enhances the aesthetic appeal and value of any space. Selecting the right pattern, meticulously preparing the subfloor, and utilizing the appropriate tools are paramount to achieving a professional and lasting result.

How To Stagger Laminate Flooring Case Study Floortheory

Interesting Hardwood Layout Patterns Flooring America

Design Guide Endless Possibilities Of Wooden Floor Layout Patterns Archdaily

Wood Flooring Patterns And Design Options Beyond Blog

How To Stagger Laminate Flooring Experts Com

How To Lay Laminate Flooring On Concrete Howtospecialist Build Step By Diy Plans Laying Installing

Determining The Direction To Lay Install Hardwood Laminate Or Luxury Vinyl Plank Flooring

How To Stagger Laminate Flooring Case Study Floortheory

Patterned Effect Laying Patterns Of Parquet Flooring

7 Quintessential Wood Floor Patterns For Your Place
Related Posts