How To Install Hardwood Floors For Beginners: A Step-by-Step Guide
Installing hardwood floors can significantly enhance the aesthetic appeal and value of a home. While it appears to be a complex undertaking, breaking the process down into manageable steps makes it achievable for beginners. This guide provides comprehensive instructions for installing hardwood floors, ensuring a successful and satisfying outcome.
I. Preparation is Paramount: Tools and Materials
Thorough preparation is critical for a successful hardwood floor installation. Gathering the necessary tools and materials beforehand will streamline the process and prevent delays. This section details the essential items required for the project.
Tools:
- Measuring Tape: Essential for accurately measuring the room and individual boards.
- Pencil: Used for marking cut lines and reference points.
- Circular Saw or Miter Saw: Required for cutting boards to the correct length. A miter saw offers greater precision for angled cuts.
- Jigsaw: Necessary for cutting around irregular shapes, such as door frames and pipes.
- Hammer: Used in conjunction with a tapping block to secure boards.
- Tapping Block and Pull Bar: These tools protect the edges of the hardwood flooring during installation and are crucial for tightening the rows.
- Moisture Meter: Important for checking the moisture content of both the subfloor and the hardwood flooring.
- Level: Used to ensure the subfloor is level, a critical factor for a professional-looking floor.
- Chalk Line: Used to create straight, accurate lines for the first row of flooring.
- Safety Glasses: Protects the eyes from dust and debris during cutting and hammering.
- Knee Pads: Improve comfort and reduce strain during extended periods of kneeling.
- Dust Mask: Protects the respiratory system from dust particles.
- Broom or Vacuum: Needed for cleaning the subfloor before installation and removing debris during the process.
- Drill with Screws: Used if the baseboards are removed for easier installation.
- Wood Putty or Filler (Matching Color): For hiding nail holes or small imperfections.
Materials:
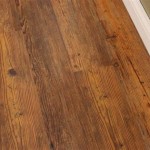
- Hardwood Flooring: Select the desired species, grade, and width of hardwood flooring. Calculate the square footage needed, adding an extra 5-10% for waste allowance.
- Underlayment: A layer of material placed between the subfloor and the hardwood flooring. It provides moisture protection, sound insulation, and cushioning. Select an appropriate underlayment based on the type of subfloor and specific needs.
- Moisture Barrier (if required): Needed if the subfloor is concrete or in areas with high humidity.
- Wood Glue (if required): Some installations, particularly with engineered hardwood, might require wood glue.
- Fasteners (nails or staples): Select the appropriate type and length of fasteners based on the thickness and type of hardwood flooring. A flooring nailer or stapler is highly recommended for efficiency.
- Spacers: Small wedges or blocks used to maintain consistent expansion gaps around the perimeter of the room.
Having all of these tools and materials readily available will significantly contribute to a smooth and efficient hardwood floor installation. Failure to adequately prepare can result in frustration and subpar results.
II. Preparing the Subfloor: Ensuring a Solid Foundation
The subfloor is the foundation upon which the hardwood floor rests. Its condition directly impacts the stability, longevity, and overall appearance of the finished floor. Proper preparation of the subfloor is therefore crucial for a successful installation. It must be clean, level, and dry.
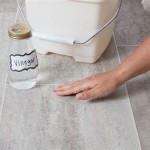
A. Cleaning the Subfloor:
Begin by thoroughly cleaning the subfloor. Remove any existing flooring materials, such as carpet, tile, or linoleum. Scrape away any adhesive residue, nails, or staples. Use a broom or vacuum to remove all dust, dirt, and debris. A clean subfloor ensures proper adhesion of the underlayment and prevents unevenness in the finished floor.
B. Leveling the Subfloor:
A level subfloor is essential for a professional-looking hardwood floor. Use a long level (at least 6 feet) to check for any dips or humps. Minor imperfections (less than 1/4 inch over 10 feet) can often be addressed with self-leveling compound. For larger discrepancies, grinding down high spots or using shims to fill low spots may be necessary. Ensure the subfloor is as flat and even as possible to prevent squeaking or uneven wear after the hardwood is installed.
C. Repairing Damaged Areas:
Inspect the subfloor for any signs of damage, such as warping, rot, or cracks. Repair any damaged areas before proceeding. Replace any sections of the subfloor that are severely damaged or compromised. For minor cracks, use a suitable patching compound. Addressing these issues ensures a solid and stable foundation for the hardwood flooring.
D. Checking Moisture Content:
Moisture is a major enemy of hardwood floors. Use a moisture meter to check the moisture content of both the subfloor and the hardwood flooring. Ideally, the moisture content of both should be within a compatible range. Allow the hardwood flooring to acclimate to the room's humidity for several days before installation. This helps to prevent warping or gapping after installation. If the subfloor's moisture content is too high, take steps to dry it out before proceeding. Installing a moisture barrier is recommended, especially when installing over concrete.
Proper subfloor preparation is time-consuming but ultimately essential. Investing the necessary effort in this stage will result in a more durable, beautiful, and long-lasting hardwood floor.
III. Installing the Hardwood Flooring: Step-by-Step Instructions
With the subfloor properly prepared, the actual installation of the hardwood flooring can begin. This section provides detailed, step-by-step instructions to guide beginners through the process.
A. Laying the Underlayment:
Roll out the underlayment over the prepared subfloor, following the manufacturer's instructions. Overlap the edges of the underlayment slightly and tape them together to create a continuous layer. The underlayment provides a moisture barrier, sound insulation, and cushioning. Secure the underlayment to the subfloor with staples or tape, as recommended by the manufacturer.
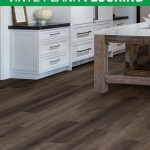
B. Planning the Layout:
Before beginning the actual installation, plan the layout of the hardwood boards. Determine the direction in which the boards will run. In general, running the boards parallel to the longest wall of the room creates a more visually appealing and spacious effect. Consider the location of doorways, hallways, and other architectural features. Aim to minimize the need for narrow cuts at the end of rows. Distribute the planks from different boxes or bundles to ensure a varied and natural-looking floor. This helps to avoid clusters of similar grain patterns or colors.
C. Installing the First Row:
The first row is the most critical, as it serves as the foundation for the rest of the floor. Use a chalk line to create a straight, accurate line along the wall where the first row will be installed. Leave an expansion gap of approximately 1/4 to 3/8 inch between the hardwood boards and the wall. This gap allows the wood to expand and contract with changes in humidity, preventing buckling or warping. Place spacers along the wall to maintain the correct expansion gap. Install the first row of boards with the tongue facing out. Fasten the boards to the subfloor using a flooring nailer or stapler, following the manufacturer's recommendations. Ensure the boards are straight and aligned correctly.
D. Installing Subsequent Rows:
Continue installing the remaining rows, working your way across the room. Stagger the end joints of the boards from row to row to create a more visually appealing and structurally sound floor. Use a tapping block and hammer to gently tap the boards into place, ensuring a tight fit. A pull bar is useful for tightening boards near walls where a nailer cannot be used. Fasten each board to the subfloor with the flooring nailer or stapler. Periodically check the alignment of the rows to ensure they remain straight. Remove any excess glue or debris from the surface of the floor as you go.
E. Cutting Around Obstacles:
Use a jigsaw to cut around obstacles such as door frames, pipes, and other irregular shapes. Measure the distance from the wall to the obstacle and transfer the measurement to the hardwood board. Use a pencil to mark the cut line and carefully cut the board with the jigsaw. Ensure the cut is clean and accurate to create a seamless fit around the obstacle.
F. Installing the Last Row:
The last row of boards may require some trimming to fit properly. Measure the distance from the wall to the last row of installed boards and subtract the expansion gap. Cut the boards to the correct width using a circular saw or miter saw. Install the last row of boards using a pull bar and hammer to tighten them into place. Fasten the boards to the subfloor with nails or screws, if necessary.
G. Finishing Touches:
Remove the spacers from around the perimeter of the room. Install baseboards or quarter-round molding to cover the expansion gaps and create a finished look. Fill any nail holes or small imperfections with wood putty or filler that matches the color of the hardwood flooring. Clean the floor thoroughly with a soft cloth or mop.
By following these step-by-step instructions, beginners can successfully install hardwood floors and transform the look and feel of their homes. Patience, attention to detail, and careful preparation are the keys to a beautiful and long-lasting hardwood floor.

How To Install Hardwood Flooring The Home Depot

How To Install Hardwood Flooring For Beginners

How To Install Laminate Flooring For Beginners

How To Install Hardwood Flooring The Home Depot

How To Install Hardwood Flooring The Home Depot

Determining The Direction To Lay Install Hardwood Laminate Or Luxury Vinyl Plank Flooring

Installing Laminate Flooring For Beginners Full Diy Guide

How To Install Hardwood Flooring The Home Depot

How To Install Hardwood Flooring Complete Instructions

How To Install Laminate Flooring Craft Your Happiness
Related Posts