How To Install Hardwood Floors For Beginners
Installing hardwood floors can significantly enhance the aesthetic appeal and value of a residence. While seemingly daunting, the process is manageable for beginners with careful planning, proper tools, and a methodical approach. This article provides a comprehensive guide to hardwood floor installation, outlining the necessary steps and considerations for a successful project.
Preparation and Planning
Prior to commencing any physical work, thorough planning is crucial. This stage involves assessing the existing subfloor, selecting the appropriate hardwood flooring material, and ensuring the necessary tools and safety equipment are on hand.
Subfloor Assessment: The subfloor serves as the foundation for the hardwood flooring and must be structurally sound, level, and clean. Typically, subfloors are constructed from plywood or concrete. Examine the subfloor for signs of damage, such as rot, mold, or cracks. Any imperfections should be addressed before proceeding. Plywood subfloors should be at least 3/4 inch thick for optimal support. Concrete subfloors require moisture testing to prevent warping or buckling of the hardwood. If moisture levels are high, a moisture barrier must be installed.
Material Selection: Hardwood flooring is available in various species, styles, and finishes. Solid hardwood is constructed from a single piece of wood and is suitable for installation above ground level. Engineered hardwood consists of multiple layers of wood veneer bonded together, offering greater stability and resistance to moisture. Consider the aesthetic preferences, budget, and environmental conditions when selecting the appropriate hardwood flooring material.
Acclimation: Allowing the hardwood flooring to acclimate to the room's temperature and humidity is essential to minimize expansion and contraction after installation. Store the unopened boxes of flooring in the room where they will be installed for at least three days, or preferably longer, depending on the manufacturer's instructions. This process allows the wood to adjust to the environment, reducing the likelihood of gaps or buckling.
Tool and Equipment Gathering: Assemble all necessary tools and equipment before starting the installation. Essential tools include a measuring tape, pencil, chalk line, safety glasses, dust mask, knee pads, hammer, tapping block, pull bar, moisture meter, circular saw or miter saw, and a nail gun or flooring stapler (depending on the installation method). Additionally, consider acquiring a floor scraper or sander to address any minor imperfections in the subfloor.
Installation Process
The installation process involves preparing the subfloor, laying out the flooring, and securing it in place. Maintaining precision and attention to detail throughout this process is crucial for achieving a professional-looking result.
Subfloor Preparation: Clean the subfloor thoroughly to remove any debris, dirt, or adhesive residue. Use a scraper to remove any hardened materials and a vacuum cleaner to eliminate dust. Level the subfloor by sanding down high spots or filling in low spots with leveling compound. Ensure the subfloor is smooth and flat to provide a stable base for the hardwood flooring.
Layout Planning: Determine the direction in which the hardwood flooring will be laid. Generally, it is recommended to install the flooring parallel to the longest wall of the room. Use a chalk line to mark a straight starting line parallel to the wall, leaving a small expansion gap (typically 1/4 to 3/8 inch) between the flooring and the wall. This gap allows for natural expansion and contraction of the wood due to changes in humidity and temperature.
Initial Row Installation: Begin laying the first row of hardwood flooring along the chalk line, ensuring the tongue side of the board faces the wall. Use shims to maintain the expansion gap between the flooring and the wall. Secure the first row using a nail gun or flooring stapler, following the manufacturer's recommendations for nail or staple spacing. Ensure the fasteners are driven in at the correct angle to prevent damage to the flooring.
Subsequent Row Installation: Continue installing subsequent rows, interlocking the tongue and groove of the boards. Use a tapping block and hammer to gently tap the boards together, ensuring a tight fit. Avoid using excessive force, which could damage the edges of the boards. Stagger the end joints of the boards to create a more visually appealing and structurally sound floor. Cut boards to length as needed using a circular saw or miter saw, maintaining the expansion gap at the ends of the rows.
Dealing with Obstacles: When encountering obstacles such as door frames or pipes, carefully measure and cut the flooring boards to fit around them. Use a jigsaw or coping saw to create precise cuts. Consider using a router to create a small recess in the flooring to accommodate the obstacle if necessary. Ensure the expansion gap is maintained around the obstacles.
Final Row Installation: Installing the final row often requires trimming the boards to fit the remaining space. Use a pull bar to tighten the boards against the wall, ensuring a tight fit. Secure the final row using a nail gun or flooring stapler, paying close attention to the angle of the fasteners to avoid damaging the wall.
Finishing and Maintenance
After the installation is complete, the final step involves finishing the floor and establishing a maintenance routine to preserve its appearance and longevity.
Removing Shims and Installing Baseboards: Remove the shims from the expansion gap around the perimeter of the room. Install baseboards or quarter-round molding to cover the expansion gap and provide a finished look. Secure the baseboards or molding to the wall, not the flooring, to allow for expansion and contraction.
Cleaning and Initial Maintenance: Clean the newly installed hardwood floor thoroughly by sweeping or vacuuming to remove any dust or debris. Avoid using excessive water or harsh cleaning chemicals, which could damage the finish. Use a damp mop with a pH-neutral cleaner specifically designed for hardwood floors. Apply a coat of floor polish or wax as recommended by the flooring manufacturer to protect the finish and enhance its appearance.
Ongoing Maintenance: Establish a regular maintenance routine to keep the hardwood floor looking its best. Sweep or vacuum the floor regularly to remove dirt and debris. Use mats or rugs in high-traffic areas to protect the finish. Avoid wearing shoes with cleats or spikes on the floor. Wipe up spills promptly to prevent staining or damage. Periodically refinish the floor to restore its luster and remove scratches or wear marks.
Addressing Potential Challenges
During the installation process, several challenges may arise. Being prepared to address these challenges can ensure a smoother and more successful outcome.
Uneven Subfloor: An uneven subfloor can result in uneven flooring, squeaks, and potential damage to the hardwood. To address this, level the subfloor before installation using a floor leveling compound. For minor imperfections, self-leveling underlayment may suffice. For more significant issues, consider consulting a professional to assess and rectify the subfloor.
Moisture Issues: Moisture is a significant threat to hardwood flooring. Before installation, test the moisture content of both the subfloor and the hardwood flooring. Use a moisture meter to determine the moisture levels. If the subfloor has high moisture content, install a moisture barrier to protect the flooring. Ensure proper ventilation in the room to prevent moisture buildup.
Gaps and Squeaks: Gaps between the hardwood boards can occur due to improper installation or changes in humidity. Use a wood filler to fill small gaps and apply a matching stain to blend the filler with the surrounding wood. Squeaks can often be attributed to loose subfloor or improperly secured flooring. Secure the subfloor with screws and ensure the flooring is properly nailed or stapled to the subfloor.
Damaged Boards: During installation, some boards may become damaged. It is essential to have extra boards on hand to replace any damaged pieces. Carefully remove the damaged board and replace it with a new one, ensuring a tight fit and proper alignment. When purchasing hardwood flooring, always order extra material to account for potential waste or damage.
By carefully following these steps and addressing potential challenges proactively, beginners can successfully install hardwood floors and enhance the beauty and value of their homes. Careful planning, attention to detail, and adherence to manufacturer's instructions are paramount for achieving a professional and long-lasting result.
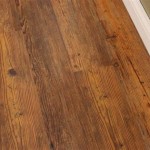
:strip_icc()/101206833-2e499ef612434b6b8ab6e5b62422a78f.jpg?strip=all "How To Install Hardwood Floors")
How To Install Hardwood Floors

How To Install Hardwood Flooring For Beginners

How To Install Hardwood Flooring The Home Depot
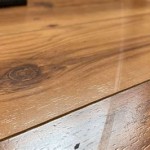
:strip_icc()/101206836-29035ec5a7c34a12a4c00cd5101818d4.jpg?strip=all "How To Install Hardwood Floors")
How To Install Hardwood Floors

How To Install Laminate Flooring For Beginners
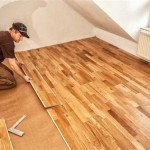
:strip_icc()/101206834-206cd78cd20a45c5b6bbb5747b29f1a4.jpg?strip=all "How To Install Hardwood Floors")
How To Install Hardwood Floors

The Ultimate Guide To Diy Hardwood Flooring Installation

How To Install Hardwood Flooring The Home Depot

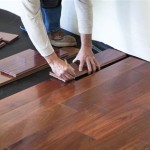
Hardwood Floor Installation Process Steps To Install Floors Reallyfloors America S Est Flooring

How To Install Hardwood Flooring The Home Depot
Related Posts