How To Install Hardwood Flooring On Stairs Without Nosing
Installing hardwood flooring on stairs can elevate the look of any home, creating a timeless and elegant aesthetic. However, the process can seem daunting, especially when it comes to handling the transition between steps and landings without traditional nosing. Nosing, the decorative trim that covers the edge of the tread, serves both functional and aesthetic purposes, helping to prevent wear and tear and providing a visually appealing finish. While it's commonly used in stair installations, creating a seamless hardwood finish without nosing is possible with careful planning and execution.
Choose the Right Flooring
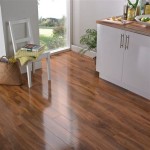
Selecting the right hardwood flooring is crucial for achieving a successful stair installation without nosing. Engineered hardwood is often the preferred choice for stairs due to its stability and resistance to moisture changes, factors that can cause warping and cracking in solid hardwood. Opt for a thicker plank, as this will allow for a more substantial tread and a safer walk. Consider the overall design of the staircase and choose a flooring that complements the existing decor.
Measure and Prepare the Staircase
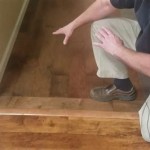
Before embarking on the installation, precise measurements are essential. Measure the width and depth of each step, ensuring uniformity across the entire staircase. Account for any existing risers and any potential for uneven surfaces. If necessary, use shims to create a smooth and even surface for the hardwood planks. Remember that, in the absence of nosing, the hardwood will need to extend slightly over the edge of the step to create a visual transition and provide a safe walking surface. This overhang, known as the "reveal," should be carefully measured and planned for to ensure a consistent and aesthetically pleasing outcome.
Install the Hardwood Flooring
The installation process for hardwood flooring on stairs without nosing involves several key steps. The first step involves preparing the subfloor to ensure a solid and level surface for the planks. This can involve sanding, patching, and leveling as needed. Next, secure the first plank along the wall using construction adhesive. This plank will serve as the starting point for the rest of the stair installation. Subsequent planks are then installed using the same method, making sure to leave a small gap between each plank to allow for movement. This gap, known as the expansion gap, is essential for preventing the hardwood from warping or cracking.
To create a smooth transition at the edge of each step, consider these key techniques:
- Staggered Cuts: Cut the planks to various lengths to avoid having seam lines in the same position on consecutive steps.
- Underlayment: Use a thin underlayment to create a smooth and even surface for the hardwood planks, especially if the subfloor is not perfectly level.
- Stair nosing: While the aim is to eliminate traditional stair nosing, a small, subtle nosing can be created by using a router to create a slight bevel at the edge of each step. This provides a subtle visual transition and adds a touch of elegance to the staircase.
Finishing Touches
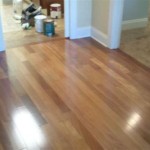
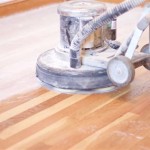
Once the hardwood flooring is installed, it's time to apply the finishing touches. This may involve sanding the surface to create a smooth, even finish and applying a sealant or stain, depending on the desired look. Consider using a sealant that is specifically designed for hardwood floors, as this will help to protect the surface from scratches, stains, and wear and tear.
Troubleshooting Common Issues
Installing hardwood flooring on stairs without nosing can present some unique challenges. Some common issues include:
- Uneven Surfaces: If the subfloor is uneven, it can create a noticeable difference in the height of the steps, leading to an uneven walking surface.
- Uneven Plank Installation: If the planks are not installed properly, it can create a noticeable gap between the planks and the edge of the step, making the staircase unsafe and unsightly.
- Lack of Visual Transition: Without nosing, the transition between the step and the landing can be abrupt and uncomfortable, creating a less aesthetically pleasing design.
Safety Considerations
Safety is paramount when installing hardwood flooring on stairs. Ensure that the staircase is properly secured before beginning the installation process. Wear appropriate safety gear, such as gloves, goggles, and a dust mask, to protect yourself from potential hazards. And always ensure that the flooring is properly secured to prevent potential falls or accidents.

How To Install Laminate On Stairs Follow Our Essential Guide Laying And Costing For

How To Install Glue Down Hardwood Floor Make Your Own Diy Stair Nosing

How To Make Stair Treads With Prefinished Flooring And Floormade Nosing Rw Supply Design

How To Install Laminate Flooring On Staircase Step By Guide

How To Install Hardwood On Stairs

How To Install Laminate Flooring On Stairs Direct Wood

You Want To Install Hardwood On Stairs Reallyfloors America S Est Flooring

Installing Wood Flooring Up To Stairs Understanding The Need For An Expansion Gap Kyinbridges Com

Stair Nosing Solid Natural Oak Craftedforlife

Hardwood To Stair Transition Complete How Guide Easiklip Floors
Related Posts