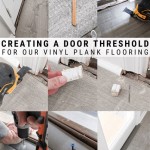
How to Cut Vinyl Flooring Molding Kit
Vinyl flooring molding kits are designed to create a seamless and polished finish around the edges of your vinyl flooring. These kits typically include various pieces, such as baseboards, quarter-round moldings, and transition strips, which can be used to cover gaps between the flooring and walls, or to create a smooth transition between different flooring types. Cutting these moldings accurately and efficiently is essential to ensure a professional installation.
This article will provide a step-by-step guide on how to cut vinyl flooring molding kits using common tools and techniques. The information provided will be beneficial to both DIY enthusiasts and professional installers.
Measuring and Marking
Precise measurements are crucial for achieving clean cuts and a perfectly fitted installation. Begin by measuring the length of each molding piece and adding a small allowance for trimming. This allowance should be about 1/4 inch for most applications. Mark the cutting point using a pencil or marker.
When marking the molding, consider the following points:
- Mark the outside of the molding if you plan to leave a small gap for expansion.
- Mark the inside of the molding if you want a tight fit against the wall or floor.
- If using a miter saw, mark the cut line on the inside of the blade.
- If using a hand saw, mark the cut line on the outside of the blade.
Cutting Vinyl Flooring Molding
Several tools can be used to cut vinyl flooring molding. The choice of tool depends on the length and complexity of the cut, as well as personal preference. Some common methods include:
Using a Miter Saw
A miter saw provides the most accurate and efficient way to cut molding, particularly for mitered corners. To use a miter saw, securely clamp the molding to the saw's table and adjust the saw's angle based on the required cut. Position the molding at the cutting point and make a clean, controlled cut.
Using a Hand Saw
For smaller cuts and tight spaces, a hand saw is a viable option. When cutting with a hand saw, use a fine-tooth blade designed for cutting molding. Start by marking the cut line and position the molding on a flat surface. Firmly grip the saw and make a slow, steady cut along the line. Ensure to maintain a steady hand and avoid applying excessive pressure to prevent the molding from splintering.
Using a Utility Knife
A utility knife can be used to make straight cuts on molding. Place a straight edge along the line marked to be cut. Pressing firmly down on the utility knife, slide the blade along the edge to cut through the molding. Multiple passes may be needed depending on the thickness of the molding.
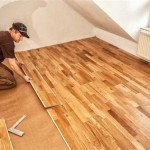
Installing Vinyl Flooring Molding
Once cut, the molding pieces need to be installed. The method used will vary depending on the type of molding.
- Baseboards: Baseboards are typically secured to the wall with nails or screws. They can be attached directly to the wall, or over an existing baseboard.
- Quarter-round moldings: Quarter-round moldings are often installed along the base of the wall to hide gaps or create a decorative pattern. They are typically attached to the floor with adhesive or nails.
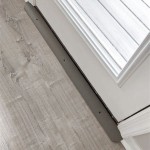
- Transition strips: Transition strips are used to create a smooth transition between different flooring types. They are typically attached to the floor with adhesive or screws.
To ensure a clean and professional installation, be sure to follow the manufacturer's instructions for each type of molding. It is important to use the correct adhesive or fasteners and apply them appropriately.
Tips for Cutting Vinyl Flooring Molding
Consider these additional tips to enhance your cutting process:
- Always use a sharp blade, which will produce cleaner cuts. Make sure the blade is clean and free from debris.
- Support the molding at the cut point to prevent it from bending or cracking. This is especially important when working with longer pieces.
- Cut slowly and deliberately to ensure a clean cut. Avoid applying excessive pressure.
- Practice on scrap pieces of molding before cutting the actual pieces to be installed.
By following these steps and tips, you can successfully cut vinyl flooring molding kits and achieve a professional finish for your installation. Remember to always prioritize safety and use appropriate tools and techniques.

How To Install Vinyl Flooring Transition Strip Lvp Moulding

How To Install Performance Accessories Vinyl 4 In 1 Molding

How To Cut Vinyl Plank Flooring

How To Install Performance Accessories Vinyl 4 In 1 Molding

How To Install A T Molding Glue Down

How To Install Vinyl Plank Flooring As A Beginner Home Renovation

10 Beginner Mistakes Installing Vinyl Plank Flooring

How To Install 3 N 1 Vinyl Flooring Molding Transition Strips Diy Installation

How To Install T Molding

How To Install Vinyl Plank Flooring In A Bathroom Fixthisbuildthat
Related Posts