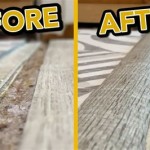
Staining your hardwood floors can dramatically change the look of the room and add a touch of elegance. However, staining hardwood flooring can be a tricky process if you don’t know what you’re doing. To ensure that your hardwood floor staining project is successful, there are some steps that you should follow.
1. Prepare the Floor
Before you start staining, you need to make sure that the floor is properly prepared. This means sanding and cleaning the floor, as well as filling in any gaps or cracks. If the floor has been finished previously, you will need to strip off the finish. It’s important to make sure that the surface is smooth and even before you start staining.
2. Choose the Right Stain
When it comes to staining hardwood floors, there are a few options to choose from. You can choose between oil-based or water-based stains, as well as different colors and shades. It’s important to do your research and choose the right stain for your floor. Make sure you test the stain on a small area before you start the staining process.
3. Apply the Stain
Once you have chosen the right stain for your hardwood floor, it’s time to start applying it. Start in one corner of the room and work your way out. Make sure to use a brush or cloth to spread the stain evenly across the floor. You may need to apply multiple coats of stain in order to get the desired color. Allow the stain to dry fully between coats.
4. Seal the Floor
Once the stain has been applied and has dried, it’s time to seal the floor. This will help to protect the stain and ensure that it lasts for years to come. You can choose between water-based or oil-based sealers, depending on what was used for the stain. Make sure to apply multiple coats of sealer and allow it to dry completely between coats.
5. Clean Up
Once the sealer has been applied, it’s time to clean up. Make sure to remove any excess stain or sealer from the floor with a damp cloth. It’s important to make sure that you don’t leave any residue on the floor as this will affect the final look.
6. Let the Floor Cure
After you have finished staining and sealing the floor, it’s important to let it cure. This will help the stain and sealer to set properly and ensure that it lasts for years to come. Make sure to keep the floor clean and free from dirt and debris while it is curing.
7. Enjoy Your New Floor!
After your hardwood floor has cured and you have cleaned up all the excess materials, you can enjoy your new floor! Staining hardwood floors can be a tricky process, but if you follow the steps outlined above, you can be sure that your project will be successful and your floor will look beautiful for years to come.


Related Posts