Hardwood flooring is a timeless and attractive addition to any home. Installing hardwood floors can be a great DIY project, but it requires a certain level of skill, patience, and dedication. Here is a comprehensive guide to help you get the job done right and create beautiful floors that will last a lifetime.
Choosing the Right Hardwood Flooring
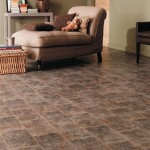
The first step in installing hardwood flooring is to select the right type of wood. There are many different types of hardwood floors, and each one has its own unique look and feel. Some of the most popular types of hardwood flooring include oak, maple, cherry, walnut, and bamboo. Depending on your budget, you may want to opt for engineered wood flooring, which is a more affordable option.
Preparing the Subfloor
Before installing your hardwood floor, it is important to make sure that the subfloor is properly prepared. This involves leveling the floor and ensuring that it is free from any debris or imperfections. You may need to use a level to ensure that the surface is even and free from any bumps or dips. If there are any problems with the subfloor, it is best to address them before proceeding with the installation.
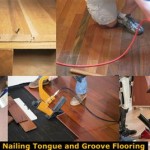
Using the Right Tools for the Job
Having the right tools for the job is essential for a successful hardwood floor installation. You will need a saw, hammer, drill, level, tape measure, pry bar, and chisel. Additionally, you may need to rent a flooring nailer and a compressor to make the job go more quickly and efficiently.
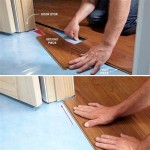
Installing the Hardwood Floor
Once you have the right tools and materials, it is time to start installing the floor. Begin by laying out the boards in the desired pattern and using a chalk line to mark the edges. Then, use a hammer and chisel to make any necessary cuts. Finally, use a flooring nailer to secure the boards in place. It is important to keep the boards as close together as possible, as this will provide a more even and stable floor.
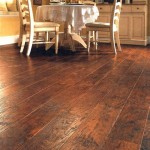
Finishing the Hardwood Floor
Once the floor is installed, it is time to finish it. This involves sanding down the floor and then staining or sealing it. Staining the floor will give it a unique look, while sealing it will protect it from dirt, moisture, and wear and tear. Once the floor is stained or sealed, it is important to allow it to dry completely before walking on it or placing furniture on it.
Caring for Your Hardwood Floor
Taking proper care of your hardwood floor is essential to maintain its beauty and extend its lifespan. Vacuuming and sweeping the floor regularly is important to keep it free of dirt and debris. Additionally, it is important to use a gentle cleaner to protect the finish and avoid using harsh chemicals that can damage the wood. Also, it is important to use furniture protectors to avoid scratching the floor and to keep it looking its best.


/154907699-56a49f3c5f9b58b7d0d7e14e.jpg)


Related Posts