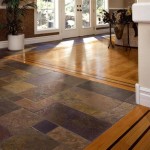
Installing a floating vinyl floor is a great way to upgrade the look and feel of any room in your home. It is a relatively simple process that can be done in just a few hours. The final step to installing a floating vinyl floor is to secure the planks between the walls and floor. This will ensure that the vinyl planks are securely installed and won’t move around or become loose over time.
Tools and Supplies Needed
Before beginning the installation process, you will need to gather the necessary tools and supplies. This includes a rubber mallet, a chalk line, a utility knife, and a box of screws. You will also need a measuring tape, a level, and a drill.
Mapping Out Your Design
The first step is to map out your design and make sure that the planks will fit properly in the room. Using a measuring tape, measure the length and width of the room. Then, use chalk to draw a line that shows where the planks will be installed. This will help to ensure that the planks are placed in the correct order and that there are no gaps between the planks.
Installing the Planks
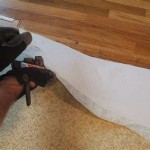
Once the planks have been mapped out, it’s time to start installing them. Begin at one corner of the room and lay down the first plank. Make sure to follow the lines that you drew earlier. Once the first plank is in place, use the rubber mallet to tap it into place. Then, use a utility knife to trim off any excess material.
Continue this process until all of the planks are installed. Make sure to leave a small gap between each plank so that the planks can expand and contract without buckling or warping.
Securing the Floor
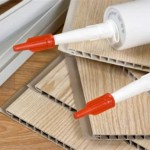
Once the planks are all in place, the next step is to secure them. This can be done by using screws to attach the planks to the walls and floor. Make sure to use a level to ensure that the planks are level before drilling in the screws. This will help to ensure that the planks are securely installed.
Finishing Up
Once the planks are all secured, the final step is to finish up the installation process. This includes vacuuming the floor to remove any debris, and then applying a sealant to the planks. This will help to protect the floor from dirt and moisture, and will also make it easier to clean.
Conclusion
Installing a floating vinyl floor is a great way to upgrade the look and feel of any room in your home. The final step to installing a floating vinyl floor is to secure the planks between the walls and floor. This will help to ensure that the planks are securely installed and won’t move around or become loose over time. With the right tools and supplies, and a little bit of patience, you can easily install a floating vinyl floor on your own.


:max_bytes(150000):strip_icc()/easy-install-plank-vinyl-flooring-1822808-09-a1f83db7bdf74f279f45594b897de82d.jpg)


/easy-install-plank-vinyl-flooring-1822808-07-9e82b716c3e94264b4a6084e174e9aeb.jpg)


Related Posts