Installing a floating vinyl plank floor can add a touch of sophistication to any room in your home. With a few simple tools and some patience, you can quickly and easily install a new floating vinyl plank floor. This article will provide you with the final steps to install a floating vinyl plank floor.
Step 1: Apply Caulk
The first step to install a floating vinyl plank floor is to apply caulk to the edges of the floor. This will help to seal any gaps between the floor and the walls. Make sure to use a good quality caulk that is designed for vinyl plank flooring. Apply the caulk with a caulk gun and smooth it out with a putty knife.
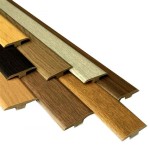
Step 2: Attach Trim
Once the caulk has dried, you can attach the trim to the edges of the floor. This will help to cover up any gaps between the floor and the walls. Make sure to use a good quality trim that is designed for vinyl plank flooring. Use a hammer and nails to attach the trim to the floor.
Step 3: Install Transition Strips
The next step is to install the transition strips at the edges of the room where the floating vinyl plank floor meets other types of flooring. This will help to protect the edges of the floor from damage. Make sure to use a good quality transition strip that is designed for vinyl plank flooring. Use a hammer and nails to attach the transition strips to the floor.
Step 4: Apply Adhesive
The fourth step is to apply adhesive to the back of the vinyl planks. This will help to keep the planks in place. Make sure to use a good quality adhesive that is designed for vinyl plank flooring. Apply the adhesive with a trowel and spread it out evenly across the back of the planks.
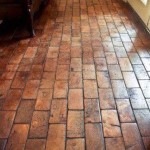
Step 5: Place the Planks
The fifth step is to place the vinyl planks onto the floor. Start in one corner of the room and work your way out. Make sure to line up the planks correctly and press them down firmly to ensure that they are securely in place. Use a rubber mallet to tap the planks together if needed.
Step 6: Install the Trim
The sixth step is to install the trim around the edges of the room. This will help to cover up any gaps between the floor and the walls. Make sure to use a good quality trim that is designed for vinyl plank flooring. Use a hammer and nails to attach the trim to the floor.
Step 7: Clean Up
The final step is to clean up any mess that you have made during the installation process. Make sure to sweep up any dust and debris, and remove any adhesive or caulk residue. Once you have finished, your new floating vinyl plank floor is ready to be enjoyed for years to come.


:max_bytes(150000):strip_icc()/easy-install-plank-vinyl-flooring-1822808-10-6cfb7acfac434155a53e0ef80bfbc825.jpg)
/easy-install-plank-vinyl-flooring-1822808-07-9e82b716c3e94264b4a6084e174e9aeb.jpg)


:max_bytes(150000):strip_icc()/easy-install-plank-vinyl-flooring-1822808-09-a1f83db7bdf74f279f45594b897de82d.jpg)
:max_bytes(150000):strip_icc()/easy-install-plank-vinyl-flooring-1822808-05-91e4c44966a145a39ad38430e4f7cc45.jpg)

:max_bytes(150000):strip_icc()/easy-install-plank-vinyl-flooring-1822808-02-19a3b80cd59943938a401560203706f3.jpg)
Related Posts