Everything You Need to Know About RV Vinyl Flooring Installation Instructions
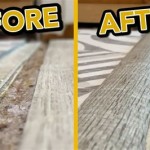
Replacing the flooring in your RV can significantly enhance its appearance and comfort. Vinyl flooring is a popular choice due to its durability, water resistance, and ease of maintenance. Installing vinyl flooring in an RV presents unique challenges due to the limited space and the need to work around existing fixtures and appliances. This article provides comprehensive instructions on how to install vinyl flooring in your RV, ensuring a successful and aesthetically pleasing outcome.
Preparation is Key: Getting Ready for Installation
Before you begin installing your new vinyl flooring, it is essential to prepare the existing subfloor. This involves removing the old flooring, assessing the subfloor's condition, and making any necessary repairs.
1. Removing the Old Flooring: Begin by removing the existing flooring. If it's carpet, you'll need to pull up the carpet and padding. If it's tile or linoleum, you'll need to pry it up using a scraper or chisel.
2. Assessing the Subfloor: Once the old flooring is removed, carefully inspect the subfloor for any damage, such as cracks, gaps, or soft spots. If you find any damage, you'll need to repair it before installing the new flooring. For minor repairs, you can use wood filler or epoxy. For more significant damage, you may need to replace sections of the subfloor.
3. Leveling the Subfloor: Ideally, the subfloor should be as flat and level as possible. If there are any significant bumps or dips, you can use leveling compound to create a smooth surface. Ensure the leveling compound is completely dry before proceeding to the next step.
Installing the Vinyl Flooring: A Step-by-Step Guide
Once the subfloor is prepped, you can start installing the vinyl flooring. Vinyl flooring comes in various forms, including sheets, tiles, and planks. The installation process may vary depending on the type of vinyl you choose. This guide will cover the general steps for installing vinyl tiles.
1. Measure and Cut Tiles: Measure and cut the vinyl tiles to fit the space. Use a utility knife or a tile cutter for precise cuts.
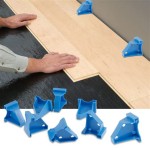
2. Laying the First Row: Start laying the vinyl tiles in the corner of the room. Make sure the tiles are flush with the walls and that they are laid in a straight line. You may need to use spacers to ensure a consistent gap between the tiles.
3. Apply Adhesive: Depending on the type of vinyl tiles you choose, you may need to apply an adhesive to the subfloor. Follow the manufacturer's instructions for applying the adhesive.
4. Laying Subsequent Rows: Continue laying the vinyl tiles in rows, ensuring that each row is properly aligned with the previous row. You may need to trim the edges of some tiles to fit around curves or obstacles.
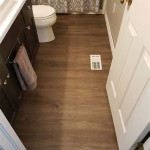
5. Installing Around Obstacles: When installing the vinyl flooring around fixtures such as sinks, toilets, or refrigerators, you'll need to trim the tiles to fit. You can use a utility knife or a jigsaw to cut the tiles precisely.
6. Sealing the Edges: Once all of the vinyl tiles are in place, you'll need to seal the edges with a sealant. This will help to prevent moisture from seeping under the tiles and causing damage.
Finishing Touches and Maintenance
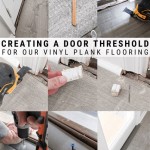
Once the vinyl flooring is installed, you can add finishing touches to enhance its appearance and functionality. This may include adding baseboards, trim, or thresholds.
1. Installing Baseboards: Installing baseboards will give your RV's interior a polished look and help to protect the walls from damage.
2. Adding Trim or Thresholds: Trim and thresholds can be used to cover gaps between the vinyl flooring and other surfaces, such as the kitchen cabinets or bathroom walls.
3. Maintaining Your Vinyl Flooring: Vinyl flooring is generally low maintenance. Regular sweeping or vacuuming will help to remove dirt and debris. You can use a damp mop to clean spills or stains. Avoid using harsh chemicals or abrasive cleaners, as these can damage the vinyl.

How To Install Vinyl Plank Flooring Our Diy Camper 2 0 The Mommy

Rv Flooring How To Install Step By

The Complete Guide To Everything About Vinyl Flooring

How To Install Vinyl Plank Flooring Our Diy Camper 2 0 The Mommy

Reflooring The Rv Installing Luxury Vinyl Planks Happilyrv

How To Install Vinyl Flooring In An Rv Field Court

Faq Xl Flooringxl Flooring

Diy Vinyl Plank Flooring Installation And Results In An Rv Reno

How To Install Vinyl Plank Flooring Our Diy Camper 2 0 The Mommy

20 Tips For A Great Vinyl Plank Flooring Installation
Related Posts