Everything You Need to Know About Vinyl Floor Tile Flooring
Vinyl floor tile has become a popular flooring choice for homeowners and businesses alike, valued for its affordability, durability, and versatility. Understanding its composition, types, installation procedures, care requirements, and advantages compared to other flooring materials is crucial for making informed decisions about its suitability for specific applications.
Vinyl flooring, in general, is a synthetic material composed primarily of polyvinyl chloride (PVC) resins, mixed with plasticizers, stabilizers, and pigments. These components are fused together under heat and pressure, resulting in a resilient and water-resistant surface. The composition of vinyl floor tile is largely similar, differing mainly in size and format compared to sheet vinyl or vinyl planks.
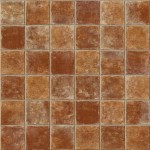
Vinyl floor tile is typically manufactured in square or rectangular shapes, ranging from small 9-inch squares to larger 18-inch or 24-inch formats. Its multilayered construction usually includes a backing layer for stability, a core layer for strength, a printed design layer for aesthetics, and a protective wear layer to resist scratches, stains, and wear. The thickness of the wear layer is a critical factor influencing the tile's overall durability and lifespan, with thicker layers generally providing greater resistance to abrasion and requiring less frequent replacement.
Types of Vinyl Floor Tile
Vinyl floor tile is available in several distinct types, each with unique characteristics and intended applications. Understanding these differences is important for selecting the most appropriate option based on factors such as budget, anticipated traffic levels, and aesthetic preferences.
Solid Vinyl Tile (SVT): This type is composed of a single layer of vinyl material throughout its thickness. SVT is incredibly durable and resistant to moisture, making it suitable for high-traffic areas and rooms prone to spills or humidity. The color and pattern are consistent throughout the tile, which helps to conceal scratches and wear over time. However, SVT tends to be more expensive than other types of vinyl tile due to its robust construction and longer lifespan.
Vinyl Composition Tile (VCT): VCT is a more economical option made from a mixture of vinyl, fillers, and pigments. It is commonly used in commercial settings due to its low cost and ability to withstand heavy foot traffic. However, VCT is more porous than SVT and requires regular sealing and waxing to maintain its appearance and prevent staining. The design layer is typically printed on the surface, making it more susceptible to wear and fading.
Luxury Vinyl Tile (LVT): LVT offers a higher level of realism and design flexibility compared to SVT and VCT. It typically features multiple layers, including a high-resolution photographic print that replicates the look of natural materials such as wood, stone, or ceramic. LVT often incorporates embossed textures that enhance the realistic appearance and provide added slip resistance. It is available in a wide range of styles, colors, and sizes, making it a popular choice for residential and commercial applications seeking an upscale look without the high cost of genuine materials.
Self-Adhesive Vinyl Tile: This type of vinyl tile features a pre-applied adhesive backing, making it relatively easy to install. The installer simply peels off the protective backing and presses the tile onto a clean, level subfloor. Self-adhesive tiles are typically thinner and less durable than other types of vinyl tile, making them best suited for light-traffic areas and DIY projects. Proper subfloor preparation is essential for ensuring a strong and lasting bond.
Installation Procedures for Vinyl Floor Tile
The installation process for vinyl floor tile can vary depending on the type of tile and the condition of the subfloor. However, certain fundamental steps are common to most installations. Proper preparation is crucial for achieving a successful and long-lasting result.
Subfloor Preparation: The subfloor must be clean, level, and dry before installing vinyl floor tile. Any existing flooring, such as carpet, linoleum, or old vinyl, should be removed. The subfloor should be inspected for cracks, holes, or unevenness, and these imperfections should be repaired using a patching compound or self-leveling underlayment. A clean subfloor free of dust and debris is essential for proper adhesion.
Acclimation: Vinyl floor tile should be acclimated to the room temperature for at least 48 hours before installation. This allows the tiles to adjust to the ambient temperature and humidity levels, minimizing the potential for expansion or contraction after installation. The tiles should be spread out in the room to ensure even acclimation.
Layout: Before applying any adhesive or removing the backing from self-adhesive tiles, it is crucial to plan the layout of the tiles. Start by finding the center of the room and mark a grid pattern to guide the placement of the tiles. Consider the orientation of the tiles and any patterns or borders that will be incorporated. Avoid placing small cuts of tile near doorways or along walls, as these can be visually unappealing. Adjust the layout as needed to achieve a balanced and aesthetically pleasing result. Partial tiles need to be cut, often with a utility knife and a straight edge. Accuracy here is vital for a professional-looking installation.
Adhesive Application (if applicable): For tiles that require adhesive, use a trowel to apply the adhesive evenly to the subfloor, following the manufacturer's recommendations for spread rate and open time. Work in small sections to prevent the adhesive from drying out before the tiles are installed. Position each tile carefully and press it firmly into the adhesive to ensure a strong bond. Remove any excess adhesive from the surface of the tiles with a damp cloth. Specific adhesives made for vinyl are recommended.
Tile Placement: Whether using adhesive or self-adhesive tiles, careful placement is crucial. Align the edges of each tile with the grid lines and press firmly to ensure full contact with the subfloor or adhesive. Use a roller to further secure the tiles and remove any air pockets. Check the alignment frequently to avoid crooked or uneven rows. Use spacers, if recommended by the manufacturer, to maintain consistent spacing between the tiles.
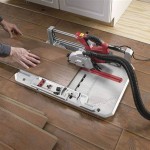
Cutting Tiles: When cutting tiles to fit around walls, doorways, or other obstructions, use a utility knife and a straight edge. Score the tile several times and then snap it along the scored line. For more intricate cuts, use a jigsaw or a specialized tile cutter. Always wear safety glasses and gloves when cutting tiles.
Sealing and Grouting (if applicable): Some types of vinyl floor tile, such as VCT, require sealing and waxing to protect the surface and prevent staining. Apply a sealant according to the manufacturer's instructions, and then apply several coats of wax. For LVT that mimics the appearance of ceramic tile or stone, grout can be used to fill the spaces between the tiles, creating a more authentic look. Choose a grout color that complements the tile and follow the manufacturer's recommendations for application and curing.
Care and Maintenance of Vinyl Floor Tile
Proper care and maintenance are essential for preserving the appearance and extending the lifespan of vinyl floor tile. Regular cleaning and preventative measures can help to prevent scratches, stains, and wear. Maintaining a strict cleaning schedule is key.
Regular Cleaning: Sweep or vacuum the floor regularly to remove dirt, dust, and debris. Use a soft-bristled broom or a vacuum cleaner with a floor brush attachment to avoid scratching the surface. For heavier cleaning, use a damp mop and a mild detergent specifically formulated for vinyl flooring. Avoid using harsh chemicals, abrasive cleaners, or scouring pads, as these can damage the wear layer and dull the finish. Bleach may discolor the material. Rinse the floor thoroughly with clean water after washing and dry it with a clean cloth.
Stain Removal: Promptly remove spills and stains to prevent them from setting. Use a soft cloth or sponge and a mild detergent to blot the stain. For stubborn stains, try using a mixture of baking soda and water or a specialized stain remover designed for vinyl flooring. Always test the cleaning solution in an inconspicuous area first to ensure that it does not damage the surface. Gently scrub the stain and then rinse with clean water.
Preventative Measures: Place mats or rugs at entrances to trap dirt and moisture and prevent them from being tracked onto the vinyl floor. Use furniture pads under the legs of chairs, tables, and other heavy objects to prevent scratches and dents. Avoid wearing shoes with high heels or cleats, as these can damage the surface. Trim pets' nails regularly to prevent them from scratching the floor. Protect the floor from direct sunlight by using curtains, blinds, or window film, as prolonged exposure to sunlight can cause fading or discoloration.
Waxing and Sealing (if applicable): For vinyl floor tile that is sealed or waxed, periodic reapplication of the sealant or wax may be necessary to maintain its protective properties and appearance. Follow the manufacturer's instructions for the appropriate type of sealant or wax and the recommended application frequency. Before applying a new coat of sealant or wax, thoroughly clean the floor to remove any dirt, grime, or old layers of sealant or wax.
Repairing Damaged Tiles: If a vinyl floor tile becomes damaged, it can often be replaced without having to replace the entire floor. Carefully remove the damaged tile using a utility knife and a heat gun to soften the adhesive. Scrape away any remaining adhesive and clean the area. Apply new adhesive to the subfloor and position the replacement tile carefully. Press firmly to ensure a strong bond and then wipe away any excess adhesive. For self-adhesive tiles, simply peel off the backing from the new tile and press it into place.
Vinyl floor tile has its own set of properties, including its resistance to water damage and ease of cleaning. Its advantages and disadvantages should be weighted depending on the specific application.

Everything You Need To Know About Vinyl Flooring Tarkett

What You Need To Know About Luxury Vinyl Plank Flooring Hatchers Floors

Vinyl Tile Installation A Comprehensive Guide Gc Flooring Pros

How To Lay A Vinyl Tile Floor Diy Family Handyman

Should You Tile Over Vinyl Flooring Builddirect

Types Of Vinyl Flooring The Home Depot

Types Of Vinyl Flooring The Home Depot

A Beginner S Guide To Installing Vinyl Plank Flooring Dumpsters Com

Ultimate Guide To Sheet Vinyl Mannington

It Might Be Time To Replace Your Flooring Here Are The Signs Look Vevano
Related Posts