All You Need To Know About Maple Laminate Flooring Installation
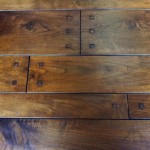
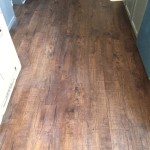
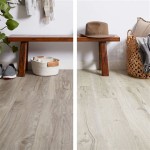
Maple laminate flooring offers an affordable and aesthetically pleasing alternative to solid hardwood maple. Its durability and ease of maintenance make it a popular choice for homeowners seeking a realistic wood look without the high cost and intensive upkeep. Understanding the intricacies of maple laminate flooring installation is crucial for achieving a professional-looking result and ensuring the longevity of the flooring.
This article provides a comprehensive guide to installing maple laminate flooring, covering everything from preparation and required tools to the installation process itself and post-installation care. By following these steps carefully, even those with limited DIY experience can successfully install maple laminate flooring and transform their living spaces.
Preparing for Maple Laminate Flooring Installation
Proper preparation is paramount for a successful maple laminate flooring installation. This phase involves assessing the subfloor, gathering necessary tools and materials, and acclimating the laminate planks to the environment.
Subfloor Assessment: The subfloor is the foundation upon which the laminate flooring will rest. It must be structurally sound, clean, dry, and level. Any imperfections in the subfloor will telegraph through the laminate, resulting in unevenness, squeaking, and potential damage. Existing flooring, such as carpet or vinyl, should be removed. Concrete subfloors should be tested for moisture using a moisture meter. High moisture levels can lead to warping and mold growth. Wood subfloors should be inspected for rot, damage, and loose boards. Minor imperfections can be addressed with patching compounds or self-leveling compounds. Major structural issues may require professional repair or replacement of the subfloor.
Tool and Material Acquisition: Gathering all necessary tools and materials before starting the installation process will ensure a smooth and efficient workflow. The following tools are typically required:
- Measuring tape: For accurate measurements of the room and planks.
- Pencil: For marking cut lines.
- Circular saw or laminate cutter: For cutting planks to size. A laminate cutter is often preferred for cleaner cuts and reduced dust.
- Tapping block: To gently tap planks together without damaging the edges.
- Pull bar: Used in conjunction with the tapping block to pull planks together in tight spaces, such as near walls.
- Spacers: To maintain the expansion gap between the flooring and the walls.
- Hammer: For use with the tapping block and pull bar.
- Safety glasses: To protect the eyes from debris.
- Dust mask: To prevent inhalation of dust particles.
- Moisture meter: To check the subfloor moisture levels.
- Level: To assess the flatness of the subfloor.
The following materials are typically required:
- Maple laminate flooring planks: Calculate the square footage of the room and add 5-10% for waste.
- Underlayment: Provides a moisture barrier, sound insulation, and cushioning. Select an underlayment appropriate for the specific laminate flooring product and subfloor.
- Vapor barrier (if required): Some underlayments have a built-in vapor barrier. If not, a separate vapor barrier should be installed over concrete subfloors.
- Baseboards or quarter round: To cover the expansion gap along the walls.
- Thresholds or transition strips: To create a smooth transition between the laminate flooring and other types of flooring.
- Wood glue (optional): For added stability in high-traffic areas or for specific types of laminate.
Acclimation: Maple laminate flooring needs to acclimate to the room's temperature and humidity before installation. This allows the planks to expand or contract, preventing gaps or buckling after installation. Store the boxes of unopened laminate flooring in the room where it will be installed for at least 48-72 hours. Ensure the room temperature is between 65°F and 75°F (18°C and 24°C) and the humidity level is between 30% and 50%.
The Maple Laminate Flooring Installation Process
The installation process involves several steps, from laying the underlayment to installing the final planks. Careful attention to detail at each step will ensure a professional and durable result.
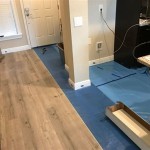
Underlayment Installation: The underlayment provides a crucial layer between the subfloor and the laminate flooring. Roll out the underlayment, ensuring it covers the entire subfloor area. Overlap the edges of the underlayment according to the manufacturer's instructions, typically by a few inches. Tape the seams with moisture-resistant tape to create a continuous moisture barrier. Consider the direction of the laminate planks when installing the underlayment. If the planks will run parallel to the seams of the underlayment, stagger the seams to prevent them from aligning. Different underlayment types have different installation recommendations. Follow the specific directions provided by the manufacturer.
First Row Installation: Begin installing the first row of laminate planks along a straight wall. Maintain an expansion gap of approximately ¼ inch to ⅜ inch between the planks and the wall. Use spacers to ensure this gap is consistent. The tongue side of the planks should typically face the wall. Click the planks together end-to-end, ensuring a tight and secure fit. If necessary, use a tapping block and hammer to gently tap the planks together. When cutting the last plank in the first row, ensure it maintains the proper expansion gap. The cut piece can often be used to start the next row, minimizing waste.
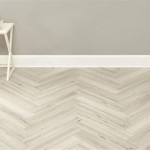
Subsequent Row Installation: Stagger the seams between rows to create a more visually appealing and structurally sound floor. A general rule of thumb is to stagger the seams by at least 6 inches, or preferably more. Start each row with a cut piece from the previous row, or with a new plank if needed. Angle the plank into the locking mechanism of the previous row and click it into place. Use a tapping block and pull bar to ensure a tight fit, especially in tight spaces near walls. Periodically check the alignment of the rows to ensure they are straight and parallel to the walls. Adjust as needed to maintain a consistent and professional appearance.
Cutting Planks Around Obstacles: When installing laminate flooring around obstacles such as pipes, door frames, or cabinets, precise cuts are necessary. Use a measuring tape and pencil to mark the outline of the obstacle on the plank. Use a jigsaw or coping saw to carefully cut the plank to the required shape. It is often helpful to create a template of the obstacle using cardboard or paper to ensure accurate cuts. Leave a small expansion gap around the obstacle, similar to the gap along the walls. Cover the gap with caulk or a trim piece for a finished look.
Final Row Installation: Installing the final row of laminate flooring often requires cutting the planks to fit the remaining space. Measure the distance between the wall and the previous row, taking into account the expansion gap. Cut the planks to the required width, ensuring a snug but not overly tight fit. Use a pull bar to pull the planks into place, maintaining the expansion gap. In some cases, it may be necessary to trim the baseboards or door casings to allow the final row of planks to slide underneath.
Post-Installation Procedures
After the installation is complete, several steps remain to ensure the longevity and appearance of the maple laminate flooring.
Baseboard and Transition Installation: Install baseboards or quarter round along the walls to cover the expansion gap. Use a nail gun or construction adhesive to secure the baseboards in place. Install thresholds or transition strips in doorways to create a smooth transition between the laminate flooring and other types of flooring. Follow the manufacturer's instructions for installing the transition strips.
Cleaning and Maintenance: Clean the laminate flooring thoroughly after installation to remove any dust or debris. Use a damp mop and a laminate floor cleaner specifically designed for laminate flooring. Avoid using excessive water, as it can seep into the seams and damage the flooring. Regularly sweep or vacuum the laminate flooring to remove dirt and dust. Use felt pads under furniture legs to protect the flooring from scratches. Avoid using abrasive cleaners or scouring pads, as they can damage the surface of the laminate flooring. Promptly clean up spills to prevent staining or water damage.
Addressing Potential Problems: Despite careful installation, some problems may arise over time. Squeaking is a common issue, often caused by an uneven subfloor or inadequate underlayment. Applying talcum powder or a laminate floor lubricant to the affected area may help reduce the squeaking. Gaps between planks can occur if the laminate flooring was not properly acclimated or if the humidity levels in the room fluctuate significantly. Filling the gaps with a laminate floor filler or replacing the affected planks may be necessary. Buckling can occur if the expansion gap is insufficient or if the flooring is exposed to excessive moisture. Adjusting the expansion gap or addressing the moisture source may be required.
Successful maple laminate flooring installation requires meticulous preparation, careful execution, and a commitment to proper maintenance. By following the guidelines described in this article, homeowners can achieve a beautiful and durable flooring solution that will enhance their living spaces for years to come.

Determining The Direction To Lay Install Hardwood Laminate Or Luxury Vinyl Plank Flooring

Things You Should Know About Maple For Hardwood Flooring Top

Maple Flooring Benefits Challenges Expert Tips

Maple Hardwood Flooring Everything You Need To Know

How To Install Laminate Flooring On Staircase Step By Guide

What Is Laminate Flooring Made Of America

Why We Love To Install Laminate Flooring Bright Green Door

Why We Love To Install Laminate Flooring Bright Green Door

Ensuring Quality Flooring Installation Maple Ridge Pitt Meadows News

Installing Laminate Flooring For Beginners Full Diy Guide
Related Posts