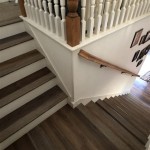
Installing hardwood floors is a great way to add value to your home and give it a stylish, timeless look. However, if you’re not an experienced DIYer, the task can seem intimidating. Don’t worry! With this comprehensive guide, you’ll be able to complete the job with confidence and ease.
Step One: Preparing the Room
The first step to installing hardwood floors is to prepare the room. This involves removing existing flooring, such as carpet, and ensuring that the subfloor is level. You should also take the time to fill any cracks or holes in the subfloor with a floor-leveling compound. Once the subfloor is prepared, you can install a moisture barrier and then begin laying the hardwood planks.
Step Two: Laying the Hardwood
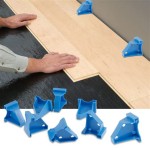
When you’re ready to begin installing the hardwood planks, you’ll first need to determine the direction in which you’ll be laying them. Generally, it’s best to lay the planks in the same direction as the longest wall in the room. Once you’ve chosen the direction, lay the first plank in the corner and continue laying the planks across the room. Make sure to leave a ⅜-inch gap between each plank for expansion and contraction.
Step Three: Trimming the Planks
As you continue to lay the planks across the room, you may find that they don’t fit perfectly around door frames or other obstacles. In this case, you’ll need to trim the planks to fit. To do this, mark the plank where it needs to be cut and then use a table saw or hand saw to make the cut. If you’re using a table saw, be sure to wear safety goggles and gloves.
Step Four: Installing the Molding
Once all of the planks have been laid, you can begin installing the molding. This includes baseboards, quarter round, and shoe molding. To install the molding, use a miter saw to cut the pieces to the desired length and then attach them to the wall with a nail gun. Make sure that the molding is level before nailing it into place.
Step Five: Sanding and Finishing
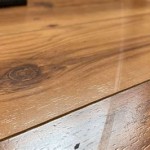
The final step to installing hardwood floors is to sand and finish them. Start by sanding the floor with a drum sander to ensure that the surface is even and smooth. Then, use an edger sander to get into the corners and edges of the room. Once the floor is sanded, you can apply the finish. This can be done with a brush or roller, but be sure to wear a face mask while applying the finish.
Conclusion
Installing hardwood floors is a great way to give your home a timeless and elegant look. With this comprehensive guide, you now have the knowledge and confidence to take on the task. Just remember to take your time and follow the steps carefully and you’ll be able to successfully install hardwood floors in your home.


Related Posts