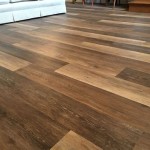
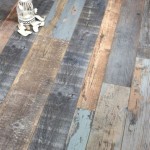
Stripping a hardwood floor is a process of removing layers of wax and dirt buildup to restore its original shine. Stripping a hardwood floor can be a difficult and tedious task, but it is essential for keeping the wood looking beautiful and healthy for years to come. This step-by-step guide will help you understand the process of stripping a hardwood floor, from start to finish.
Step 1: Preparation
Before you begin stripping the hardwood floor, it is important to prepare the space. This includes removing furniture, rugs, and other items from the area, as well as vacuuming the floor to remove any debris. Additionally, you may want to protect other areas of the room with drop cloths or plastic sheeting, as the stripping process can be messy.
Step 2: Applying the Stripper
Once you have prepared the area, the next step is to apply the stripper. Floor strippers are typically sold in liquid or paste form and can be found in most home improvement stores. For best results, apply the stripper in small sections, using a paint roller or a mop. Allow the stripper to sit for about 15 minutes, then remove it with a damp mop.
Step 3: Scrubbing the Floor
Once the stripper has been removed, you can scrub the floor with a stiff-bristled brush. This will help loosen any remaining dirt and grime, as well as any wax that may be embedded in the wood. Be sure to thoroughly scrub the floor, paying special attention to any areas that may be particularly dirty.
Step 4: Rinsing the Floor
When you have finished scrubbing the floor, it is important to rinse it with clean water. This will help remove any residual stripper and dirt, as well as any wax that may have been left behind. Use a mop and bucket to thoroughly rinse the floor, then allow it to dry completely before moving onto the next step.
Step 5: Applying New Wax
Once the floor is completely dry, it is time to apply a new layer of wax. Wax comes in both liquid and paste form and can be found in most home improvement stores. When applying the wax, use a soft, lint-free cloth and make sure to work in small sections. Allow the wax to dry completely before buffing it with a soft cloth.
Step 6: Finishing Touches
The final step in the process is to put the finishing touches on your newly stripped hardwood floor. This includes replacing furniture, rugs, and other items that were removed, as well as vacuuming the floor to remove any residual dust or dirt. Additionally, you may want to consider applying a sealant to the floor, as this will help protect it from future dirt and damage.
Conclusion
Stripping a hardwood floor is a tedious but necessary task for maintaining its beauty and longevity. By following the steps outlined in this guide, you can strip your hardwood floor quickly and easily, restoring its original shine and luster. With the right tools and supplies, you can have a beautiful hardwood floor in no time.


Related Posts