Removing hardwood flooring is not an easy task. It can be a time-consuming process that requires significant effort and skill. However, with the right tools and techniques, the job can be done quickly and efficiently. In this article, we’ll provide a step-by-step guide on how to remove hardwood flooring from your home. Read on to learn more!
Step 1: Preparing the Room
The first step in removing hardwood flooring is to prepare the room. This includes removing furniture, rugs, and any other items from the space. For best results, work from the outside and work your way inward, so that you don’t end up damaging the flooring in the process. Make sure to wear protective gear, such as safety goggles and gloves, to protect yourself from debris and splinters.
Step 2: Removing the Flooring
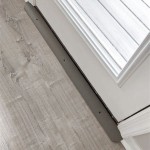
Once you have prepped the room, you can begin removing the flooring. Start by using a pry bar to remove the baseboard and any molding around the floor. Once that is removed, you can use a hammer and chisel to remove the floorboards. Work slowly and carefully to avoid damaging the subfloor. Once all of the flooring has been removed, you can discard it properly.
Step 3: Sanding the Subfloor
Once the floorboards have been removed, you’ll need to sand down the subfloor. This will help to smooth out any rough patches and remove any debris that may have been left behind. Use a sander with fine-grit sandpaper to get the job done, and make sure to wear protective gear, such as a dust mask, to protect yourself from the dust.
Step 4: Installing New Flooring
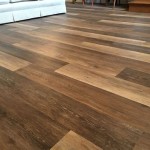
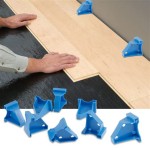
Once the subfloor has been sanded, you can begin to install the new flooring. Start by laying down a vapor barrier, followed by the new flooring. Make sure to use nails and a hammer to secure the flooring, and use a level to ensure that the floor is even. Once the flooring is installed, you can begin to reinstall the baseboard and other molding.
Step 5: Finishing Up
The last step in removing hardwood flooring is to finish up. This includes cleaning up any debris, filling any gaps or cracks, and applying a sealant to the flooring. This will help to protect the floor from water damage and wear and tear. Once the sealant has dried, you can begin to enjoy your new floors!
Conclusion
Removing hardwood flooring can be a difficult task, but with the right preparation and tools, it can be done quickly and easily. Follow the steps outlined above, and you’ll be well on your way to removing hardwood flooring from your home. Good luck!


:max_bytes(150000):strip_icc()/Man-removing-floor-GettyImages-200467183-001-b20da3c5e3884f0ea2b171a20a8de124.jpg)


Related Posts