How to Remove Laminate Flooring From Under Kitchen Units
Removing laminate flooring from under kitchen units presents a unique challenge compared to removing it from open areas. The limited space and presence of fixed cabinets require a more meticulous and strategic approach. This article provides a comprehensive guide on how to effectively and safely remove laminate flooring from beneath kitchen units, covering preparation, techniques, and potential issues.
The process demands patience and careful attention to detail. Rushing can lead to damage to the kitchen units, plumbing, or electrical wiring. A thorough understanding of the steps involved, coupled with the right tools and techniques, is crucial for a successful outcome.
Preparation is Paramount
Before commencing the removal process, thorough preparation is essential. This stage involves gathering the necessary tools, protecting the surrounding areas, and assessing the specific situation related to the kitchen units and the laminate flooring.
Firstly, assemble the required tools: * Pry Bar or Flat Bar: For lifting and separating the laminate planks. * Hammer: To gently tap the pry bar and dislodge stubborn planks. * Utility Knife or Oscillating Multi-Tool: For scoring or cutting the laminate along the cabinet edges. * Chisel: For removing small pieces of laminate or adhesive. * Safety Glasses: To protect eyes from debris. * Gloves: To protect hands and improve grip. * Dust Mask: To avoid inhaling dust particles. * Vacuum Cleaner or Shop Vac: To clean up debris as the work progresses. * Putty Knife or Scraper: For removing adhesive residue. * Measuring Tape: To measure distances and plan cuts. * Pencil: To mark cutting lines.
Secondly, protect the kitchen units and surrounding areas. Cover the base of the cabinets with cardboard or protective film to prevent scratches and dents. Secure the film with masking tape to ensure it stays in place. If there are exposed pipes or wiring beneath the units, take extra precautions to avoid damaging them during the removal process. Turn off the water supply to any nearby sinks or dishwashers, and if necessary, disconnect any electrical circuits feeding appliances in the vicinity.
Thirdly, carefully inspect the laminate flooring and the kitchen units. Determine how the laminate flooring is installed under the units. Is it a floating floor that simply slides under the cabinets, or is it glued or nailed in place? Identify any potential obstructions, such as pipes, wires, or leveling feet. Take photographs before starting to document the existing conditions and to serve as a reference during the reinstallation process, if applicable.
Effective Removal Techniques
The actual removal process involves a series of techniques designed to systematically detach the laminate flooring from under the kitchen units without causing damage. The approach may vary depending on the installation method and the available space.
The first step is to score or cut the laminate flooring along the edge of the kitchen units. Use a utility knife or an oscillating multi-tool to create a clean separation. This prevents the laminate from tearing or splintering when it is lifted. Score the line several times to ensure a deep cut. Exercise caution when using the utility knife or oscillating multi-tool to avoid damaging the cabinets. If using an oscillating multi-tool, select a blade designed for cutting wood or laminate and maintain a steady hand to achieve a straight and clean cut.
Next, use a pry bar or flat bar to lift the laminate planks. Start at the edge of the flooring and gently insert the pry bar between the laminate and the subfloor. Apply gradual pressure to lift the plank. If the plank is stuck, use a hammer to tap the pry bar lightly. Avoid using excessive force, as this can damage the laminate or the subfloor. Work slowly and methodically, moving along the edge of the plank until it is completely detached. If the laminate is glued down, the process may require more force and patience.
Once the first plank is removed, continue removing the remaining planks in a similar manner. Work strategically, focusing on areas where there is more space to maneuver. If necessary, use a chisel to remove small pieces of laminate that are difficult to reach with the pry bar. Pay close attention to any obstructions, such as pipes or wires, and adjust the removal technique accordingly. For example, it may be necessary to cut the laminate around the obstruction before lifting it.
As the laminate is removed, use a vacuum cleaner or shop vac to clean up debris. This will help prevent the spread of dust and dirt, and it will make the work area safer. Dispose of the removed laminate planks properly. Check local regulations for disposal options. In many areas, laminate flooring can be disposed of with regular household waste. However, in some areas, it may need to be taken to a recycling center or a landfill.
Addressing Potential Issues
During the laminate removal process, certain issues may arise. Addressing these issues promptly and effectively is critical to minimizing damage and ensuring a smooth removal process.
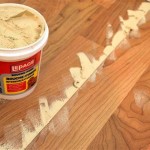
One common problem is dealing with glued-down laminate. If the laminate is heavily glued, removing it can be extremely difficult. In such cases, try using a heat gun to soften the adhesive. Apply heat to the laminate for a few seconds, then try prying it up with the pry bar. The heat may make the adhesive more pliable and easier to remove. Be careful not to overheat the laminate, as this can damage it or the subfloor. Use a putty knife or scraper to remove any remaining adhesive residue. Adhesive removers can also be used according to the manufacturer's instructions, but be mindful of their potential effects on the subfloor material.
Another issue is dealing with damaged or brittle laminate. Older laminate flooring can become brittle and prone to cracking. If the laminate is damaged, it may be more difficult to remove without breaking it into small pieces. In such cases, use a sharp utility knife or oscillating multi-tool to cut the laminate into smaller sections before attempting to remove it. This will make it easier to handle and prevent it from splintering. Wear safety glasses and gloves to protect yourself from sharp edges.
Another potential problem is encountering hidden obstructions. Kitchen units may have leveling feet or other structural components that extend beneath the flooring. Before removing the laminate, carefully inspect the area for any hidden obstructions. If necessary, use a flashlight to look under the units. If an obstruction is encountered, determine the best way to work around it. It may be possible to adjust the leveling feet or remove the obstruction temporarily. If not, carefully cut the laminate around the obstruction before lifting it.
Finally, consider the potential for subfloor damage. The subfloor can be damaged during the laminate removal process, especially if the laminate is glued down or if excessive force is used. Exercise caution when using the pry bar and avoid gouging or scratching the subfloor. If the subfloor is damaged, it may need to be repaired before installing new flooring. Small holes or cracks can be filled with patching compound. Larger areas of damage may require replacing a section of the subfloor.
Following these steps and taking necessary precautions will facilitate the safe and effective removal of laminate flooring from under kitchen units.

Remove Hardwood Floors Under Cabinets Baseboards

What Comes First Flooring Or Cabinets

How To Remove Vinyl Flooring The Home Depot

How To Replace That Old Rotted Out Sink Base Floor Step By

Can You Replace Kitchen Flooring Without Removing Cabinets Proline Range Hoods

How To Remove Laminate Flooring

How To Remove Laminate Flooring The Home Depot

How To Remove Laminate Flooring A Step By Guide The Forge Skip Hire Leeds Blog

How To Install Laminate Flooring Around Doors And Cabinets

How To Remove Vinyl Flooring Mastic From Hardwood Floor Under Kitchen Cabinet Toe Kick Lumberjocks Woodworking Forum
Related Posts