How to Install Vinyl Flooring Around a Bathroom Vanity
Installing vinyl flooring in a bathroom, particularly around a vanity, is a popular choice for many homeowners due to its water resistance, durability, and affordability. While professional installation is always an option, understanding the process allows for a confident DIY approach, saving on labor costs. This guide provides a detailed explanation of the steps involved in installing vinyl flooring around a bathroom vanity.
The success of this project hinges on meticulous preparation and accurate execution. Skipping steps or rushing through the process can lead to uneven surfaces, water damage, and the need for costly repairs. Prioritize a clean, level subfloor and precise measurements for a professional-looking and long-lasting result.
Key Point 1: Preparation – Subfloor Assessment and Material Acquisition
The foundation of any successful flooring installation is a properly prepared subfloor. Start by removing the existing flooring material. This might involve prying up tiles, peeling away old vinyl, or dismantling existing wood flooring. Scrape away any remaining adhesive or debris using a floor scraper. A clean, smooth surface is crucial for the vinyl to adhere properly.
Inspect the subfloor for any signs of damage, such as cracks, holes, or water damage. Repair any imperfections with a patching compound designed for subfloors. Leveling the subfloor is essential, especially around the vanity where unevenness will be most noticeable. Use a self-leveling compound to create a smooth, flat surface. Allow the patching compound and self-leveling compound to dry completely according to the manufacturer's instructions.
Once the subfloor is prepared, measure the bathroom floor space, paying particular attention to the area around the vanity. Accurate measurements are paramount for ordering the correct amount of vinyl flooring. Consider purchasing slightly more flooring than the calculated area to account for waste during cuts and potential errors. This is typically around 10% extra.
Acquire the necessary tools and materials. Essential tools include a utility knife with sharp blades, a measuring tape, a straight edge or ruler, a pencil, a notched trowel (if using adhesive), a seam roller (for sheet vinyl), safety glasses, and knee pads. Materials needed include the chosen vinyl flooring (either sheet vinyl, vinyl planks, or vinyl tiles), adhesive (if required by the flooring type), seam sealer (for sheet vinyl seams), and appropriate underlayment (if needed).
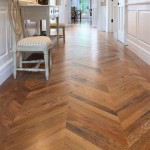
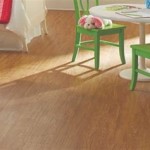
Selecting the right type of vinyl flooring is important. Vinyl planks and tiles are generally easier to install than sheet vinyl, especially for beginners, as they require less precise cutting and manipulation. Sheet vinyl, however, offers a seamless, waterproof surface, which can be advantageous in a bathroom setting. Consider the pros and cons of each type before making a decision. Also, take into account the existing bathroom decor and choose vinyl flooring that complements the overall aesthetic.
Key Point 2: Precise Cutting and Fitting Around the Vanity
Before cutting any vinyl flooring, create a template of the vanity's footprint. This can be done using cardboard or heavy paper. Place the template around the vanity base and trace its outline onto the template material. Cut out the template along the traced lines. This accurately represents the shape of the vanity and helps to prevent costly cutting errors when working with the actual vinyl flooring.
Place the vinyl flooring in the bathroom and allow it to acclimate to the room's temperature for at least 24 hours. This helps prevent expansion or contraction after installation. Position the flooring so that it overlaps the walls and the vanity area. This will allow for precise trimming and fitting.
Using the previously created template, transfer the vanity's outline onto the vinyl flooring. Carefully position the template on the vinyl and trace around it with a pencil. Ensure the template is aligned correctly to avoid incorrect cuts. Double-check the tracing before proceeding to the cutting stage.
When cutting the vinyl flooring, use a sharp utility knife and a straight edge to ensure clean, straight cuts. Cut slightly outside the traced line initially, leaving a small margin for adjustments. This prevents cutting the vinyl too short. Make several light passes with the knife rather than trying to cut through the vinyl in one go. This results in cleaner cuts and reduces the risk of damaging the vinyl.
After cutting the vinyl to the general shape of the vanity, test-fit the flooring around the vanity base. If necessary, make small adjustments with the utility knife to ensure a snug fit. If the fit is too tight, the vinyl may buckle or warp. If the fit is too loose, there will be unsightly gaps. The goal is to achieve a close, seamless fit around the vanity without forcing the vinyl into place.
For pipes extending from the floor, use a hole saw or utility knife to create appropriately sized openings in the vinyl flooring. Measure the diameter of the pipe accurately and mark the center point on the vinyl. Use a hole saw that is slightly larger than the pipe diameter to allow for some wiggle room. If using a utility knife, make several small cuts around the marked circle until the opening is large enough to accommodate the pipe. Consider using pipe collars to cover the edges of the opening and provide a more finished look.
Key Point 3: Installation and Sealing
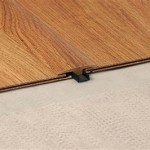
Once the vinyl flooring has been precisely cut and fitted around the vanity, begin the final installation. If using adhesive-backed vinyl planks or tiles, peel off the backing and carefully position each piece on the subfloor, working from the center of the room outwards. Apply firm pressure to each piece to ensure proper adhesion. Use a seam roller to further secure the planks or tiles and eliminate any air pockets.
If using sheet vinyl or vinyl flooring that requires adhesive, apply the adhesive to the subfloor using a notched trowel. Follow the manufacturer's instructions regarding the type of adhesive and the appropriate trowel notch size. Apply the adhesive evenly, covering the entire area that will be covered by the vinyl flooring. Allow the adhesive to become tacky before laying the vinyl.
Carefully position the vinyl flooring on the adhesive, starting at one edge of the room and working towards the opposite edge. Smooth out any wrinkles or air bubbles using a seam roller. Apply firm, even pressure to ensure the vinyl adheres properly to the adhesive. Work slowly and methodically to avoid trapping air or creating wrinkles.
For sheet vinyl installations, seams are often unavoidable. To create a watertight seal, use a seam sealer specifically designed for vinyl flooring. Apply the seam sealer according to the manufacturer's instructions, ensuring it penetrates the seam fully. Wipe away any excess sealer with a damp cloth. Allow the seam sealer to dry completely before exposing the flooring to water.
Once the vinyl flooring is installed, trim any excess material along the walls and around the vanity with a utility knife. Use a straight edge to ensure clean, straight cuts. Install baseboards or quarter-round molding to cover the edges of the vinyl flooring and create a finished look. Caulk any gaps between the baseboards and the walls to prevent water from seeping behind the flooring.
Allow the adhesive to cure completely before using the bathroom. Follow the manufacturer's instructions regarding the curing time. Avoid walking on the flooring or placing heavy objects on it during the curing process. Once the adhesive is cured, the vinyl flooring will be securely bonded to the subfloor and ready for use.
Regular cleaning and maintenance will help to prolong the life of the vinyl flooring. Sweep or vacuum the floor regularly to remove dirt and debris. Clean spills immediately with a damp cloth and mild detergent. Avoid using harsh chemicals or abrasive cleaners, as they can damage the vinyl surface.

How To Install Vinyl Plank Tiles In A Bathroom

How To Install Vinyl Plank Flooring Into A Bathroom

Dos And Don Ts For Installing Vinyl Plank Floors In The Bathroom Advice Homeowners

How To Install Vinyl Plank Flooring In A Bathroom Fixthisbuildthat

How To Install Vinyl Plank Flooring In A Bathroom As Beginner Home Renovation

How To Install Vinyl Plank Tiles In A Bathroom

How To Install Sheet Vinyl Floor Decor Adventures

How To Install Vinyl Plank Flooring In A Bathroom Fixthisbuildthat

How To Install Vinyl Plank Tiles In A Bathroom

Dos And Don Ts For Installing Vinyl Plank Floors In The Bathroom Advice Homeowners
Related Posts