How To Cut Laminate Wood Flooring Around a Toilet
Installing laminate wood flooring can significantly improve the aesthetics of a bathroom. However, navigating obstacles like the toilet presents a unique challenge. Cutting laminate flooring to fit snugly around a toilet requires precision, patience, and the right tools. This article details a comprehensive guide to achieving a professional-looking installation.
Preparation is paramount for a successful outcome. Before beginning any cutting, ensuring a clean workspace and gathering all necessary materials is crucial. This minimizes errors and streamlines the installation process. Accurate measurements and careful planning are the foundation for a flawless fit.
Essential Tools and Materials
A successful laminate flooring installation around a toilet hinges on having the correct tools and materials. The following list outlines the essential items:
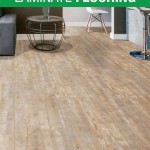
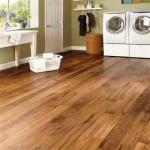
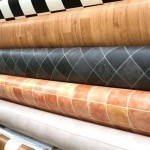
- Laminate Flooring: Ensure you have enough flooring to cover the area, including extra for mistakes. It is recommended to purchase approximately 10% more than needed to account for waste.
- Measuring Tape: A reliable measuring tape is essential for accurate measurements. Choose one that is easy to read and extends to a sufficient length.
- Pencil: A standard pencil is used for marking cut lines on the laminate boards. Ensure the pencil lead is sharp for precise lines.
- Speed Square or Combination Square: These tools are used to create accurate square cuts and to transfer measurements to the laminate flooring.
- Jigsaw: A jigsaw is the primary tool for cutting the curved shape around the toilet. A jigsaw with variable speed settings allows for greater control.
- Drill with Hole Saw Attachment: A hole saw set, specifically one that includes a bit slightly larger than the toilet flange, is beneficial for creating a clean, round opening for the toilet drain.
- Safety Glasses: Protecting your eyes from debris is crucial during cutting and drilling. Always wear safety glasses.
- Dust Mask: Laminate flooring dust can be irritating to the lungs. A dust mask is recommended to minimize inhalation.
- Ear Protection: The noise from power tools like jigsaws and drills can be damaging to hearing. Earplugs or earmuffs are recommended.
- Painter's Tape: Applying painter's tape along the cut lines can help prevent chipping and splintering of the laminate flooring.
- Caulk (Silicone or Acrylic): After the flooring is installed, caulk is used to seal the gap around the toilet, preventing water damage.
- Caulk Gun: A caulk gun is necessary for applying the caulk neatly and evenly.
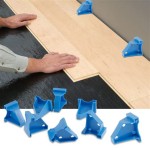
- Spacers: Spacers are used to maintain a consistent expansion gap between the flooring and the walls or fixtures.
Acquiring high-quality tools, though potentially more expensive upfront, will ultimately result in a cleaner, more professional installation and will likely last longer. Investing in durable tools minimizes the risk of breakage during the installation process.
Accurate Measurement and Template Creation
Achieving a seamless fit around the toilet requires precise measurements and a well-constructed template. Errors in this stage will compound later in the installation, leading to gaps and an unprofessional appearance. Therefore, taking the time to carefully measure and create a template is crucial.
The first step is to accurately measure the distance from the wall to the center of the toilet drain. This measurement will determine the placement of the hole saw or jigsaw cut on the laminate board. Use a measuring tape to determine the exact distance, and transfer this measurement to the laminate board using a pencil and a square.
Next, measure the diameter of the toilet flange. This measurement will dictate the size of the hole that needs to be cut in the laminate flooring. If using a hole saw, select a bit that is slightly larger than the flange diameter to allow for minor adjustments. If using a jigsaw, draw a circle on the laminate board representing the size of the hole to be cut.
For a more accurate fit, consider creating a template of the area around the toilet. This can be done using cardboard or heavy paper. Place the cardboard or paper around the base of the toilet and carefully trace the outline. Cut out the template along the traced lines. This template can then be placed on the laminate flooring to determine the cutting path.
When creating the template, pay close attention to any irregularities in the shape of the toilet base or the surrounding wall. These irregularities should be accurately reflected in the template to ensure a snug fit. It is often helpful to use a contour gauge to capture these complex shapes.
Transfer the template to the laminate flooring. Position the template on the laminate board, aligning it with the previously measured center point of the toilet drain. Trace the outline of the template onto the laminate flooring using a pencil. Ensure the template is securely held in place during tracing to prevent any shifting or inaccuracies.
Before cutting, double-check all measurements and the accuracy of the template. It is always better to err on the side of caution and make multiple small adjustments rather than making one large, irreversible cut. This iterative approach minimizes the risk of mistakes and ensures a professional-looking result.
Cutting Techniques and Installation
With accurate measurements and a well-defined template in place, the cutting process can begin. Proper cutting techniques are essential to prevent chipping, splintering, and other damage to the laminate flooring. Using the correct tools and following a specific procedure will ensure a clean and professional cut.
Before cutting, apply painter's tape along the cut lines on the laminate flooring. This tape helps to prevent chipping and splintering, especially when using a jigsaw. Ensure the tape is firmly adhered to the surface of the laminate.
If using a hole saw, select the appropriate size bit and attach it to the drill. Position the hole saw over the marked center point and begin drilling slowly. Apply consistent pressure and maintain a steady grip on the drill. Avoid forcing the hole saw, as this can cause it to bind or damage the laminate flooring.
If using a jigsaw, start by drilling a pilot hole inside the traced circle. This pilot hole will allow you to insert the jigsaw blade. Insert the jigsaw blade into the pilot hole and begin cutting along the traced line. Use a slow, steady cutting motion to prevent chipping and splintering. Follow the traced line carefully, making small adjustments as needed.
When cutting the curved shape around the toilet, use a jigsaw with a fine-tooth blade designed for laminate flooring. This type of blade will produce a cleaner cut with minimal chipping. Maintain a slow and steady cutting speed, and follow the traced line carefully.
After cutting the hole or curved shape, remove the painter's tape and inspect the edges of the cut. If there are any rough edges or splinters, use a fine-grit sandpaper to smooth them out. This will ensure a clean and professional finish.
Before installing the laminate flooring around the toilet, dry-fit the cut piece to ensure it fits properly. Make any necessary adjustments to the cut to achieve a snug fit. Remember to leave a small expansion gap between the laminate flooring and the toilet flange to allow for expansion and contraction.
Once the laminate flooring fits properly around the toilet, it can be installed according to the manufacturer's instructions. Ensure the flooring is properly aligned and secured in place. Use spacers to maintain a consistent expansion gap between the flooring and the walls.
After the flooring is installed, apply a bead of caulk around the base of the toilet to seal the gap and prevent water damage. Use a caulk gun to apply the caulk neatly and evenly. Smooth the caulk with a wet finger or a caulk smoothing tool. Allow the caulk to dry completely before using the toilet.

How To Cut Engineered Wood Laminate And Lvt Around Your Toilet Flooring Mountain

How To Cut Flooring Around A Toilet Luxury Vinyl Plank Bathroom Installation Calibamboo

How To Cut Engineered Wood Laminate And Lvt Around Pipes Flooring Mountain

How To Install Vinyl Plank Flooring In A Bathroom Fixthisbuildthat

How To Install Vinyl Plank Flooring In A Bathroom Fixthisbuildthat

Easy Vinyl Flooring Cutting Around A Toilet

How To Cut Engineered Wood Laminate Lvt Around Toilets Top Trade Tips

How To Lay Laminate Flooring Around A Toilet Builddirect

How To Install Vinyl Plank Flooring In A Bathroom Fixthisbuildthat

How To Install Laminate Around A Toilet And Other Round Shapes Installing Flooring Laying
Related Posts