How to Repair Engineered Hardwood Floors
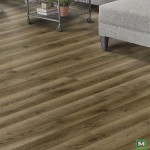
Engineered hardwood floors offer a balance of aesthetic appeal and practicality, making them a popular choice for many homeowners. Constructed with a thin layer of hardwood bonded to a core of plywood or high-density fiberboard (HDF), engineered hardwood mimics the look of solid hardwood while providing greater stability and resistance to moisture. However, like any flooring material, engineered hardwood is susceptible to damage from daily wear and tear, accidents, and environmental factors. Knowing how to address these common issues can save homeowners significant costs associated with replacement or professional repair. This article provides a comprehensive guide to repairing engineered hardwood floors, covering a range of problems and detailing the necessary steps for effective restoration.
Identifying the Damage and Choosing the Right Approach
Before attempting any repairs, it is crucial to accurately assess the type and extent of the damage. This will dictate the appropriate repair method and the necessary materials. Common types of damage to engineered hardwood floors include scratches, dents, gouges, stains, water damage, and loose or squeaky boards. Superficial scratches might only affect the finish, while deeper gouges or dents can penetrate the hardwood veneer. Water damage can cause swelling, warping, and discoloration, and loose boards may result from adhesive failure or subfloor issues.
Once the damage is identified, the appropriate tools and materials need to be gathered. For minor scratches, a touch-up pen or wax filler stick may be sufficient. For deeper scratches, wood filler or epoxy putty may be required. Dents can often be addressed with steam and a damp cloth. Water-damaged boards might need to be replaced entirely. Addressing loose boards requires reapplication of adhesive or, in some cases, securing them with finishing nails.
Proper preparation is essential for a successful repair. This includes cleaning the affected area thoroughly to remove dirt, dust, and debris. Protecting the surrounding flooring with painter's tape can also prevent accidental damage during the repair process. For certain repairs, sanding may be necessary to create a smooth surface for the new finish or filler.
Repairing Scratches and Dents
Scratches are a common occurrence on engineered hardwood floors, especially in high-traffic areas. Minor scratches that only affect the finish can often be concealed with a touch-up pen or marker that matches the color of the flooring. Apply the pen or marker directly to the scratch, following the grain of the wood. Wipe away any excess with a clean cloth. For slightly deeper scratches, wax filler sticks are an alternative. Choose a filler stick that matches the floor's color and rub it across the scratch, applying pressure to fill the indentation. Remove excess wax with a plastic scraper or credit card and buff the area with a soft cloth.
For deeper scratches that penetrate the veneer, wood filler or epoxy putty may be necessary. Clean the scratch thoroughly and apply the filler according to the manufacturer's instructions. Overfill the scratch slightly to allow for sanding. Once the filler is dry, sand it smooth with fine-grit sandpaper, blending it seamlessly with the surrounding floor. Apply a matching stain or finish to the repaired area to match the rest of the floor.
Dents in engineered hardwood can often be removed using steam and a damp cloth. Place a damp cloth over the dent and apply heat with a steam iron. The steam will penetrate the wood fibers, causing them to swell and return to their original shape. Repeat the process as necessary until the dent is minimized. Be careful not to overheat the wood, as this could cause damage. If the dent is deep or the steam method is ineffective, wood filler may be required, following the same procedure as for deep scratches.
Addressing Water Damage and Stains
Water damage is a serious concern for engineered hardwood floors, as it can lead to swelling, warping, and discoloration. The extent of the damage will determine the appropriate course of action. For minor water damage, such as small spills that are cleaned up promptly, simply drying the affected area thoroughly may be sufficient. Use a clean cloth to absorb any excess water and allow the area to air dry. A dehumidifier can help to speed up the drying process.
For more significant water damage, such as leaks or flooding, the damaged boards may need to be replaced. Carefully remove the affected boards, taking care not to damage the surrounding flooring. Inspect the subfloor for any signs of moisture or mold. If necessary, dry the subfloor thoroughly and treat it with a mold inhibitor before installing new boards. When replacing damaged boards, ensure that the new boards are of the same type, color, and thickness as the existing flooring. Adhere the new boards to the subfloor using the appropriate adhesive, following the manufacturer's instructions.
Stains on engineered hardwood can be challenging to remove, depending on the type of stain and the finish on the floor. For surface stains, such as food spills or dirt, try cleaning the area with a mild soap and water solution. Use a soft cloth to gently scrub the stain, and then rinse with clean water. Dry the area thoroughly. For more stubborn stains, such as ink or pet stains, specialized hardwood floor stain removers may be necessary. Always test the stain remover in an inconspicuous area first to ensure that it does not damage the finish. Follow the manufacturer's instructions carefully when using stain removers.
In cases where the stain has penetrated the finish and discolored the wood, sanding and refinishing may be required. Sand the affected area down to bare wood, being careful not to damage the surrounding flooring. Apply a matching stain to the sanded area, and then apply several coats of polyurethane finish to protect the wood. Blend the new finish seamlessly with the existing finish to create a uniform appearance.
Repairing Loose or Squeaky Boards
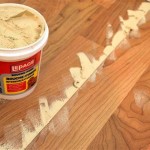
Loose or squeaky boards are a common issue in engineered hardwood floors, often caused by adhesive failure or subfloor problems. Identifying the cause of the problem is essential for determining the appropriate repair method. Start by inspecting the area around the loose board for any signs of damage or moisture. If the board is loose due to adhesive failure, the simplest solution is to reapply adhesive.
Carefully lift the loose board, taking care not to damage it or the surrounding flooring. Clean the subfloor and the back of the board to remove any dirt, dust, or debris. Apply a bead of hardwood floor adhesive to the subfloor and reattach the board. Use weights or clamps to hold the board in place while the adhesive dries, following the manufacturer's instructions. Once the adhesive is dry, remove the weights or clamps and clean up any excess adhesive.
If the board is loose due to subfloor problems, such as unevenness or damage, the subfloor may need to be repaired before reattaching the board. Inspect the subfloor for any signs of damage, such as cracks or rot. Repair any damage to the subfloor before installing the new board. If the subfloor is uneven, use a leveling compound to create a smooth surface. Once the subfloor is repaired, reattach the board using adhesive, as described above.
Squeaky boards can be addressed in a similar manner. If the squeak is caused by the board rubbing against the subfloor, a small amount of powdered graphite or talcum powder can be applied between the board and the subfloor to lubricate the area. If the squeak persists, it may be necessary to secure the board with finishing nails. Drive the nails through the board and into the subfloor at an angle, being careful not to damage the finish. Countersink the nails and fill the holes with wood filler that matches the color of the flooring.
For larger areas of loose or squeaky flooring, professional assistance may be required. A flooring contractor can assess the situation and recommend the appropriate repair method. They may need to remove and replace a larger section of flooring or reinforce the subfloor to prevent further problems.

How To Repair Your Wood Floors Kährs

How To Replace Engineered Hardwood Floor Planks Diy Repair

Home Remedies For Scuffed Engineered Wood Floors Scvfloorsmith

How To Fix A Chipped Wood Floor Diy Edge Chip Repair

How To Repair Engineered Wood Flooring A Step By Guide

How To Repair Dents In Engineered Wood Flooring By Yourself Major

Dritac Engineered Wood Floor Repair Kit

How To Repair Water Damaged Engineered Wood Floor

Restoring Engineered Hardwood Floors Full Of Residue Recoating With Semi Gloss Finish

How To Repair Engineered Wood Flooring King
Related Posts