How To Put Down Vinyl Flooring: A Step-by-Step Guide
Vinyl flooring, prized for its durability, water resistance, and relative ease of installation, has become a popular choice for both residential and commercial spaces. This article provides a comprehensive, step-by-step guide to installing vinyl flooring, ensuring a professional-looking result. The processes covered encompass preparation, installation techniques for both sheet vinyl and vinyl tiles/planks, and finishing touches.
Before commencing the installation, careful planning and preparation are crucial. Proper preparation ensures the vinyl flooring adheres correctly, lies flat, and provides the expected longevity. Neglecting this phase can lead to issues such as bubbling, peeling, or uneven surfaces.
Key Point 1: Subfloor Preparation
The subfloor forms the foundation upon which the vinyl flooring is laid. Its condition directly impacts the final appearance and performance of the new flooring. The subfloor must be clean, level, and structurally sound.
Cleaning the Subfloor: Begin by thoroughly cleaning the existing floor. Remove any debris, dust, grease, or old adhesive residue. A vacuum cleaner with a hard floor attachment is ideal for removing loose particles. For stubborn residues, use a specialized adhesive remover, carefully following the manufacturer's instructions, and ensuring adequate ventilation. Subsequently, wipe the floor with a damp cloth and allow it to dry completely.
Leveling the Subfloor: Unevenness in the subfloor can telegraph through the vinyl flooring, creating unsightly bumps and potentially causing premature wear. Address any dips, cracks, or raised areas. Small cracks can be filled with a suitable patching compound designed for flooring applications. Apply the compound according to the manufacturer's instructions, ensuring it is feathered smoothly to blend with the surrounding surface. For larger areas of unevenness, a self-leveling compound may be necessary. This compound is poured onto the floor and spreads to create a perfectly level surface. Allow the self-leveling compound to dry and cure completely before proceeding.
Ensuring Structural Soundness: Inspect the subfloor for signs of damage or weakness. Replace any damaged or rotten sections before installing the vinyl flooring. Loose or squeaky floorboards should be secured with screws. If the subfloor is plywood, ensure it is properly fastened to the joists. A stable and robust subfloor is essential for preventing future problems.
Moisture Testing: Moisture is a vinyl flooring's nemesis. Excessive moisture can lead to adhesive failure, mold growth, and warping of the vinyl. Conduct a moisture test before installation, especially in basements or areas prone to dampness. Several methods are available, including using a moisture meter or taping a plastic sheet to the floor and observing for condensation. If moisture levels are high, address the source of the moisture and allow the subfloor to dry completely before proceeding. Consider applying a moisture barrier to the subfloor.
Acclimation: Allow the vinyl flooring to acclimate to the room's temperature for at least 48-72 hours before installation. This allows the material to expand or contract according to the room's ambient conditions, preventing issues with buckling or gapping after installation. Store the vinyl flooring in the room where it will be installed, laying the boxes flat to prevent warping.
Underlayment (Optional): Although not always necessary, an underlayment can provide additional cushioning, sound insulation, and moisture resistance. Choose an underlayment specifically designed for use with vinyl flooring. Ensure the underlayment is properly installed according to the manufacturer's instructions.
Key Point 2: Installation Techniques for Sheet Vinyl
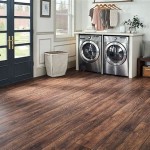
Sheet vinyl comes in large rolls and is typically glued down to the subfloor. This type of vinyl flooring is ideal for bathrooms and kitchens due to its seamless nature, which minimizes the risk of water damage.
Measuring and Cutting: Accurate measurement is crucial for a successful sheet vinyl installation. Measure the room carefully, taking into account any irregularities or angles. Add a few inches to each dimension to allow for trimming. Transfer the measurements to the vinyl sheet, using a straight edge and a sharp utility knife to cut the sheet to the approximate size.
Dry Fitting: Before applying adhesive, dry fit the vinyl sheet in the room. This allows to check the fit and make any necessary adjustments. Position the sheet carefully, allowing the excess material to extend up the walls. Use a utility knife to trim the vinyl sheet around doorways, pipes, and other obstacles. Make sure the sheet aligns properly with the walls and that there are no gaps or overlaps.
Adhesive Application: Fold back half of the vinyl sheet, exposing the subfloor. Apply the recommended adhesive to the subfloor using a notched trowel. Follow the adhesive manufacturer's instructions regarding the type of trowel and the amount of adhesive to apply. Ensure even coverage, avoiding puddles or dry spots. Allow the adhesive to tack up slightly according to the manufacturer's recommendations.
Laying the Vinyl: Carefully roll the vinyl sheet back into place over the adhesive-covered subfloor. Use a floor roller or a smoothing tool to press the vinyl firmly into the adhesive, working from the center outwards. This removes air bubbles and ensures good contact between the vinyl and the subfloor. Repeat the process for the other half of the vinyl sheet.
Seam Treatment (if necessary): If the room is wider than the vinyl sheet, seams will be required. Overlap the edges of the vinyl sheets slightly and use a seam roller to press them together. Cut through both layers of vinyl with a utility knife, creating a clean, tight seam. Remove the excess vinyl and apply a seam sealer to prevent water penetration.
Trimming Excess Material: Once the adhesive has set sufficiently, trim the excess vinyl along the walls using a utility knife and a straight edge. Leave a small gap (approximately 1/8 inch) between the vinyl and the wall to allow for expansion and contraction. This gap will be covered by baseboards or trim.
Rolling and Curing: After trimming, roll the entire vinyl sheet again with a floor roller to ensure complete adhesion. Allow the adhesive to cure completely according to the manufacturer's instructions before walking on the floor or installing baseboards.
Key Point 3: Installation Techniques for Vinyl Tiles and Planks
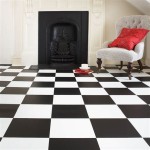
Vinyl tiles and planks offer a modular approach to flooring installation. They come in a variety of sizes, shapes, and styles, allowing for creative design possibilities. They are available in both peel-and-stick and glue-down versions.
Layout Planning: Before installing vinyl tiles or planks, plan the layout carefully. Start by finding the center of the room and drawing perpendicular lines to create a grid. This will help ensure that the tiles or planks are aligned correctly and that the pattern is balanced. Consider the placement of full tiles or planks along the walls and adjust the layout as needed to minimize the number of small cuts.
Peel-and-Stick Installation: Peel-and-stick vinyl tiles and planks are the easiest to install. Simply peel off the backing paper and press the tile or plank firmly onto the subfloor. Align the edges carefully to create a tight, seamless joint. Use a floor roller to apply pressure and ensure good adhesion. When cutting tiles or planks to fit around obstacles, use a utility knife and a straight edge.
Glue-Down Installation: Glue-down vinyl tiles and planks require the application of adhesive to the subfloor. Apply the recommended adhesive using a notched trowel, following the manufacturer's instructions regarding the type of trowel and the amount of adhesive to apply. Allow the adhesive to tack up slightly before installing the tiles or planks. Press each tile or plank firmly into the adhesive, aligning the edges carefully. Use a floor roller to apply pressure and ensure good adhesion. Wipe away any excess adhesive immediately with a damp cloth.
Cutting Techniques: A sharp utility knife is essential for cutting vinyl tiles or planks. Use a straight edge as a guide and score the tile or plank several times before snapping it along the score line. For more complex cuts, use a jigsaw or a specialized vinyl tile cutter. Always wear safety glasses when cutting vinyl flooring.
Maintaining Alignment: Maintaining proper alignment is crucial for a professional-looking installation. Use spacers to ensure consistent spacing between the tiles or planks. Check the alignment frequently as the installation progresses. If a tile or plank is misaligned, carefully remove it and reposition it before the adhesive sets completely.
Rolling and Curing: After installing the tiles or planks, roll the entire floor with a floor roller to ensure complete adhesion. Allow the adhesive to cure completely according to the manufacturer's instructions before walking on the floor or installing baseboards.
Sealing (Optional): Some vinyl tiles and planks may benefit from sealing to protect against stains and wear. Apply a sealant specifically designed for vinyl flooring according to the manufacturer's instructions.
Finishing Touches: Once the vinyl flooring is installed and the adhesive has cured, install baseboards or trim to cover the expansion gap along the walls. This provides a finished look and protects the edges of the flooring. Clean the flooring thoroughly with a pH-neutral cleaner designed for vinyl floors.
Putting down vinyl flooring requires meticulous preparation and careful execution. By following these step-by-step instructions, a durable and aesthetically pleasing floor can be achieved. The resulting floor will contribute to the overall value and comfort of the space.

How To Lay Sheet Vinyl Flooring

20 Tips For A Great Vinyl Plank Flooring Installation

Post Nbl Express Eco Flooring

A Beginner S Guide To Installing Vinyl Plank Flooring Dumpsters Com

10 Beginner Mistakes Installing Vinyl Plank Flooring

How To Lay Lvt Flooring A Step By Guide Factory Direct

Laying Vinyl Planks The Right Way Expert Guide By Fantastic Handyman

Step By Guide On How To Install Hybrid Flooring Parrys

How To Install Waterproof Vinyl Plank Flooring Diy Installation

Your Step By Guide How To Install Luxury Vinyl Plank Wc Supply Whole Cabinet
Related Posts