Can You Put Laminate Flooring On Tiles? A Comprehensive Guide
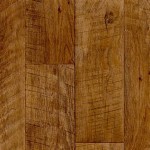
Laminate flooring, known for its durability, affordability, and ease of installation, is a popular choice for homeowners seeking to update their floors. Its layered construction, typically comprising a wear layer, a decorative layer, a core board, and a backing layer, replicates the appearance of hardwood, stone, or tile without the associated cost and maintenance demands. A common question that arises during renovation planning is whether laminate flooring can be installed directly over existing tile floors. This article will explore the viability of this approach, considering the factors that influence the outcome and providing guidance on best practices.
Installing laminate flooring over existing tile can be a practical solution in specific circumstances, offering benefits such as reduced labor costs and faster project completion. Removing existing tile can be a time-consuming and messy process, generating significant dust and debris. By opting to install laminate over the tile, this disruptive stage can be avoided. However, it is essential to understand that not all tile floors are suitable for this type of overlayment. Careful assessment and preparation are critical to ensure a successful and long-lasting result.
Key Point 1: Evaluating the Existing Tile Floor
The condition of the existing tile floor is the most crucial factor in determining the feasibility of installing laminate flooring over it. Several aspects need to be carefully assessed:
Surface Levelness: Laminate flooring requires a relatively flat and even subfloor. Unevenness in the existing tile floor can create pressure points on the laminate, leading to premature wear, cracking, and potential joint separation. Use a long level (at least 6 feet) to check for significant variations on the tile's surface. Minor imperfections can sometimes be addressed with a self-leveling compound, but substantial dips, humps, or slopes will likely require more extensive remediation or reconsidering the laminate-over-tile approach.
Tile Stability: Loose or cracked tiles are a significant concern. Any movement in the underlying tiles will telegraph through to the laminate, causing instability and potential damage. Individual loose tiles should be re-secured using appropriate adhesive, and significantly damaged tiles should be replaced. The overall stability of the tiled floor is crucial; widespread instability necessitates addressing the underlying issues before laminate installation.
Grout Line Depth and Width: Deep or wide grout lines can create an uneven surface that affects the stability and appearance of the laminate. The depth and width of the lines need to be considered. If the grout lines are too deep, they may require filling with a cement-based filler or self-leveling compound to create a smooth, even surface. Failure to address this can lead to the laminate conforming to the grout lines, creating an undesirable texture and potential weaknesses.
Moisture Levels: Moisture is a laminate flooring's enemy. It is essential to check for any signs of moisture intrusion in the existing tile floor. This is particularly important in bathrooms, kitchens, and basements. A moisture meter can be used to assess the moisture content of the tile and surrounding areas. If moisture is present, it must be addressed before installing laminate flooring. This may involve repairing leaks, improving ventilation, or applying a moisture barrier.
Tile Material: The type of tile influences the preparation needed. Smooth, non-porous tiles like porcelain may require a bonding primer to ensure proper adhesion of any leveling compounds. More porous tiles, such as ceramic, may require less preparation in this regard. Understanding the tile's surface characteristics is essential for selecting the appropriate preparation methods.
If the existing tile floor fails to meet these criteria, it may be necessary to remove the tile before installing laminate flooring. While this is a more labor-intensive option, it ensures a solid and stable foundation for the new floor and prevents potential problems down the line.
Key Point 2: Preparing the Tile Floor for Laminate Installation
Assuming the existing tile floor passes the initial assessment, proper preparation is vital to ensure a successful laminate installation. The preparation process involves several steps designed to create a smooth, clean, and level surface:
Cleaning: Thoroughly clean the tile floor to remove any dirt, dust, grease, or debris. Use a suitable cleaning solution recommended for tile and grout. Rinse the floor thoroughly and allow it to dry completely. This ensures proper adhesion of any subsequent materials applied.
Repairing Damage: Repair any loose or damaged tiles. Re-adhere loose tiles using a suitable tile adhesive. Replace cracked or broken tiles with matching replacements or similar-sized tiles. Allow the adhesive to cure completely before proceeding.
Leveling the Surface: Address any unevenness or grout line issues. For minor imperfections, a self-leveling compound can be applied to create a smooth surface. Follow the manufacturer's instructions carefully for mixing and application. For deeper grout lines, a cement-based filler can be used to fill the gaps. Ensure the filler is flush with the tile surface and allow it to dry completely.
Applying a Moisture Barrier: Even if there are no apparent moisture problems, it is generally recommended to install a moisture barrier over the tile floor before installing the laminate. This is especially important in areas prone to moisture, such as bathrooms and kitchens. The moisture barrier helps to prevent moisture from seeping up from the tile and damaging the laminate flooring. Select a moisture barrier specifically designed for laminate flooring installations.
Underlayment Installation: An underlayment is a crucial component of any laminate flooring installation. It provides cushioning, reduces noise transmission, and helps to even out minor imperfections in the subfloor. Select an underlayment that is compatible with laminate flooring and suitable for installation over tile. Some underlayments come with a pre-attached moisture barrier, which can eliminate the need for a separate moisture barrier. Follow the manufacturer's instructions for installing the underlayment.
By following these preparation steps, you can create a solid and stable base for your laminate flooring, ensuring a professional and long-lasting result.
Key Point 3: Considerations for Specific Environments and Laminate Types
The environment in which the laminate flooring is being installed and the specific type of laminate used can influence the overall success of the project. Some environments and laminate types require special considerations:
Bathrooms and Kitchens: These areas are prone to moisture, which can damage laminate flooring. It is crucial to select a water-resistant or waterproof laminate specifically designed for these environments. Ensure the moisture barrier is properly installed and that all seams are sealed. Proper ventilation is also essential to minimize moisture buildup.
Basements: Basements are often susceptible to moisture issues. Conduct thorough moisture testing and address any problems before installing laminate flooring. Consider using a laminate flooring with a built-in moisture barrier or installing a more robust moisture barrier. Proper insulation can also help to reduce moisture condensation.
Heated Floors: If the existing tile floor has radiant heating, it is essential to ensure that the laminate flooring is compatible with heated floors. Select a laminate flooring specifically designed for this application and follow the manufacturer's instructions carefully. Some laminate flooring types may not be suitable for use with heated floors.
Laminate Thickness: Thicker laminate flooring tends to be more durable and resistant to wear and tear. It can also help to bridge minor imperfections in the subfloor. Consider using a thicker laminate flooring if the existing tile floor has some minor unevenness.
Laminate AC Rating: The Abrasion Class (AC) rating indicates the laminate flooring's resistance to abrasion and wear. Select a laminate flooring with an AC rating appropriate for the intended use. Higher AC ratings are recommended for high-traffic areas.
By considering these environmental and laminate type-specific factors, you can make informed decisions and ensure a successful and long-lasting laminate flooring installation over existing tile.
Ultimately, the decision of whether or not to install laminate flooring over existing tile requires careful consideration of the existing tile floor's condition, the preparation involved, and the specific requirements of the environment and laminate type. A thorough assessment, proper preparation, and adherence to best practices are essential for achieving a successful and durable result.

Can You Put Laminate Flooring Over Tile Twenty Oak

Can You Put Laminate Or Vinyl Plank Flooring Over Tile

How To Install Laminate Flooring Over A Tile Floor 2024 Today S Homeowner

Installing Laminate Tile Over Ceramic Diy Floors Wonderhowto

Install Laminate Flooring Over Ceramic Tile

Should You Install Vinyl Floor Over Tile

Can I Install Laminate Floors On Ceramic Tiles The Carpet Guys

Can I Install Vinyl Tiles Over Laminate Flooring Comprehensive Guide

What Type Of Flooring Can You Put Over Ceramic Tile

Installing Laminate Tile Over Ceramic Diy Floors Wonderhowto
Related Posts