Installation Guide for Sheet Vinyl Flooring in Bathrooms
Sheet vinyl flooring offers a practical and cost-effective solution for bathroom floors. Its waterproof nature and durability make it a suitable choice for a moisture-prone environment. This guide provides a comprehensive overview of the installation process, ensuring a long-lasting and visually appealing result.
Proper preparation is crucial for a successful sheet vinyl installation. This includes assessing the existing floor condition, gathering necessary tools and materials, and meticulously preparing the subfloor. Failure to adequately prepare the subfloor can lead to imperfections, unevenness, and premature wear of the finished floor.
Key Point 1: Subfloor Preparation
The subfloor serves as the foundation for the sheet vinyl. Its condition directly impacts the final appearance and longevity of the flooring. A smooth, level, and clean subfloor is essential for a professional-looking installation.
Inspection: Begin by thoroughly inspecting the existing subfloor. Look for any signs of damage, such as cracks, holes, or moisture stains. Identify any unevenness or protruding nails or screws.
Repairing Imperfections: Address any identified imperfections. Fill cracks and holes with a suitable patching compound designed for flooring applications. Allow the compound to dry completely according to the manufacturer's instructions, and then sand it smooth with fine-grit sandpaper.
Leveling the Subfloor: If the subfloor is significantly uneven, consider using a self-leveling compound. This will create a perfectly flat surface for the sheet vinyl. Follow the manufacturer's instructions carefully when applying the leveling compound.
Cleaning the Subfloor: Thoroughly clean the subfloor to remove any dust, dirt, debris, or adhesive residue. Vacuum the area first to remove loose particles, and then use a damp mop with a mild detergent solution to clean the surface. Allow the subfloor to dry completely before proceeding to the next step.
Underlayment (Optional): In some cases, an underlayment may be recommended or required. Underlayment provides additional cushioning, sound insulation, and thermal insulation. Consult the sheet vinyl manufacturer's recommendations to determine if an underlayment is necessary for your specific product.
Key Point 2: Accurate Measurement and Cutting
Precise measurement and cutting are critical for achieving a professional and seamless sheet vinyl installation. Inaccurate cuts can lead to gaps, overlaps, and an overall unprofessional appearance.
Measuring the Room: Accurately measure the length and width of the bathroom at its widest points. Add a few inches to each dimension to allow for trimming and adjustments. It is always better to have a slightly larger piece of vinyl than a piece that is too small.
Creating a Template (Recommended): For bathrooms with irregular shapes or multiple fixtures, creating a template can simplify the cutting process. Use paper or cardboard to create a template of the floor area, carefully tracing around all fixtures, corners, and doorways.
Transferring Measurements to the Vinyl: Lay the sheet vinyl flat on a clean, smooth surface. Transfer the measurements or the template to the vinyl, using a measuring tape, straightedge, and marker. Ensure that the pattern of the vinyl is aligned correctly before making any cuts.
Rough Cutting: Using a utility knife with a sharp blade, carefully cut the sheet vinyl to the approximate size and shape of the room. Leave several inches of excess material around the perimeter for trimming.
Fine-Tuning the Cuts: Place the roughly cut sheet vinyl into the bathroom. Carefully trim the edges to fit snugly against the walls, fixtures, and doorways. Use a utility knife and straightedge to make precise cuts. Take your time and make small, incremental cuts to avoid overcutting.
Cutting Around Toilets and Fixtures: Cutting around toilets and other fixtures requires careful attention. Use a template or accurate measurements to create the necessary cutouts. Consider using a jigsaw for more intricate cuts.
Key Point 3: Adhesive Application and Installation
The proper application of adhesive is crucial for securing the sheet vinyl to the subfloor and preventing movement or bubbling. Different types of adhesives are available, so it is important to choose the correct adhesive for your specific sheet vinyl product and subfloor material.
Selecting the Correct Adhesive: Consult the sheet vinyl manufacturer's recommendations to determine the appropriate adhesive for your product and subfloor. Consider factors such as the type of subfloor material, the moisture level in the bathroom, and the type of sheet vinyl being used.
Applying the Adhesive: Follow the adhesive manufacturer's instructions carefully. Typically, the adhesive is applied to the subfloor using a notched trowel. The size and shape of the notches will determine the amount of adhesive that is applied. Apply the adhesive evenly and consistently, covering the entire subfloor area.
Working Time: Be aware of the adhesive's working time. This is the amount of time you have to position the sheet vinyl after applying the adhesive. The working time will vary depending on the type of adhesive and the ambient temperature and humidity.
Positioning the Sheet Vinyl: Carefully position the sheet vinyl onto the adhesive-covered subfloor. Start at one edge or corner and gradually lower the vinyl into place, working your way across the room. Avoid trapping air bubbles beneath the vinyl.
Rolling the Vinyl: Once the sheet vinyl is in place, use a floor roller to press it firmly into the adhesive. Roll the entire surface of the vinyl, paying particular attention to the edges and seams. This will ensure good adhesion and prevent bubbling.
Seam Treatment (If Applicable): If the bathroom requires more than one sheet of vinyl, you will need to create a seam. Follow the sheet vinyl manufacturer's instructions for seaming. This may involve using a chemical weld or a heat-welding process.
Curing Time: Allow the adhesive to cure completely according to the manufacturer's instructions. During the curing time, avoid walking on the floor and keep the bathroom well-ventilated.
After the sheet vinyl has been installed and the adhesive has cured, the finishing touches can be applied. This includes installing baseboards, trim, and caulking around fixtures.
Baseboards and Trim: Install baseboards around the perimeter of the room to cover the edges of the sheet vinyl and create a finished look. Install trim around doorways and other openings to protect the edges of the vinyl and create a smooth transition to other flooring materials.
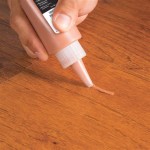
Caulking: Apply a bead of caulk around the perimeter of the room, where the sheet vinyl meets the walls, fixtures, and trim. This will create a waterproof seal and prevent water from seeping underneath the flooring. Use a high-quality, mildew-resistant caulk specifically designed for bathrooms.
Cleaning and Maintenance: Clean the sheet vinyl floor regularly with a damp mop and a mild detergent solution. Avoid using abrasive cleaners or harsh chemicals, as these can damage the surface of the vinyl. Immediately wipe up any spills to prevent staining. Regular maintenance will help to keep the sheet vinyl floor looking its best for years to come.
Installing sheet vinyl flooring in a bathroom is a manageable project for experienced DIYers. However, it requires careful planning, precise execution, and attention to detail. By following these guidelines, one can achieve a professional-looking and long-lasting result.

How To Lay Sheet Vinyl Flooring

How To Install Sheet Vinyl Floor Decor Adventures

Luxury Sheet Easy Bathroom Floor Diy Instructions Tarkett Home

How To Install Sheet Vinyl Floor Decor Adventures

How To Install Sheet Vinyl Floor Decor Adventures

How To Install Sheet Vinyl Lino Flooring In A Bathroom Easy Step By Diy Guide

How To Install Vinyl Plank Tiles In A Bathroom

How To Install Sheet Vinyl Floor Decor Adventures

How To Install Vinyl Plank Flooring In A Bathroom As Beginner Home Renovation

How To Install Vinyl Plank Flooring In A Bathroom Fixthisbuildthat
Related Posts