Installing Plank Vinyl Flooring: A Comprehensive Guide to Installation
Plank vinyl flooring has gained immense popularity due to its durability, water resistance, and stunningly realistic wood-like appearance. Installing it yourself can be a rewarding DIY project, saving you substantial costs compared to hiring professional installers. This comprehensive guide will walk you through the complete process, from choosing the right planks to finishing touches, empowering you to achieve a beautiful and functional floor.
1. Preparation: The Foundation of Success
The success of your plank vinyl flooring installation hinges on thorough preparation. Begin by clearing the area, removing furniture, appliances, and any existing flooring. Carefully examine the subfloor for imperfections, such as unevenness, cracks, or moisture damage.
For uneven surfaces, consider using a self-leveling compound to create a smooth base. If your subfloor is wooden, ensure that it is strong enough to support the weight of the new flooring. For concrete subfloors, check for cracks or gaps that need repair. Ensure the subfloor is clean and dry before proceeding.
2. Choosing the Right Plank Vinyl Flooring
Plank vinyl flooring is available in various styles, colors, and textures, offering endless possibilities for your home's aesthetic. Consider the following factors when selecting your planks:
- Style and Color: Choose a style that complements your existing décor and personal preferences. Consider the overall look you desire, whether it's a traditional wood-look or a modern contemporary design.
- Wear Layer: The wear layer determines the plank's durability and resistance to scratches and scuffs. Higher wear layers are ideal for high-traffic areas like kitchens and hallways.
- Installation Type: Plank vinyl flooring is available in click-lock and glue-down options. Click-lock systems offer easy installation, while glue-down planks provide a more permanent and secure bond.
- Thickness: Thickness impacts the plank's stability and overall appearance. Thicker planks offer better sound insulation and are more substantial underfoot.
Once you've selected your planks, calculate the required quantity. Always purchase a little extra to account for waste during installation.
3. Installation: A Step-by-Step Guide
Once you have the necessary tools and materials, you can begin the installation process. The following steps provide a comprehensive guide:
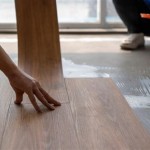
- Lay Out the First Row: Start from the furthest corner of the room and work your way in. Measure the width of the room and cut the first plank to fit, leaving a small gap between the plank and the wall for expansion.
- Click-Lock Installation: For click-lock planks, use a tapping block and mallet to secure each plank into place. Interlock the planks by pressing them together until you hear a click, ensuring a tight and secure fit.
- Glue-Down Installation: For glue-down planks, apply a thin, even layer of adhesive to the subfloor using a notched trowel. Position the plank and press firmly to secure it to the adhesive. Use a roller to ensure even pressure throughout the plank.
- Continue Laying Rows: Install each subsequent row by aligning the end of the plank with the groove of the previous row. Stagger the planks in each row to create a more natural-looking pattern and enhance stability.
- Cutting Planks: Use a utility knife or a circular saw with a fine-tooth blade to cut the planks to fit around obstacles, such as door frames or pipes. Make sure to use a straight edge or a cutting guide for precise cuts.
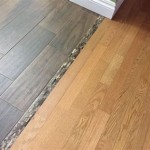
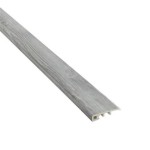
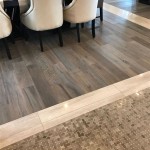
- Transition Strips: Use transition strips to seamlessly connect the new plank vinyl flooring to other flooring types, such as tile or carpet.
4. Finishing Touches: Completing the Project
After installing the planks, apply molding or trim around the perimeter of the floor to create a clean and finished look. Use trim that complements the style of your flooring and home décor. For areas with a lot of foot traffic, consider adding an additional layer of protection with a clear polyurethane sealant. This will help to prevent scratches and scuffs and extend the life of your flooring.
Once the installation is complete, allow the adhesive to cure completely before placing furniture or appliances back in place.

A Beginner S Guide To Installing Vinyl Plank Flooring Dumpsters Com

Vinyl Plank Flooring Cosy Group

Post Nbl Express Eco Flooring

How To Install Luxury Vinyl Plank Flooring For Beginners Flooret Lvp Review Builds By Maz

20 Tips For A Great Vinyl Plank Flooring Installation

Your Step By Guide How To Install Luxury Vinyl Plank Wc Supply Whole Cabinet

Vinyl Plank Flooring Installation A Step By Guide

How To Install Vinyl Plank Flooring Prep And Complete Guide

How To Lay Vinyl Flooring Sheets Tiles And Planks Tarkett

Laying Vinyl Planks The Right Way Expert Guide By Fantastic Handyman
Related Posts