Installing vinyl floor tiles with adhesive is a great way to refresh the look of your home. It’s an easy and affordable project that can be done in a few hours, and it will give your home a new and modern look. In this article, we’ll provide an overview of the steps involved in installing vinyl floor tiles with adhesive, so you can get started on your project right away.
Preparing the Floor
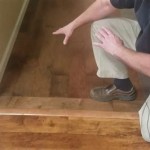
Before you start, you need to make sure the surface is ready for the new floor tiles. Remove any existing flooring, such as carpeting or underlayment, and clean the subfloor thoroughly. Make sure the subfloor is smooth and level, and fill in any gaps or cracks with a patching compound. Once the surface is ready, spread a layer of adhesive on the subfloor and allow it to dry before you start laying the tiles.
Laying the Tiles
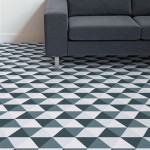
Once the adhesive is dry, you can begin laying the vinyl floor tiles. Start at the far corner of the room and work your way outwards. Use a straight edge and a level to make sure the tiles are being laid level and straight. For most tiles, you’ll want to leave a small gap between each tile, which will be covered by a trim piece. As you lay the tiles, use a trowel to spread additional adhesive on the subfloor, as needed.
Cutting the Tiles
You may need to cut some of the tiles to fit around obstacles, such as door frames or cabinets. For this, you’ll need a tile cutter or wet saw. Follow the manufacturer’s instructions for cutting the tiles, and make sure to wear protective gear, such as safety glasses and gloves. When cutting, make sure to leave a small gap between the cut tile and the obstacle.
Trimming and Sealing
Once the tiles have been laid, you’ll need to trim any excess tiles around the edges of the room. Use a utility knife to cut off the excess tile and then use a trim piece to cover the gap. You can also use a caulking gun to seal the edges of the trim piece, which will help prevent moisture and dirt from getting underneath. Finally, you’ll need to let the adhesive dry and cure before you can walk on the floor.
Finishing Touches
Once the adhesive has cured, you can add the finishing touches to your new floor. You can add transition strips between the vinyl floor tiles and other flooring materials, such as carpet or hardwood. You can also add rugs or mats for extra cushioning and comfort. Finally, you can use a mop and a cleaning solution to keep your new floor looking its best.
Conclusion
Installing vinyl floor tiles with adhesive is a great way to refresh the look of your home. It’s an easy and affordable project that can be done in a few hours. Before you start, make sure the subfloor is smooth and level, and spread a layer of adhesive. Then lay the tiles, cut any necessary pieces, and trim and seal the edges. Finally, add transition strips and rugs or mats to complete the look. With these steps, you can have a beautiful new floor in no time!


/Tiling-a-Floor-112790382-56a4a0685f9b58b7d0d7e3ca.jpg)


/cdn.vox-cdn.com/uploads/chorus_image/image/65891755/howto_vinylfloor_05.0.jpg)


Related Posts